How to Turn a Wooden Baby Rattle
What you'll need
Most woodturners, if they are asked to make a baby rattle, would chose to do this using captive rings. However, in this how to project, we offer you a more traditional rattle that features dried peas!
There are many important things to consider when making wooden children’s toys. Firstly, the timber you chose needs to be non toxic. Beech, ash, cherry, sycamore, maple and boxwood are good examples. Also you will need to consider the finish. We have chosen to use no finish.
To create the rattle, dried peas or beans will work well.
To make this wooden baby rattle, watch our Woodworking Wisdom demo or follow our step by step guide below.
Select a piece of timber, measuring approximately 150mm by 40mm. Mount the blank between centres and rough down to a straight cylinder using a roughing gouge.
On either end cut a tenon to fit into a set of chuck jaws. We used the 38mm O'Donnell jaws. Then mount into the chuck. From the chuck, measure a distance of 45mm and mark with a pencil.


Turn the internal lid section
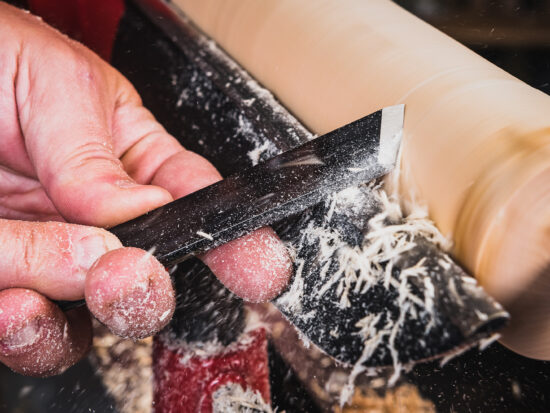
Using a thin parting tool, part the workpiece into two parts cutting on the waste side of the line. Top tip: Do not have the tailstock in place, as this will create pressure pinching on the parting tool. This will create heat and will drag the tool. This will form the handle and top sections.


Set up a depth gauge to 30mm. Using the long point of a skew chisel, flat on the tool rest, to create a V cut in the centre point. Then, using a 6mm spindle gouge, or drill bit, drill to the 30mm depth.


Use a pencil to mark a diameter guideline of the internal hollow. This is about 30mm overall. Then use the small spindle gouge to hollow this working centre outwards with the flute between the 9-10 o'clock position, working down to the depth and out to the pencil line, creating the internal shape. Refine the shape with a round nose scraper. This does not need sanding.


With the shape hollowed, next cut the recess that acts as the joining point. This needs to be about 5mm deep from the opening towards the headstock. Top tip: Try not to open the diameter out, and the most important bit, this needs to be parallel.


Turn the outer shape
Use a scrap block to create a carrier to hold this hollowed section. This will allow the external shape to be created. Carefully cut a tenon so that the straight recess fits onto it firmly, and mount the work, bringing the tailstock up to add support
Turn this to the desired shape, checking the thickness with fingers, aiming for about 3mm in thickness. Draw the tailstock back for the last stage of cleaning up the top of the bead.


Turn the handle and base section
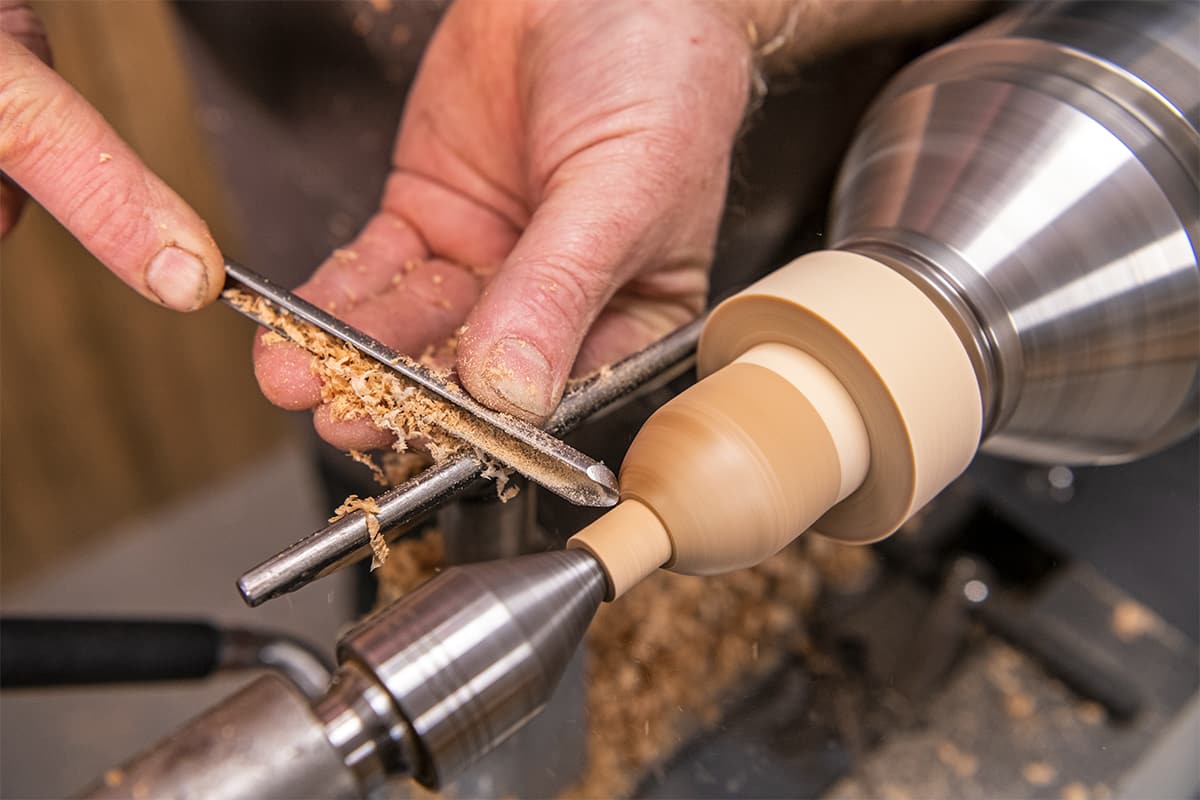
Mount the prepared base section into the chuck and carefully cut the tenon to fit the top cap onto it. This needs to fit firmly.


Next, hollow the base section. Use the skew and gouge, or drill, to create a depth hole 20mm deep. Then, hollow out the internal section using the small gouge and clean up with the refinement scraper.


Measure the internal depth and add on about 3mm. Draw a line on the outside as a guide. The top cap can be put in place and the tailstock bought up, changing the tailstock centre to one that won’t damage the bead.
Using a parting tool, create a brake line on the waste side of the pencil line and use a gouge to remove some of the waste to allow better access.


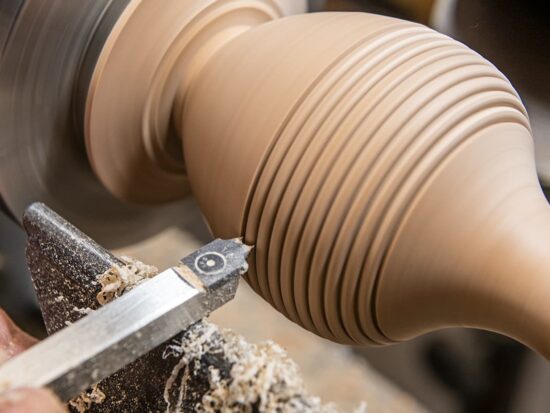
Shape the external surface of the base section
Use a 6mm bowl gouge to shape the exterior, blending the top and base together gradually reducing the diameter of where this joins the handle. Measure the thickness, aiming for about 3mm thick. Sand this top section to 400 grit to help hide the join. Add a few V cuts lightly with the tip of a skew chisel.


Draw back the tailstock and remove the top cap. Shape the handle section using the 6mm bowl gouge and skew chisel. Top tip: Be careful when working towards the chuck, the spindle gouge has a narrow tip and will help get into this area.
As this gets thinner, bring the tailstock up to add light support. With the shape completed, sand the handle section. Then, use a parting tool to part this off.


Sand and finish
To finish the shape on the handle, use a disc sander fitted on the lathe. Remove a little material from either side of the handle to make this oval. This acts as a teething point and also stops it rolling about.
Change to a pad sander to help blend the shape together, then a light hand sand with some 400 grit to finish off.


To finish, fill the base with some dried peas and apply some wood glue to the rim before putting the top in place. Allow to dry. And there you have your finished baby rattle.

Made it? Share it!
If you have had a go at making these rattles, then we would love to see it. Share with us your images on social media by tagging @axminstertools on Instagram or Facebook. Or email us at woodworkingwisdom@axminstertools.com
If you have had a go at Jason’s traditional wooden baby rattle, then why not try Colwin’s captive ring version.