Pallet Wood Wall Art | How To
What you'll need
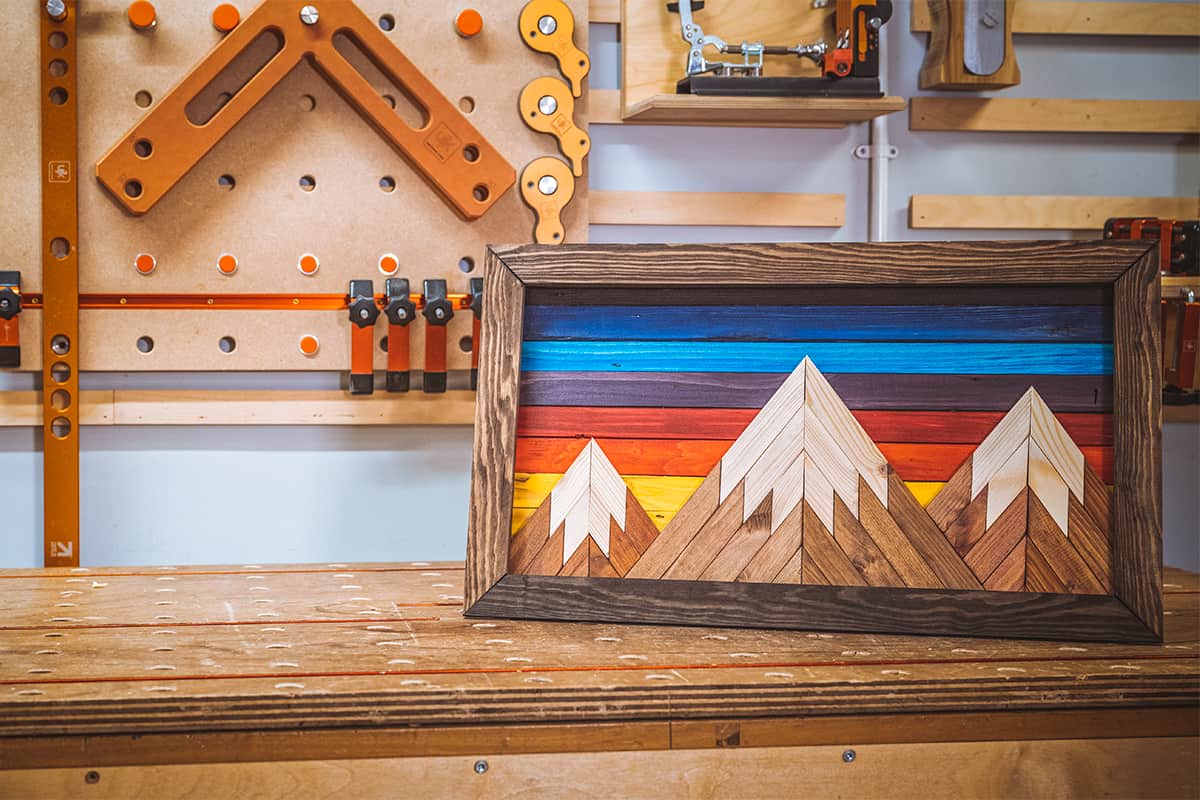
Pallet wood is a great source of cheap timber for all kinds of wood working projects. In this How To, we are going to show you how you can turn this inexpensive timber, into a beautiful piece of wall art.
Pallet wood can usually be sourced easily, and your local industrial estate is often a good place to start, with many businesses often having pallets to spare.
Watch our Woodworking Wisdom demo, or follow our steps below, to turn scrap wood in to art, by creating the colourful mountain scene.
Prepare your pallet wood
First, carefully dismantle the pallet and cut to size. Here we cut our lengths into 30mm strips. We decided not to plane the timber, as wanted a rough finish, but you could plane the surface for smoother finish. Then sand off any ragged edges after cutting.
After cutting to the correct width dimensions, cut the backing pieces to length.
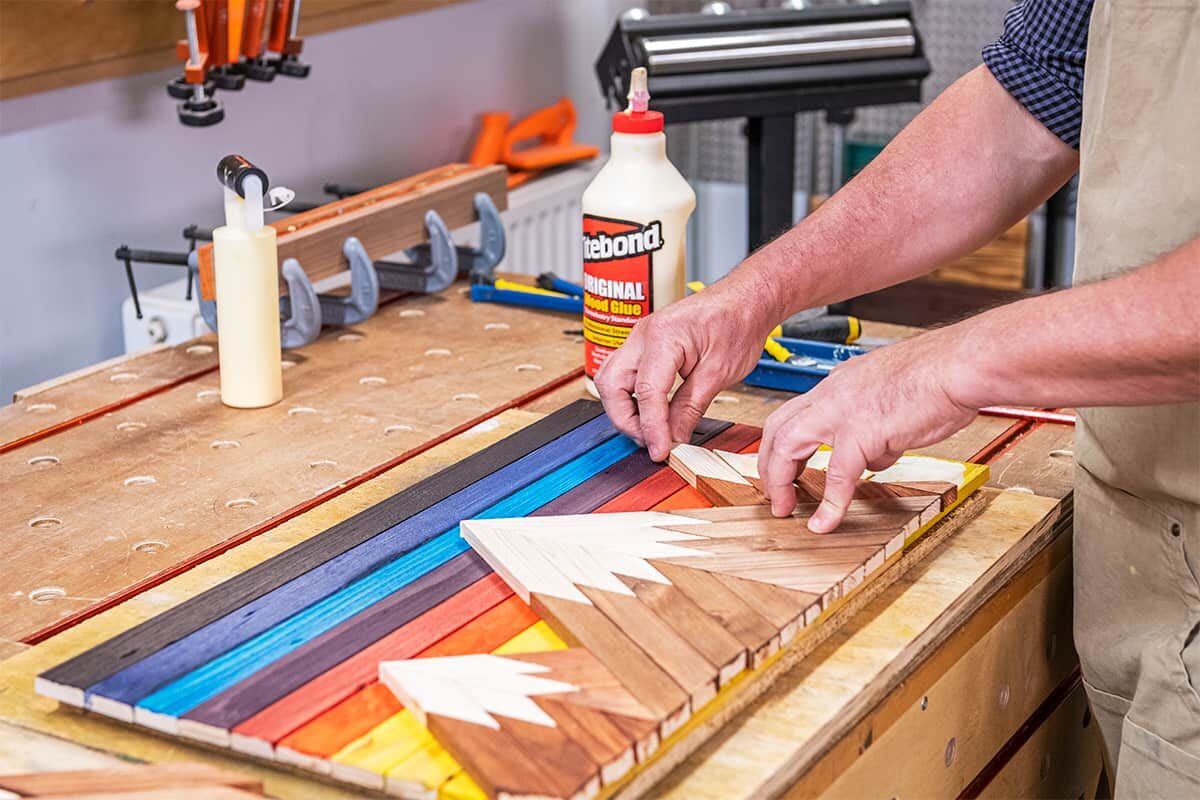
Lay out the design
We used a backing board to fix our design to once all pieces were cut and coloured. Once the backing strips are in position start laying the mountains out. Here you can work out the angles to cut the joins to. Simply move the sticks to an angle you’re happy with and draw a vertical line.
Once marked, take to the chop saw and line up your pencil mark. Our chosen angle came to 50 degrees.
Start positioning each piece and rough cutting away the tag ends, making sure you leave some hanging over to trim straight later.


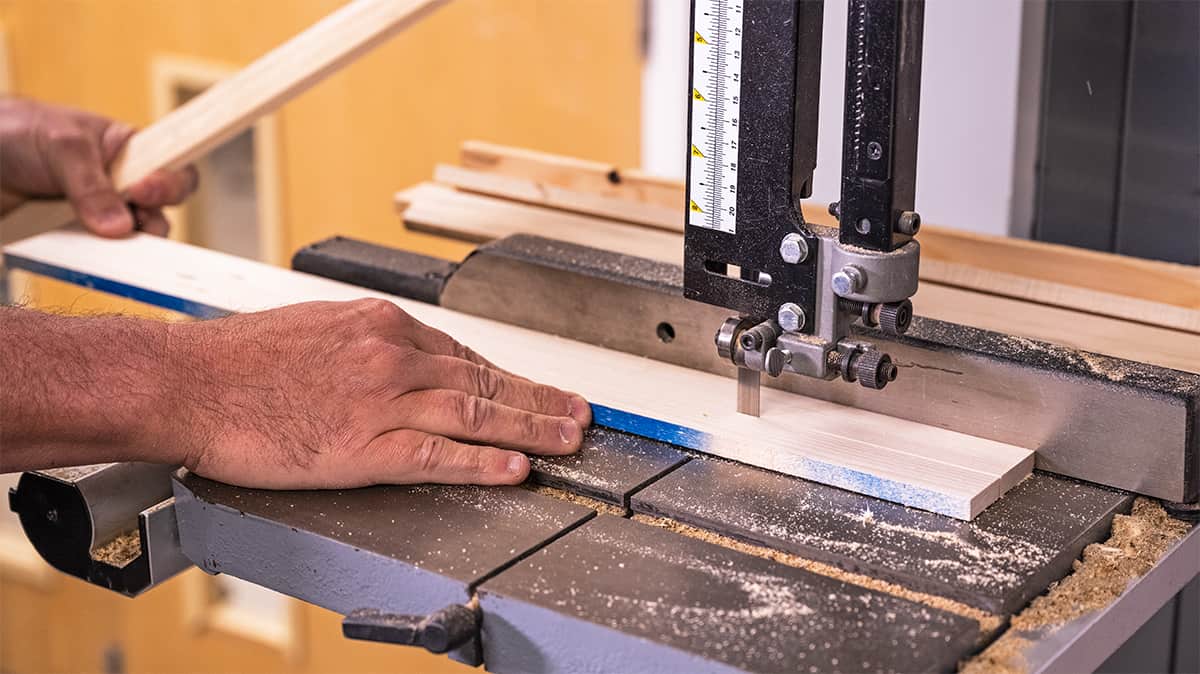
Once all the small pieces are finished, hold them down and scribe a line to trim to on the bandsaw.


Complete the scene
Once the large mountain in the foreground is done you can get to work on the other mountains. Again start positioning to preference, marking and cutting on the bandsaw.
To give the effect of the snow caps to the mountains, you will need to cut three of the strips down in size, this is not easy or safe on the chop saw, so we used the bandsaw instead. This can also be done just as easy with a Japanese pull saw.
Once the pieces are all cut, it’s a good idea to number the back of the pieces to make sure they go back in the correct order.


Colour your pallet wood scene
We are going to use a selection of colours to re-create the sunset and mountains. Top tip: brushing is a little easier than ragging straight out of the jar, so we used old takeaway tubs to pour the dyes into. Brush the colour on then wipe off any excess.
Once the background sunset has been coloured, leave to dry and move on to the mountains. Leave everything to dry for a good couple of hours before attempting to glue.


Glue and assemble
Glue the background on to start with. We used a roller to apply an even coat of glue to the backing board. Simply place your sunset piece onto the backing board and weigh down to dry.


When the backing has had chance to dry, start laying out your mountain. Lightly mark the outline of the mountains and take them away again.


Using these marks glue the area keeping inside your lines. Refit the mountain pieces and weigh down again.


While the picture is drying, you can cut a simple frame by measuring the length and depth of the picture and cutting mitres to the length required. Do joints required, as we will just glue them onto the picture.


There we are, the picture pallet wood wall art mountain scene ready to hang in pride of place.