How to Make a Wooden Boot Rack
What you'll need
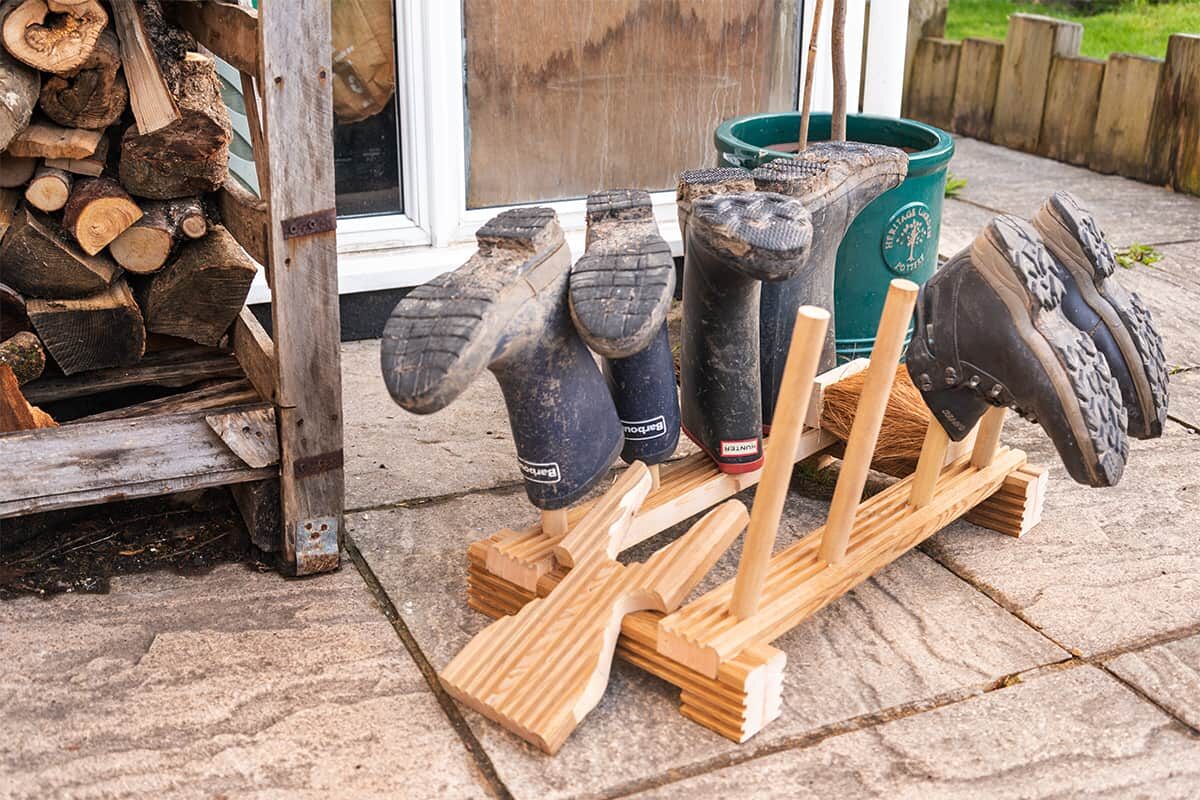
This outdoor boot rack is the perfect scrap wood project to help keep your welly boots clean and dry in all seasons.
This simple design has many useful features, including a boot scrap, boot brush, boot jack to help remove your shoes and a storage rack.
A cheap and easy project, it's ideal for using up decking off cuts, meaning it will stand the test of time outside in all weathers. With removable dowels, this boot rack can also be easily disassembled and stored away if not needed in dry weather.
Watch our Woodworking Wisdom video tutorial with Jason Breach or follow our step by step guide below.
Top Tip!
To get an idea of the size, and to ensure that there is enough timber to make your rack, try making a mock up from MDF and a few thin sections of dowel. This is quick and simple to do, screwing together the sections to gauge the size of your finished piece. This will help you decide the sizes you need from your decking boards in preparation for marking out and cutting.
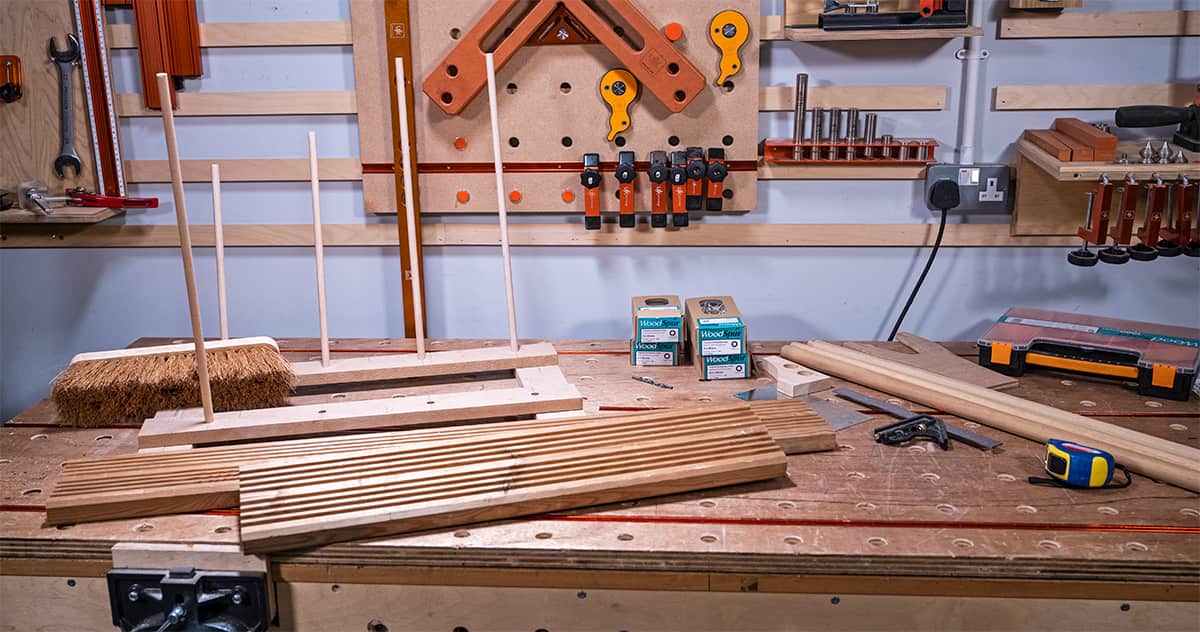
- Mock up in MDF and thin sections of dowel
Prep your feet and cut the boards
To ensure that the project sits level, and to help it dry, it is raised up on four feet.
To create a nice shape within these use a pillar drill with a 25mm forstner bit to drill the holes through the boards. The holes are set in 70mm from the ends and meet on the central point of the board. A stop block set up on the drill will prevent drilling through and damaging the table.


The longer length of decking needs to be ripped down the centre to make two lengths. To find the middle of your board, scribe a line with a marking gauge. Set up the bandsaw keeping the guide nice and low to the workpiece, it's safe, and also more accurate. With this cut, the location of the recesses can be marked out into the feet boards.
Cut the recesses


To cut the recesses, a number of tools can be used, including a handsaw or jigsaw. We used a bandsaw. To allow a repetitive depth of cut to be taken, block clamp a piece of timber onto the fence, set the fence distance up to cut on the waste side of the marked lines, and then do a number of cuts that are in total wider than the width of the blade. These thin sections can be broken off.
All four sides need doing each end. Set up the fence to rip cut the remaining waste. The section that had the thin cuts allows the access. Check the long rails fit into these recesses.


Rip the feet boards down the central point of the board then set up the fence so that the material between the drilled holes can be cut out. The leg sections are made in this method as they double up. Assemble the legs and long rails to check how this come and fits together.


Fit the dowels
Next, mark out the positions to drill the holes that the lengths of the dowel will be inserted into. Set up the pillar drill with a drill bit the same size as the dowel. A back fence makes this easier.
To create an angle that is repeatable, we added a scrap of plywood, which is held in place with some double-sided tape. This lifts the workpiece up on the outer edge, a simple way to drill and angle. Set the depth of the drill. These do not need to go all the way through.
Drill the four holes in each board, then change the drill to a 4mm bit and drill all the way through, these holes allow the dowels to screw in.


Next, cut the dowels to length. If using a bandsaw, adding a clamp will make this a lot safer as this will stop them spinning and catching in the blade. The brush head can also be cut into two parts with the middle section containing the hole being cut out.


A metal strip for the boot scraper can be cut to size. A small PROXXON grinder is ideal for this. This needs setting into the long rails, with one of the feet sections in place. Run the blade of the Japanese saw along the edge of this board, cross cutting into the long rails to a depth of about 20mm.
With this done the feet sections can be glued and clamped together. The metal boot scraper will need to be inserted.


Make the boot jack
To make the boot jack, mark out the desired shape. Use a 50mm forstner bit to drill three holes, cut the shape out and clean up with a spokeshave.


Fit the boot jack into the leg section that does not have the metal insert. This needs to fit in place firmly. Lay this out on the bench to set up the angle, measure the width and mark this out. Cut this as a straight groove to start with, taking a number of saw cuts across the width. Then, chisel this out to create a flat recess.
Position the boot jack in place and mark out the shape using a marking knife. Chisel the waste away to allow the boot jack to fit in.


Assemble your boot rack
Next, screw the brush sections in place. Clamp the brush head in place and drill three pilot holes through the long boards and into the brush head. Fix in place with stainless steel screws.
Now fix the long rails in position by drilling through the underside of the feet sections. Then use screws to hold this together. Insert the dowels. We have chosen not to glue these as it allows the rack to be flat packed and stored away easily. Screw them into position through the 4mm holes as drilled earlier.


Finish by inserting the boot jack. And there you have your finished boot rack.