How To Make A Ring Box

For a Valentine’s day gift, ‘that’ engagement or just because… gift your loved one a ring in a bespoke ring box. For some great woodworking ideas, simply follow our informative How To guide to learn ‘How to Make A Ring Box’.
Woodworking Ideas & Projects- How To Make A Ring Box
Tools Needed:
- Disc sander
- Bandsaw
- Mitre fence
- Glue
- Masking tape
- Brush
- Sanding disc
- Router
- Router table
- Chisel
- Sanding sealer
- Microcrystalline Wax
- G clamp
- Block plane
- Contact adhesive
- Scalpel
Alternatively, if you’re more of a hand tools user:
- Alternative to bandsaw; Mitre saw box
- Alternative to disc sander; Shooting board
Wood measurements:
- 4 sides: 55mm x 48mm x 10mm
- Lid and base: 45mm x 45mm x 4mm
- Interior wood lining: 35 x 35mm x 2mm
- Small pieces of contrasting wood for decor
- 2 blocks for cushion ring support
Also required:
- Small piece of thin glove leather for lining cushion
- Foam for cushion lining
How to make the box
- Prepare four pieces of wood for the sides to size, using disc sander or alternative shooting board.
- Cut mitres. Use bandsaw with mitre fence and stop or alternative mitre saw/box.
- Sand mitres on disc sander.
- Mark one piece ‘M’ (master) and check that all the others are identical. Sand as necessary.
- Use high tack masking tape to bring the 4 sides together in a line, ensuring they are lined up exactly, this is to pull all four pieces together to make a hollow box; before pulling together, apply glue to each of the mitred sides. Remove excess glue with a damp brush. Here, be sure to leave the tape on as long as possible to reinforce the joints.
- Stick a large piece of 120g sandpaper to a board (a disc sanding sheet used here), sand the top and bottom of the box flat.
- Rout the top and bottom to slightly greater depth that the thickness of the lid and base.


- Square out the corners top and bottom with a large chisel.
- Mark one of the corners on the box and lid with a large pencil ‘dot’ to use as a reference corner from which to work; by fitting this corner first and working round the other corners it will ensure a good fit of the box/lid all the way round. Sand (or shoot) the top and bottom to fit if needed.
- Mask off and polish the interior of the lid and box. (Liberon Sanding Sealer and Microcrystalline Wax). By doing so, this acts as a resist later on when dried glue is removed from the lid interior. Please note that there's no need to mask/polish the base.
- Prepare ply blocks (pads) for gluing lid and base.
- Remove masking tape and apply glue with small paintbrush, clamp with blocks and a G clamp.
- Next, sand off the excess on the disc sander and then finish top and bottom on the sanding board.


Woodworking Ideas- How To Make A Ring Box (continued)
- Sand box/lid interface on sanding board.
- Remove dried glue from lid interior with knife or chisel.
- If the corner inserts are not required, go to 28 and follow instructions for fitting the lining. Ignore all instructions for machining and fitting the inserts.
- Construct jig as shown for machining slots.
- Lid ready to be machined with 2.5mm wing cutter.
- Box and lid with slots machined.
- Prepare inserts for slots. Use contrasting timber (eg. oak).
- Glue inserts, leave to set


 with knife or chisel")


- Prepare lining material on disc sander. Bevel the inside face at the bottom, shown arrowed. This is to allow for any hardened glue ‘squeeze out’ on the base.
- Prepare gluing blocks and glue in each lining one at a time, allowing around 6mm as an upstand.
- Remove excess insert material using the bandsaw.
- Flush the inserts on lid/box with a block plane.
- Level the top of the lining (arrowed) on the sanding board.
- Very lightly sand the leading edge (arrowed) of the lining to allow a snug fit for the lid.
- Sand the box exterior on the sanding board, ensuring that lid/box are straight and equal on each side, and mitres are in line and sharp.
 bevel inside face base edge (arrowed)")


")

- Materials needed for the box interior to support the ring; 6mm foam, wood and very thin leather (ie. glove leather).
- Plane a round edge on the wood (arrowed). This provides a pair of curved surfaces to make it easier to insert the ring when it’s placed in the box.
- Cut the wood to make two blocks as shown to fit loosely inside the box.
- Stick foam to the blocks with contact adhesive and trim to size with a scalpel.
- Stick leather to the blocks with contact adhesive.
- Trim the ends of the leather using sharp scissors to about 5mm long.
- Use a scalpel to remove sections from the corners in order to fold the ends in flat. Glue with contact adhesive.
- Sand the exterior of the box to 320g, remove sharp edges and corners with very fine sandpaper. Next, polish and wax the exterior. Finally, insert the leather covered blocks.


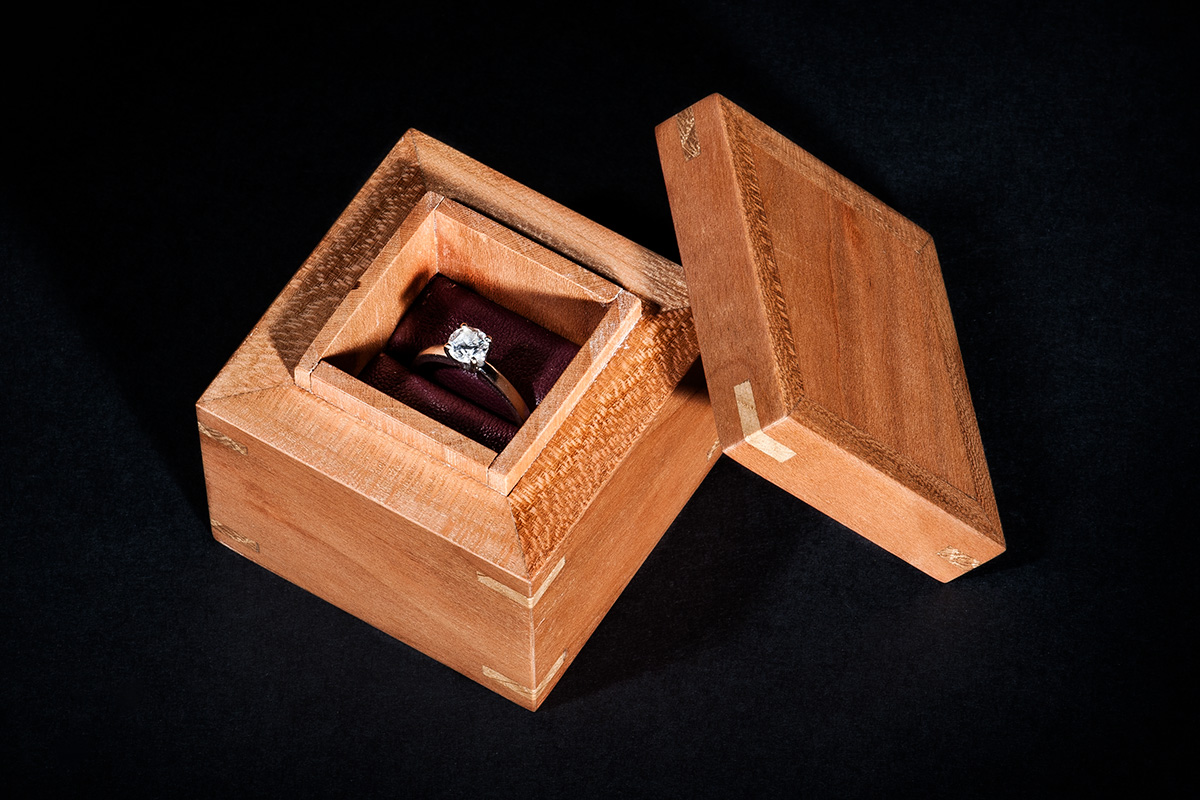
The finished box


Discover more…
In the spirit of Valentines, our Store Managers tell us about the tools they love. With tools and machinery galore, we think we've got the best of the bunch. There's something for everyone's tastes and preferences but why not have a read and see what you think for yourself?
Furthermore, our 'Step Towards the Ultimate Workshop' post is a great resource for anyone looking at building their dream woodworking workshop, and what you could potentially include. Take a look at some of our favourite products and see what you could accomplish within your own workshop…Don't forget to dream big!
Get in touch!
If you’ve tried out this woodworking idea we’d love to hear from you. Comment below or send us a photograph and tell us all about your new ring box and how it turned out.
Alternatively, get in touch via our social media platforms. Find us on Facebook or send us a tweet using #woodworkingideas to @AxminsterTools.