Make it for Mother’s Day | How to Make a Wooden Box
What you'll need
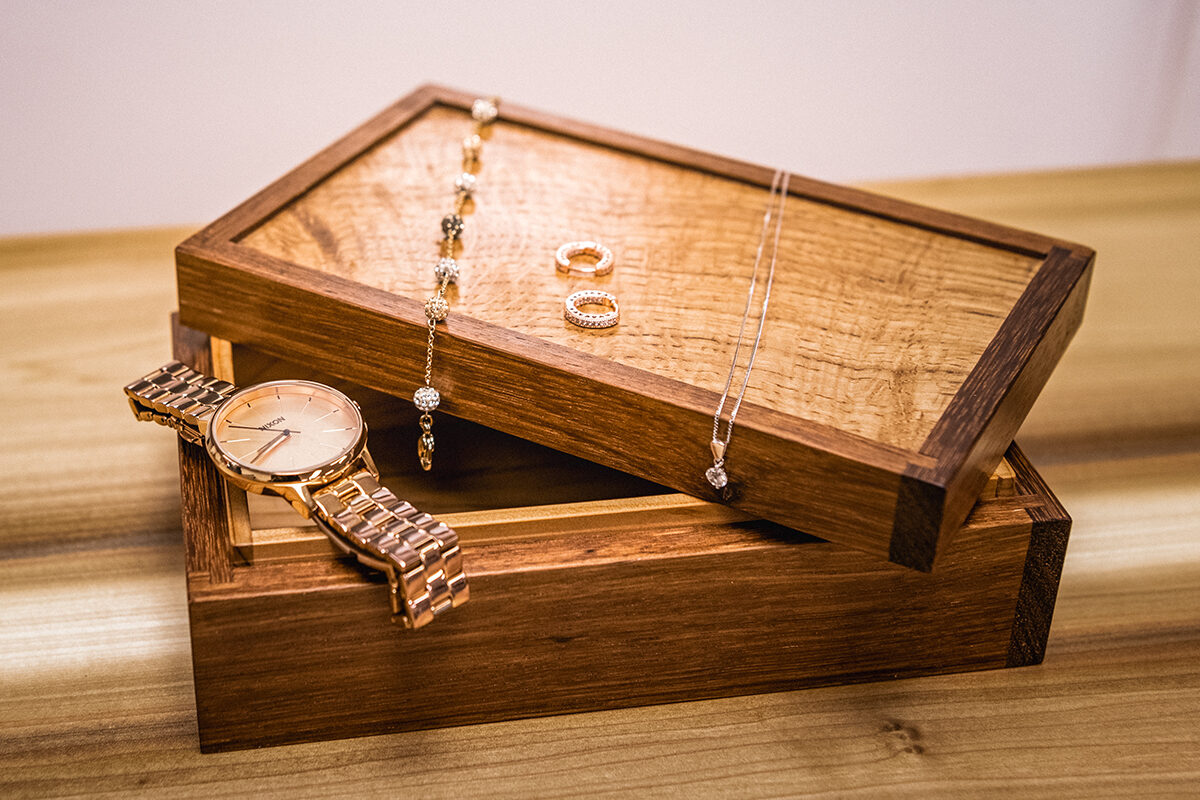
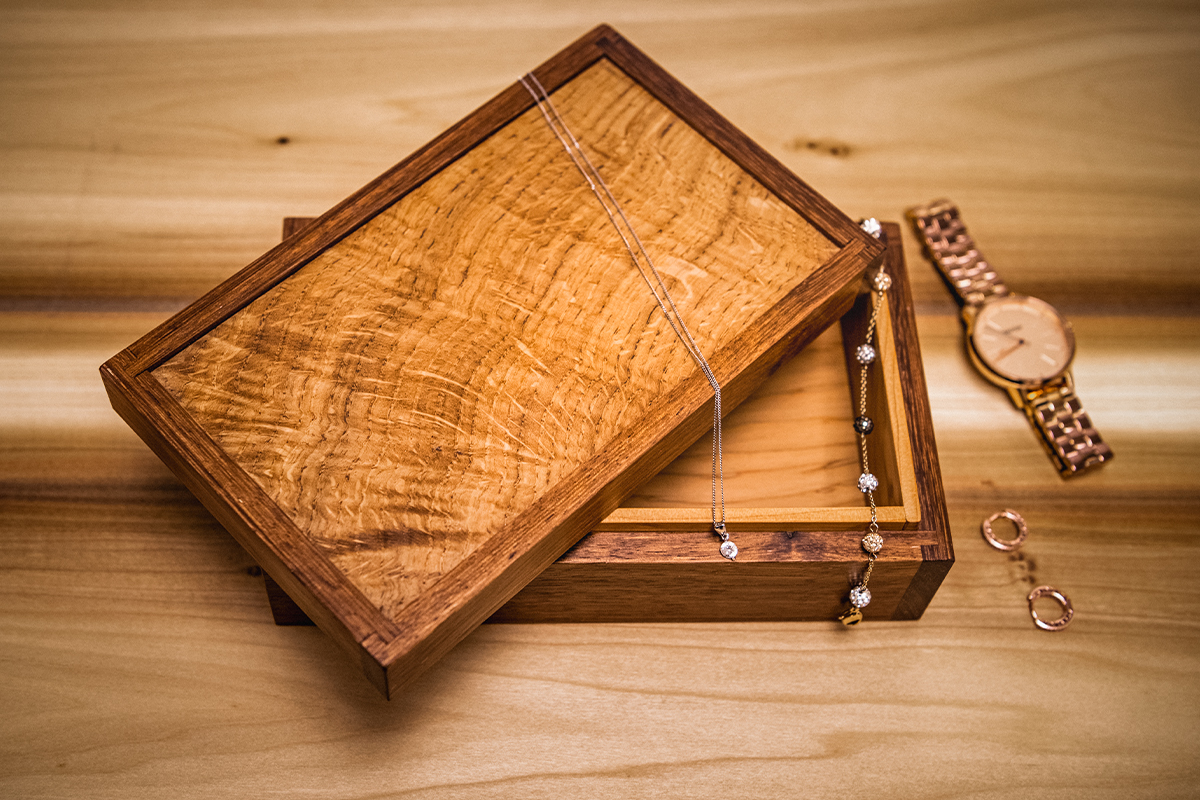
The ideal gift for Mother’s Day, birthdays, Valentine’s Day or just because, this beautiful wooden box is perfect for keeping those treasured possessions safe.
Box sizes:
Sides 900 x 70 x 10mm
Top 300 x 150 x 10mm
Bottom and lining 350 x 190 x 6mm
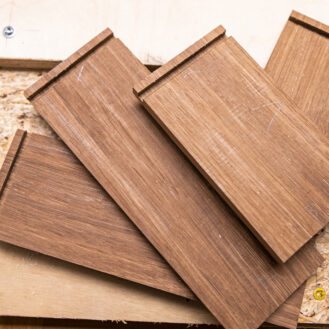
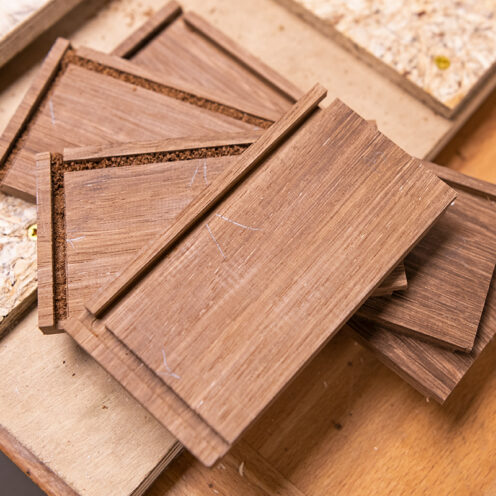
The timbers Jason has used in this project are Tasmanian Blackwood (sides) Oak (top) Cedar of Lebanon bottom and lining, But any woods will be suitable, it is nice to have timbers that contrast.
Prep your project
Jason made a routing jig from sheet material, to ensure all his box pieces are machined to the same thicknesses. Have some extra timber to hand to practice and set up with. These need preparing to the same sizes as your chosen timber.
On projects like this it can be nice to draw out a scale drawing. MDF can be great for this. This makes an easy reference guide for the sizes.
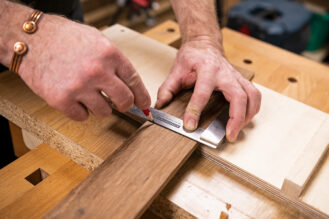
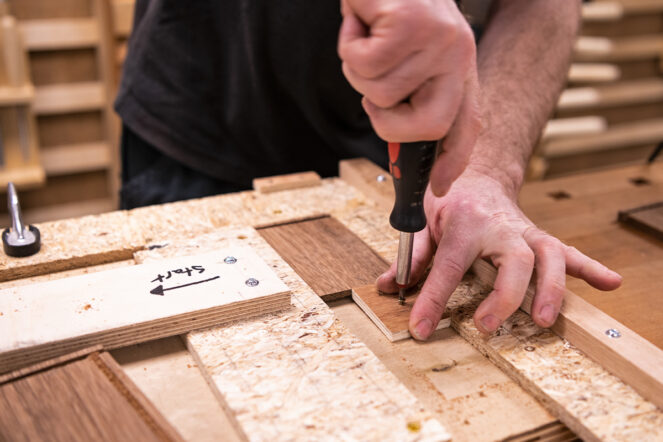
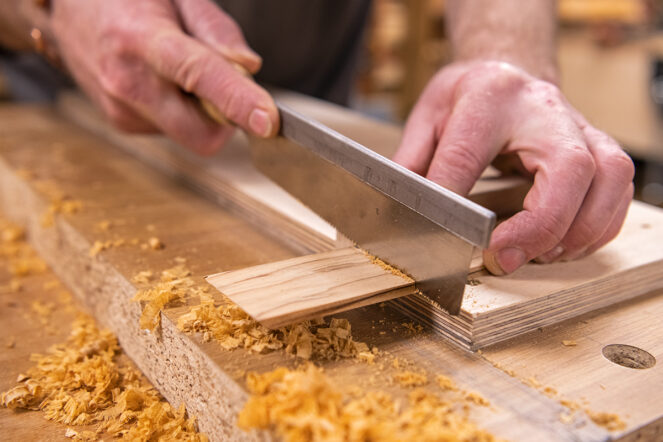
Marking and cutting your lengths
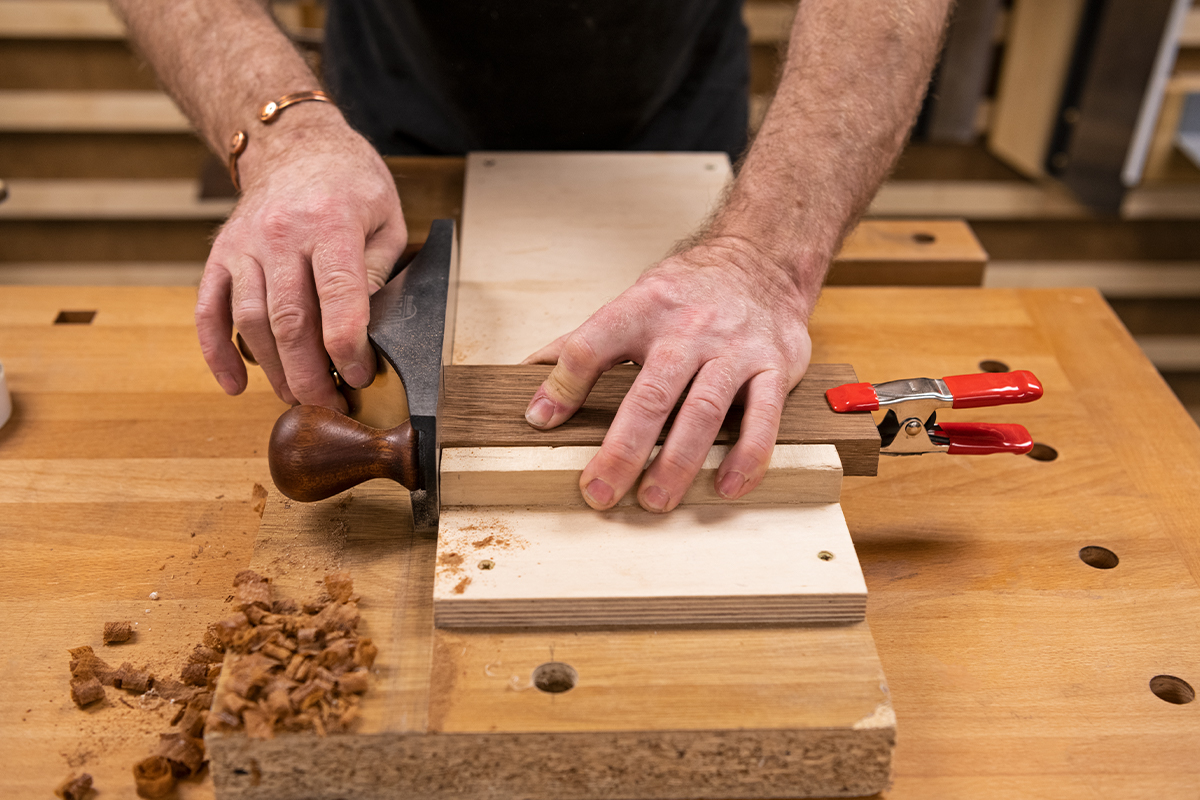
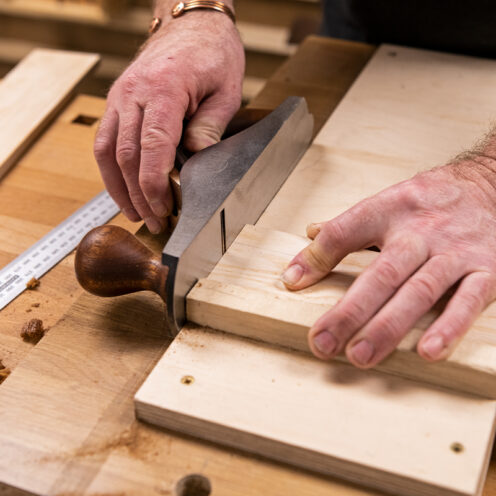
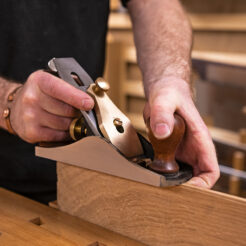
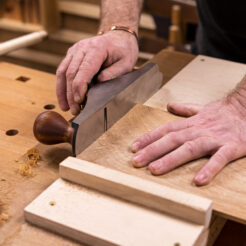
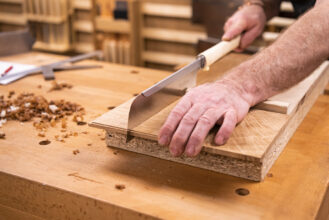
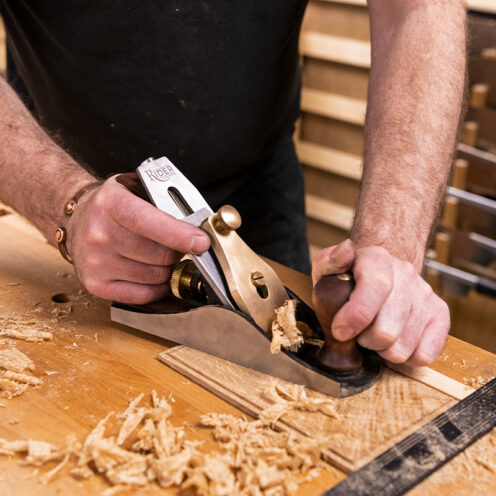
Having machined the timber to size, Jason squared the ends of the material using a shooting board and plane, for control and accuracy.
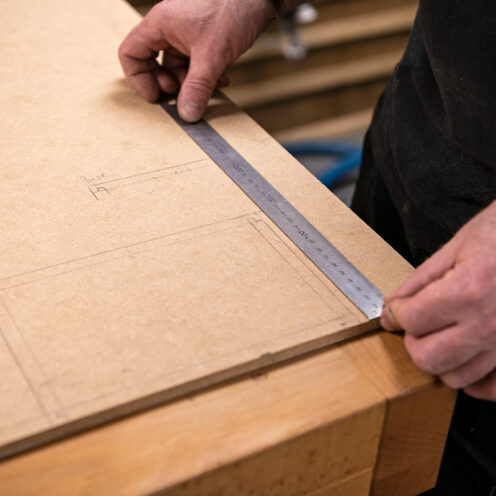
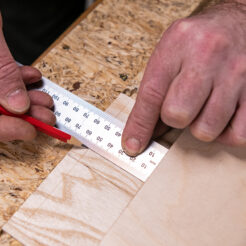
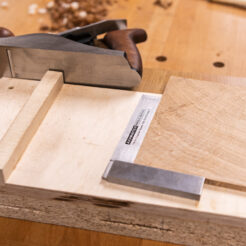
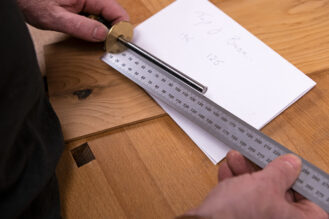
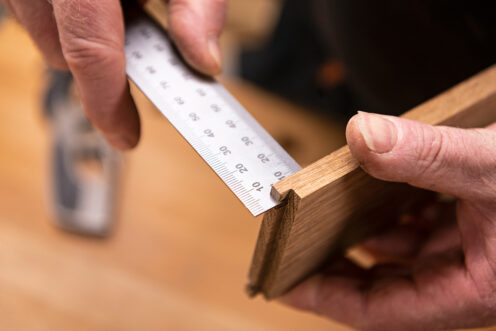
Next, use a steel rule to measure and mark out the lengths of your pieces, then use a square to mark a cut off line across the board. Using a saw, cut this to length, but remember to cut on the waste side of the line.
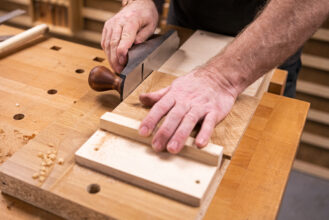
Using the shooting board, square up the end to the machined length, so that the end is clean and square.
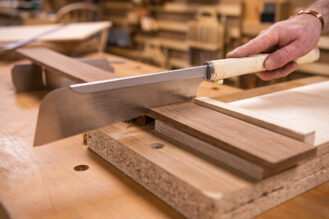
Small sections of double sided tape can really help to hold the two pieces together so that they can be accurately be cut to size at the same time. Ensure that the square ends are level, lined up and pushed together

Cut this to length using a handsaw. The edge of the saw blade is guided by the end of the shorter pre-cut length. Use the shooting board to clean up the saw cuts.
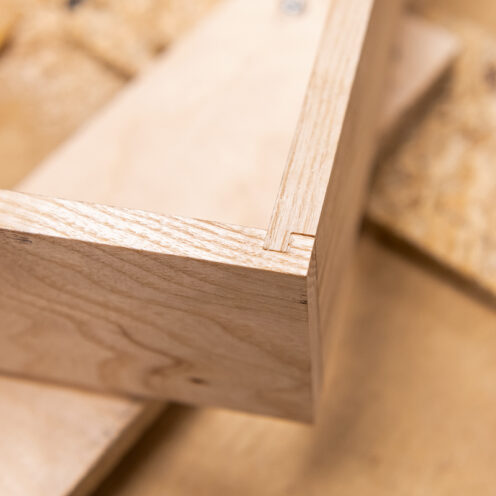
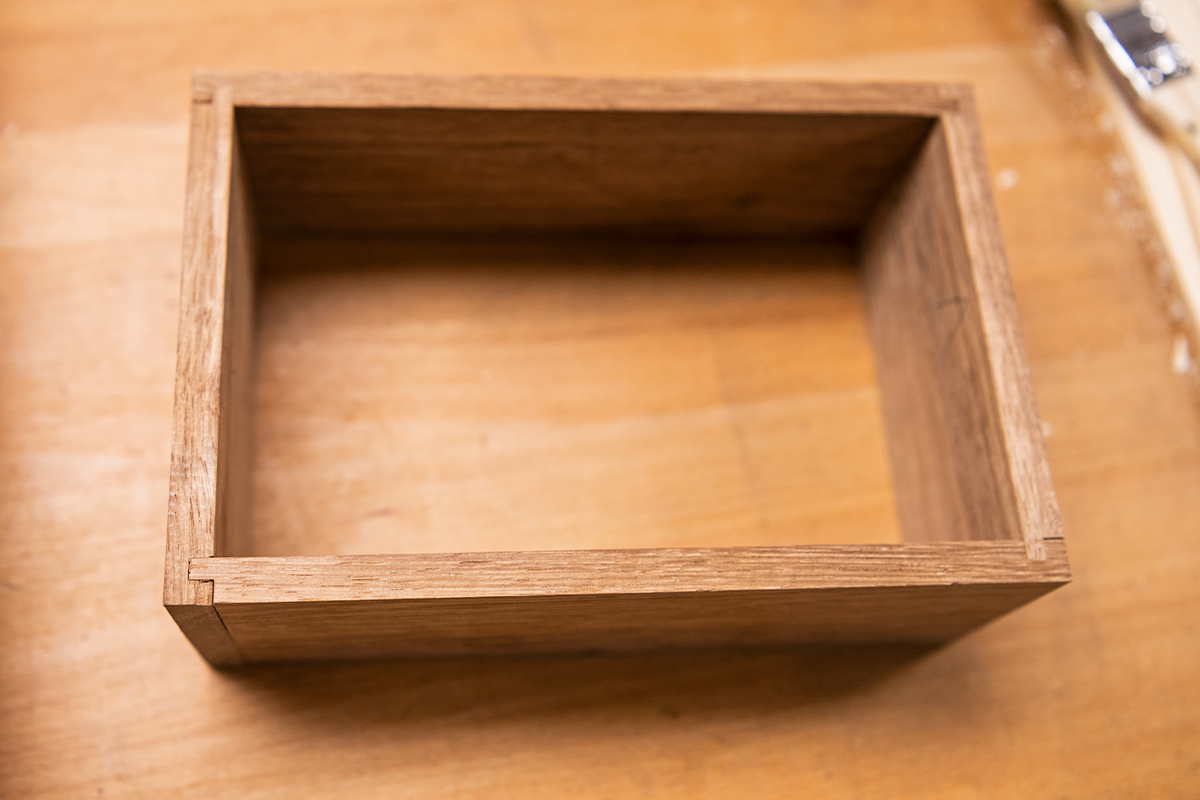
Repeat these steps so that you end up with the four sides of the box, accurately cut to length and square on the ends.
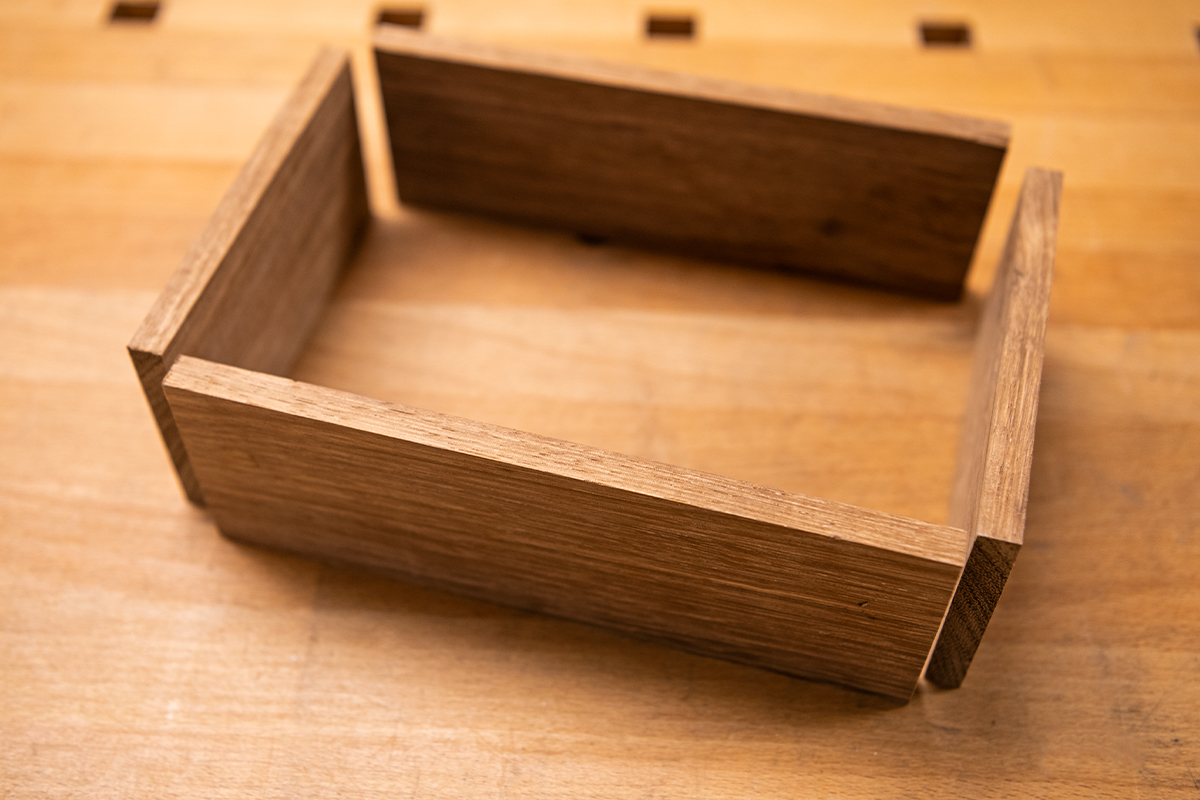
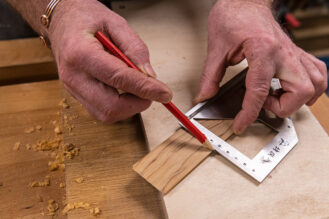
Prepare the cutting line
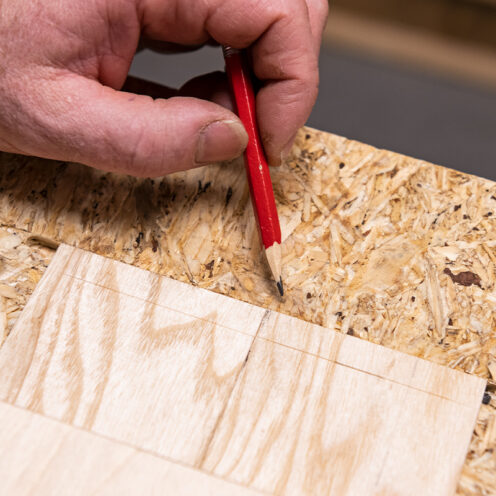
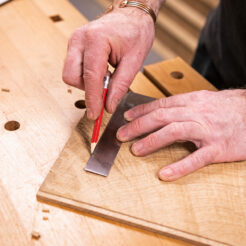
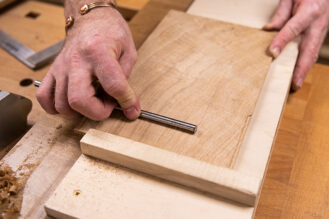
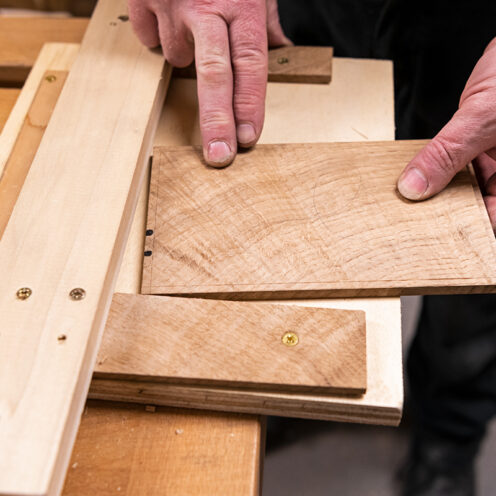
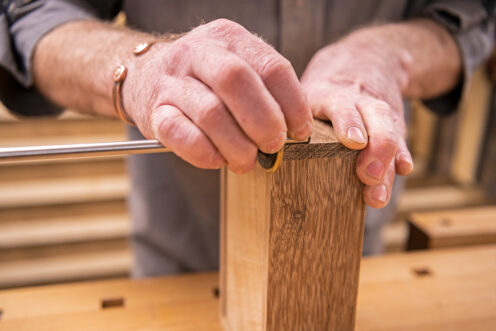
Lay out the four components to make the box shape. Mark the inside face and number the joints to show how these come together. This also helps to identify which face needs cutting.
To help set up the routed position of the joints, use a cutting gauge to scribe a cut line. Set up the cutting gauge to the thickness of the material, then scribe the line across the grain on the overlapping corner of each board on the inside face.
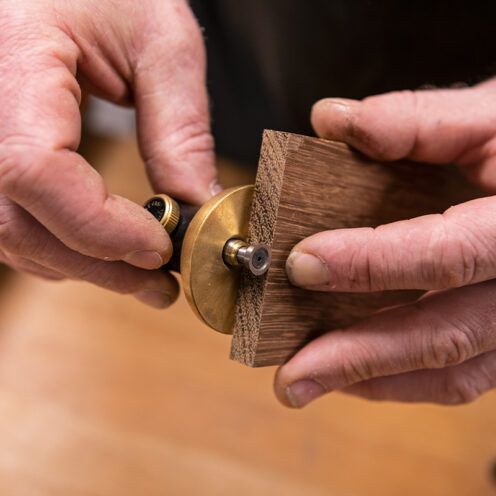
The practice material needs to be prepared in the same way, with the ends square on both ends of the boards and marked with a scribe line.
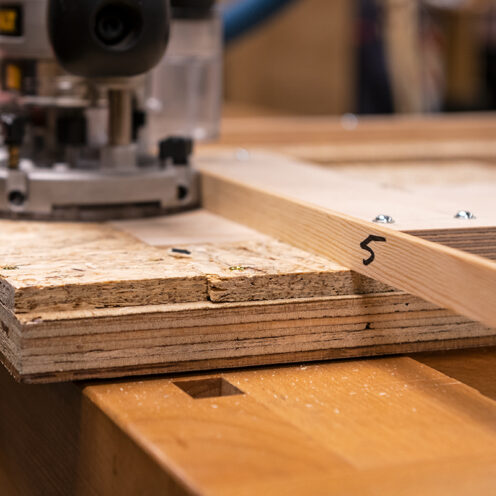
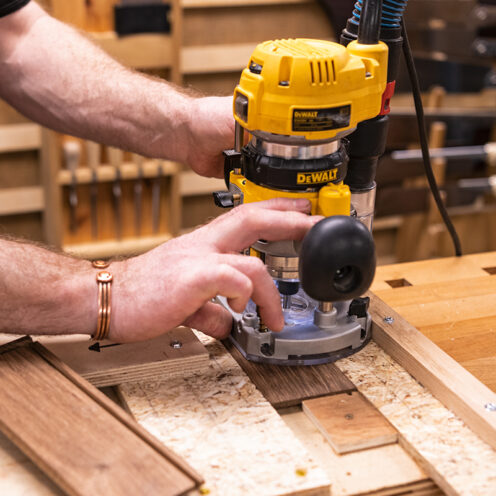
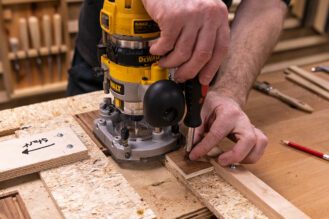
Prepare for routing
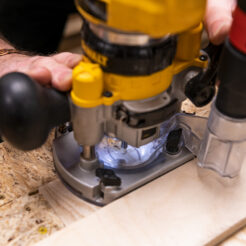
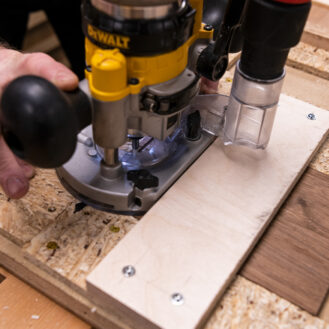
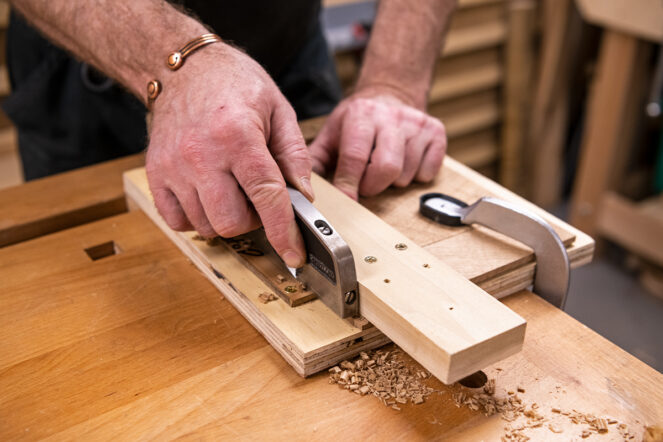
To cut the joints, a hand router is used along with a simple jig to hold the workpiece. The idea of the jig is to hold the work in place, allowing repeat cuts to be made accurately across the grain in a set location.The jig allows two workpieces to be held at one time. These slide into place from the back of the jig.
The box material and sheet material used for the making of the jig are the same thickness. The sheet material is screwed down into a ply board, creating a U shape location that the two workpieces can be slid into. The jig needs to be accurately made to hold the workpiece squarely in place.
To allow the parts of the joints to be accurately cut, a back stop needs to be fixed in position, This can be timber/plywood. As long as this is straight and long enough to guide the router along.
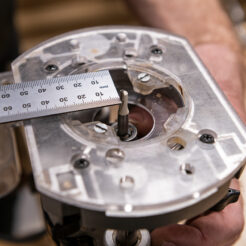
This allows the router to run parallel to the front of the boards. To set this up, load the router cutter into the router, measure from the cutter outer edge to the outside edge of the router base.
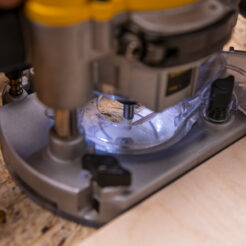
With the practice pieces placed within the jig, with the scribe line upwards and towards the front of the jig, the position of the backstop is the measurement taken from the router base to the cutter edge, measured back from the scribe line.
Clamp this in place, double check, adjust and then fix this in place with screws, do a small test cut (1-2 mm deep) to check the cutter is cutting on the front of the scribe line.

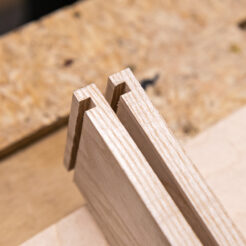
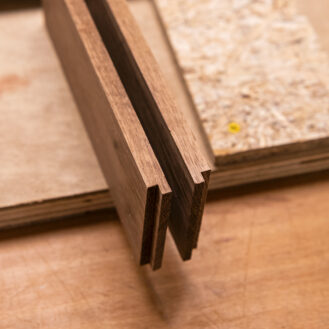
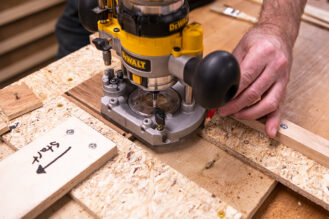
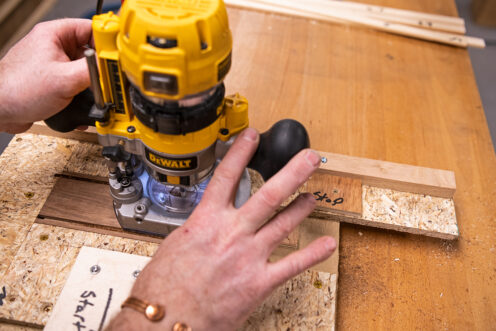
Cut your halving joints
Test before switching on, position the router on the router jig and slide across the jig from left to right to check this moves freely and no screws are in the way.
Set the cutter depth. This needs to be set to half of the material thickness.
Using the practice pieces to do a cut across the two boards, working from left to right. This will cut the halving joint slot across the boards.

To cut the other part of the joint, make a spacer stick to move the router toward the front of the jig board. The spacer stick needs to be the size of the router cutter. It can be worth having slightly different thicknesses to allow joint fit adjustment.
Replace the practice pieces so the uncut ends are at the front of the jig, with the spacer in place against the back stop, working from left to right, cut the boards using the same cutter depth.
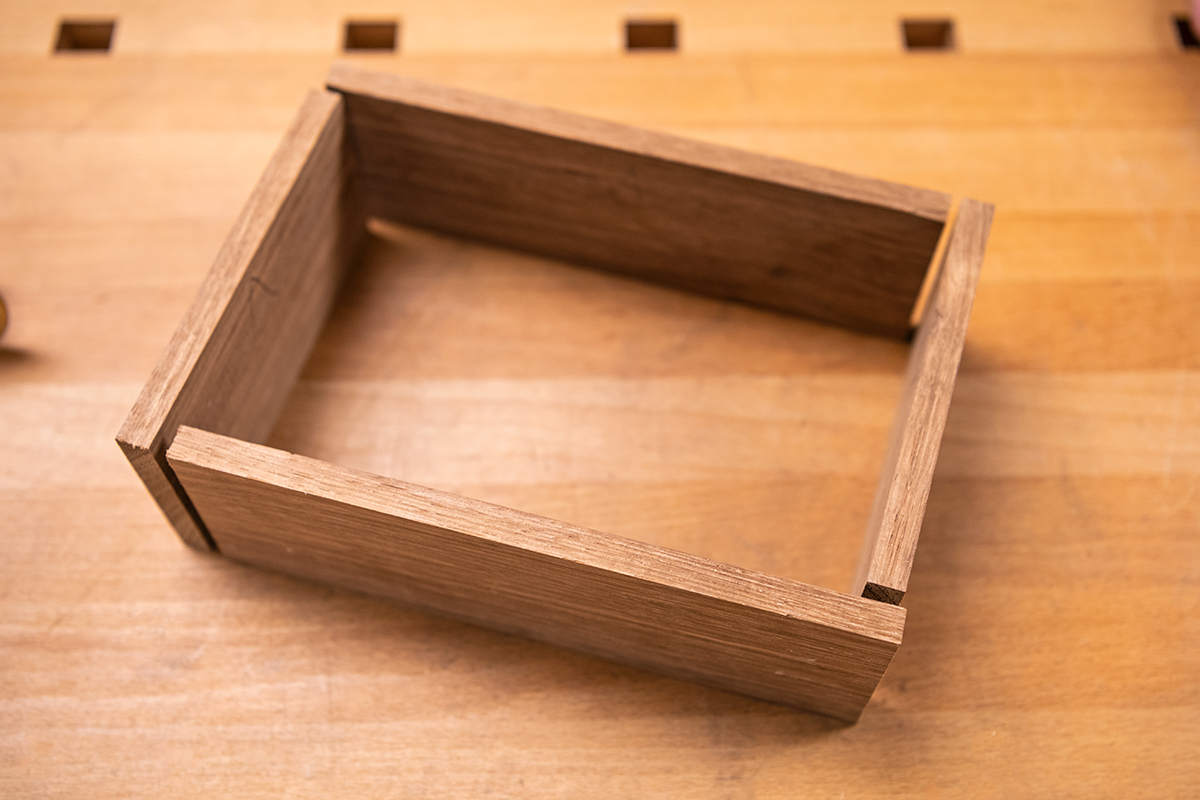
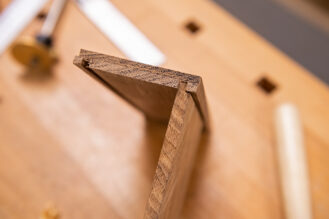
Bring the cut joints together to make a right angled corner, check how things line up and fit, and adjust the cutter depth if required.
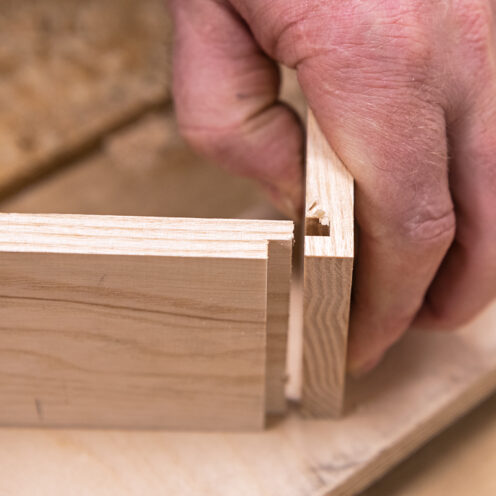
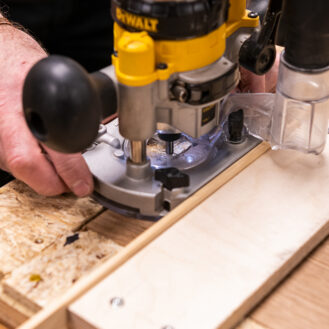
Repeat this set up for your chosen box material. Do all the halving joint slots first, the two long boards and then the two short boards. Remember the inside face of the material is face up.
Reposition the box material back into the jig, so that the tenon end of the joint can be cut, this time the material will need to be face down, and the spacer stick will need positioning against the back stop. Working left to right, do the two long and then the two short pieces, ensure the jig is kept clean as a build up of dust will make this less accurate.
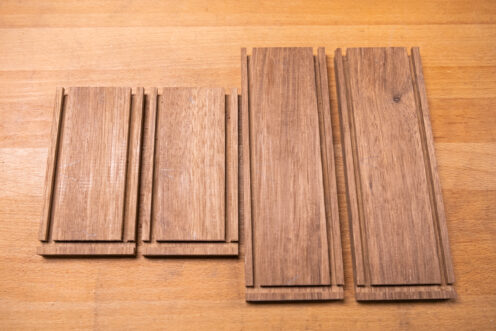
Cut the grooves for the top and bottom
Bring the four pieces together to make the rectangular box frame. Using the marking gauge in the same position as set before, scribe a line on the inside face of one piece to set out where the groove will go to hold the top and bottom.
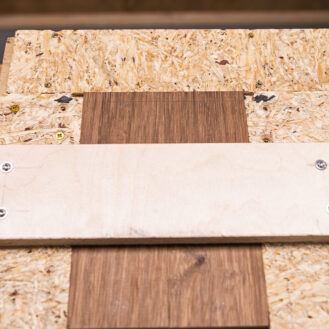
The router can also be used to cut the slot to insert the top and bottom pieces. The workpiece fits into the jig board and a backstop can be fixed in place to run the router against. This is set up in the same way as before, measuring from the edge of the cutter to the outer edge of the router base, measuring from the scribe line. Position the backstop up to this measurement, and fix in place.
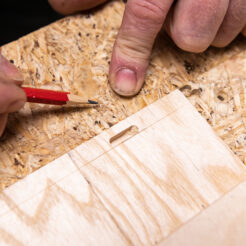
As the groove does not need to cut through the end of the halving joint a start and stop position can be set up. With the router unplugged, position the router so that the cutter lines up with the halving point slot. Use a pencil to draw around the router base, remove the router and screw a scrap piece of material onto the outer edge of the pencil line. As the box material is different lengths a holding block can be fixed in place to hold the workpiece within the jig. This will need moving for the different lengths.


Cut the groove in the four boards. The cutter is set to the same depth as before, working from left to right. Start with the halving joint slot on the left hand side, face up.
Unplug the router, remove the stop blocks, insert one of the workpieces so that the groove that has been cut is furthest away from the back fence.With the groove face up, fix a block to stop the work moving within the jig. Position the router so that the cutter lines up with the halving joint cut, which is now on the right hand side. Draw a line around the router base and then fix on a scrap block to create a stop point, working from left to right, cut the groove.
Repeat the set up for the shorter lengths.
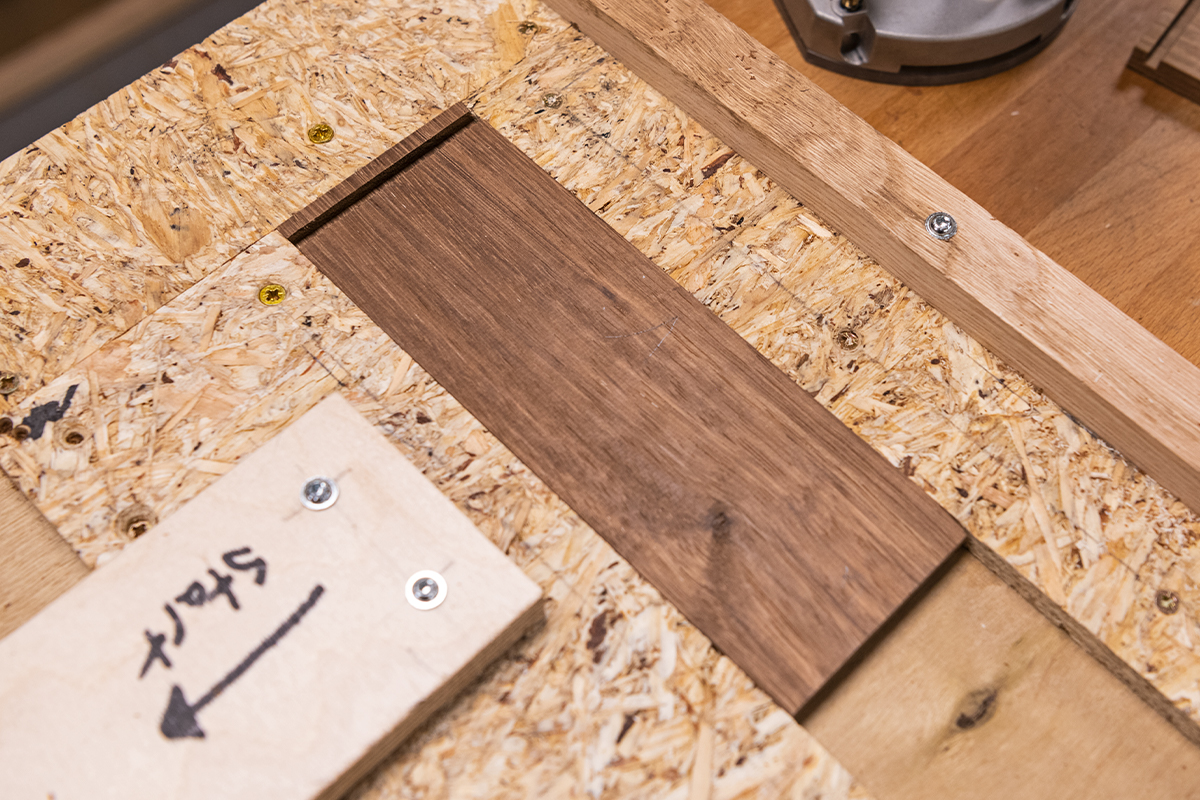
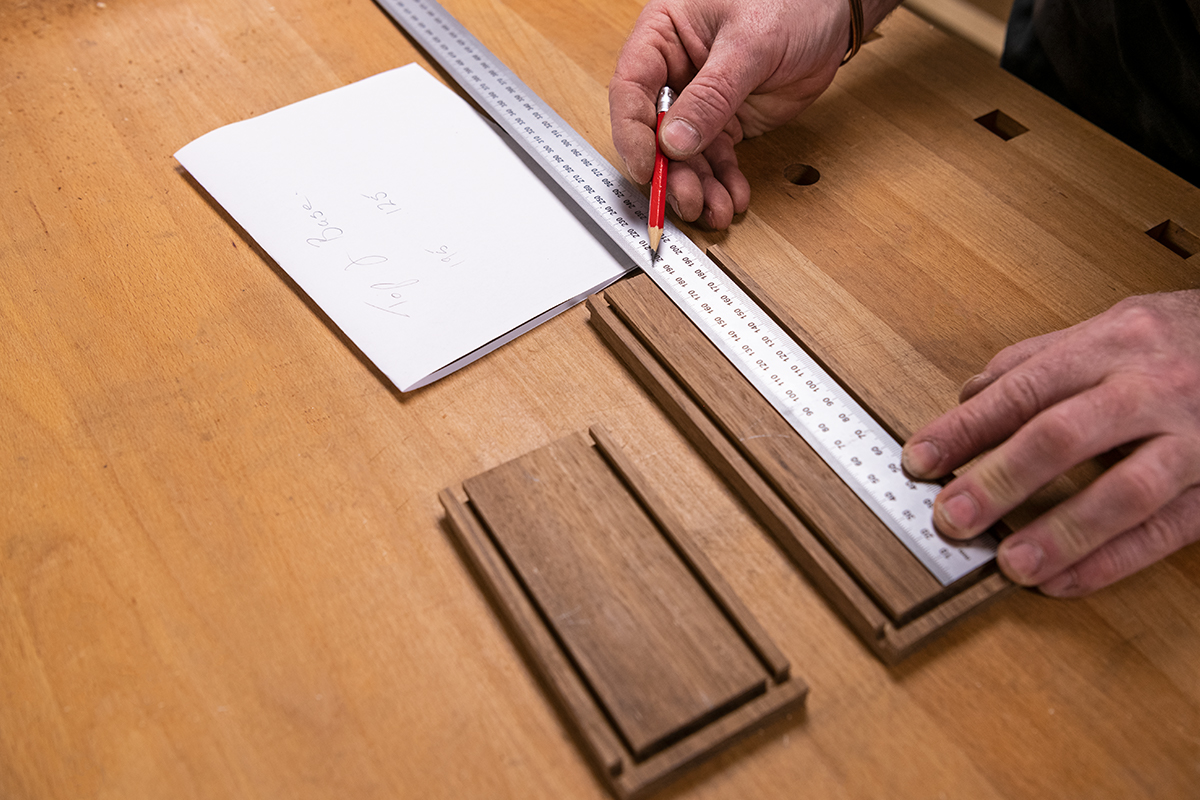
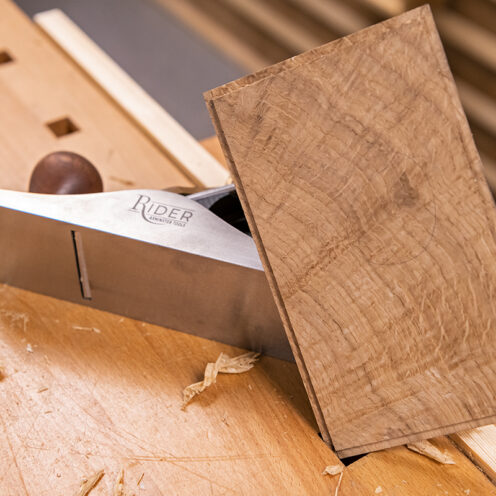
Cut the top and bottom pieces
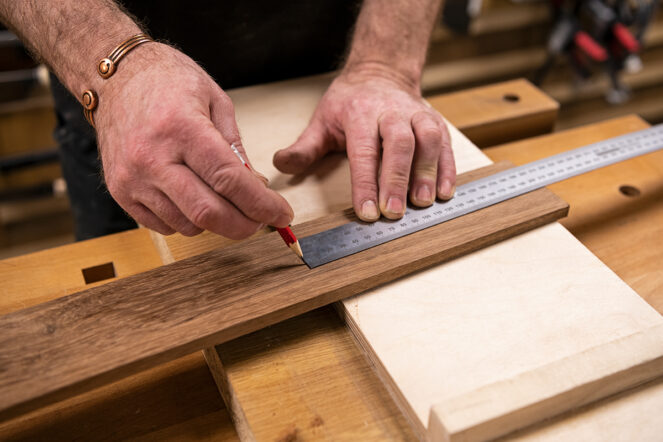
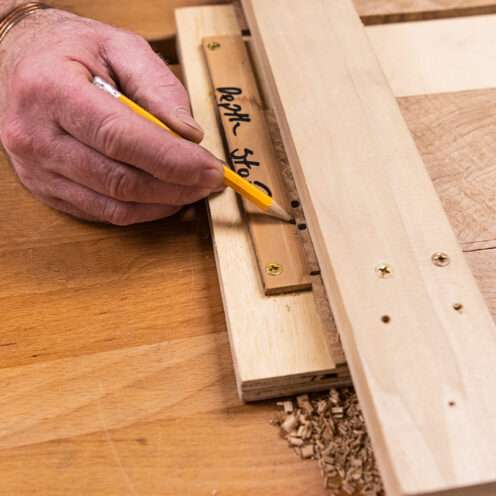
Measure the required sizes for the top and bottom pieces, measuring from the outside edge of the halving joint to the end of the board, long and short pieces.
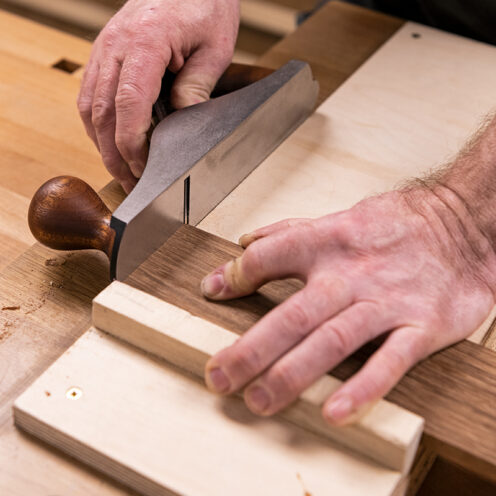
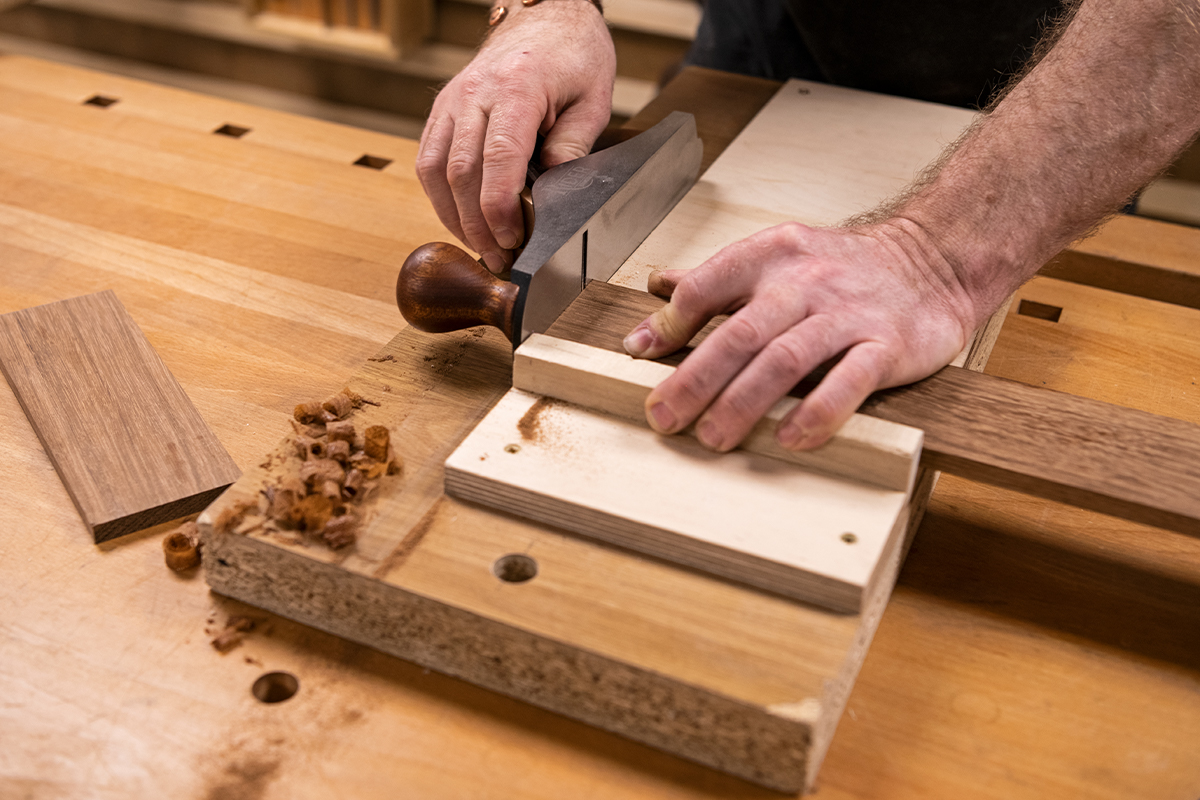
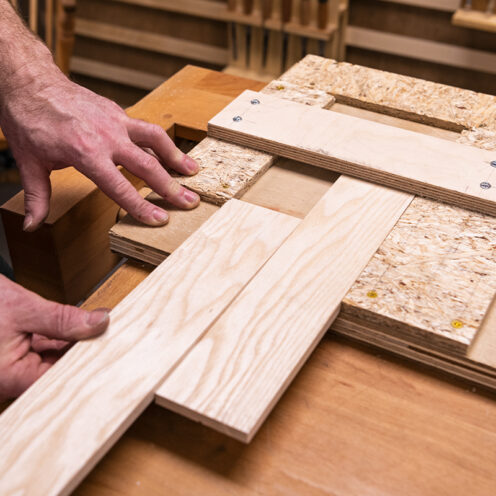
Select the material. Create a straight edge along the grain, mark out the sizes to make the best use of the material's decorative grain, cut one end square, and then shoot this to make it square.
To get the board parallel and to size, set up the width required on a marking gauge. Scribe a line down the length of the timber on both sides and mark out the length. Cut just over size outside the line, then using the shooting board with the pre-cut edges on the fence, plane the board to size, cross grain first, then down the grain. Do this top and bottom.


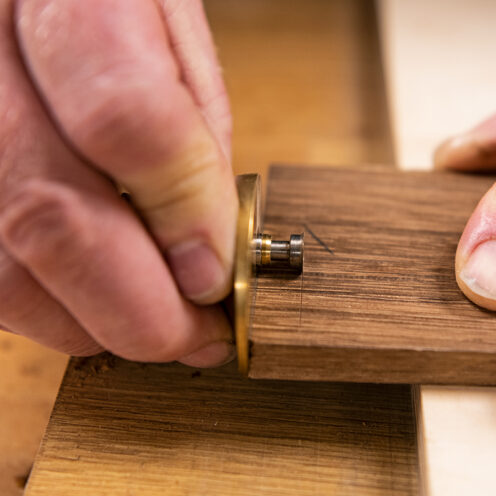
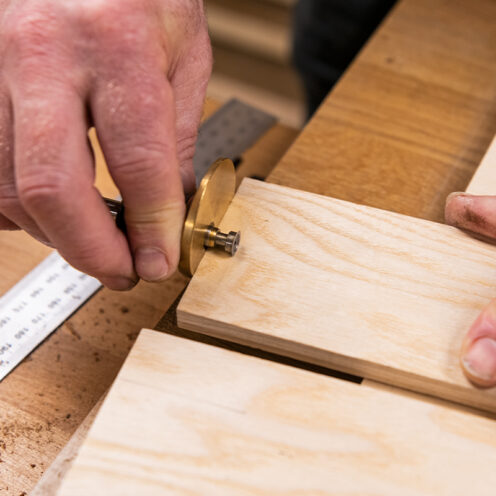
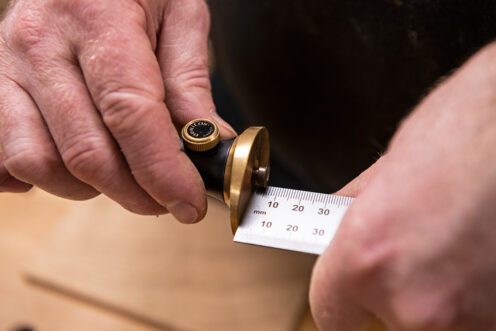
Measure the depth of the groove and set up on a wheel cutting gauge. On the outer face of the top and bottom material, mark a scribe line all the way around.
To cut the rebate to fit in the groove, a shoulder plane can be used. A simple board can be made, which is similar to a shooting board as it keeps the work square.
A top rail is fixed into position, this guides the shoulder plane. The work slides under the top rail so that the scribe line lines up with the edge of this rail. With the scribe line set parallel to the fence, clamp the workpiece in place by fixing a length of timber along the edge of the workpiece, which creates a lengthstop. If this is cut to fit into the groove, it will act as a size guide of the rebate, to be cut with the shoulder plane.
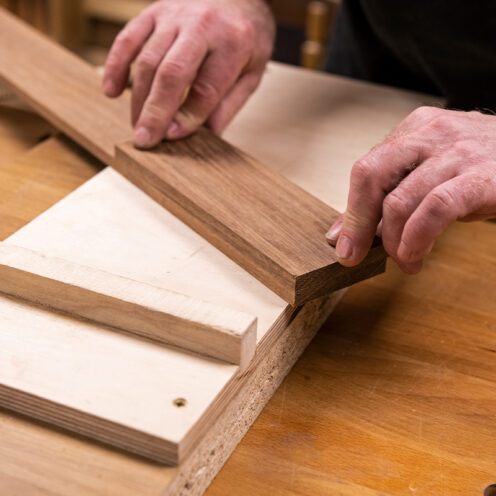
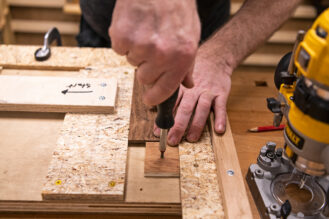
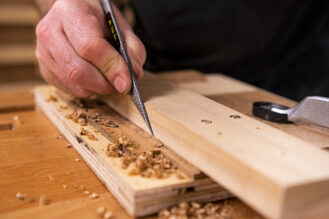
Use the shoulder plane to create the rebate, working across the end grain first. Fix the workpiece in place with a clamp, and use a marking knife to scribe the shoulder line deeper.
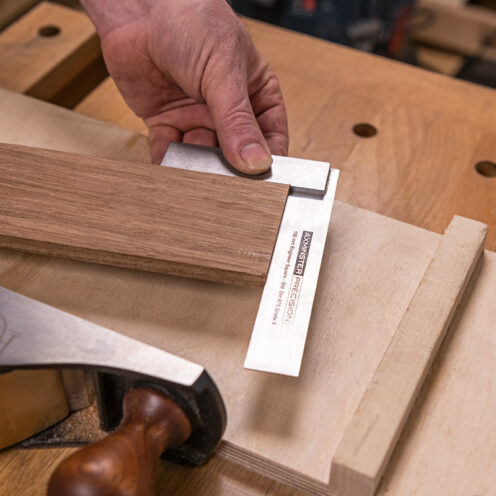
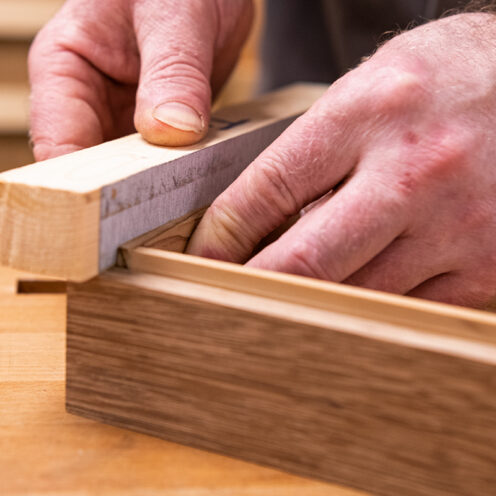
Remove the work from the jig to check how this fits into the groove. Do all four sides of the top and bottom.
Regular checks are important to ensure a good fit. If this is too tight it will split the groove.
With the rebate done, do a test assembly to see how things come together.
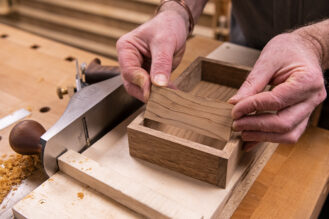
Clean up the pieces
The highly figured oak top board that I used needed to be cleaned up, a little bit of torn grain to try to lose first stage ,sharpen the blade, add a little bit of camber, so that the corners don't mark the work
Flat the top with light cuts, this provides a clean finish straight off the plane, the Number 4 plane is highly suited to this task, with good weight and control.
Clean up the internal faces of the box, sand to get clean, hand sanding is better for this as it will keep the surface flat and not round off the edge, like a power sander.
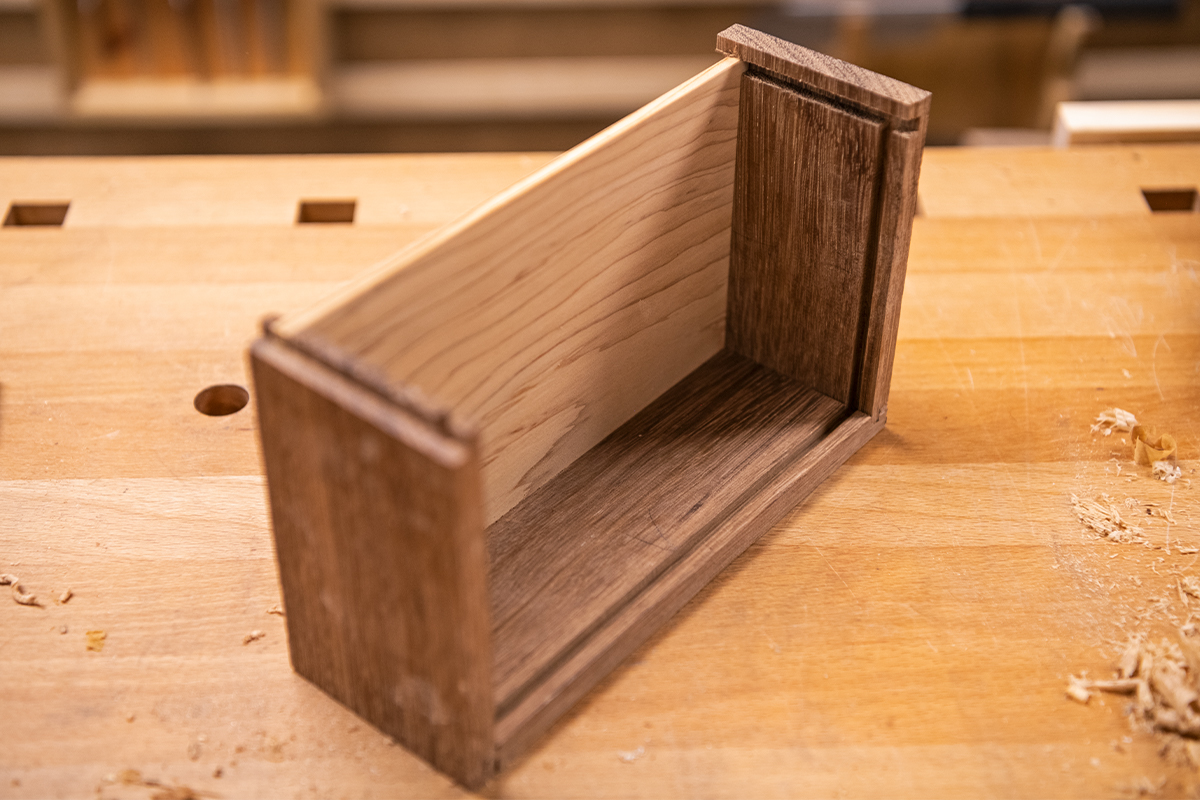
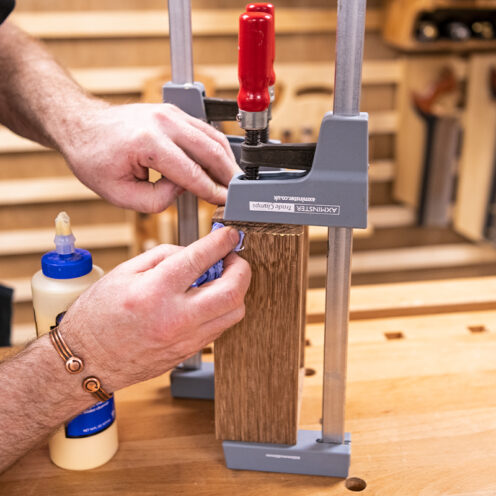
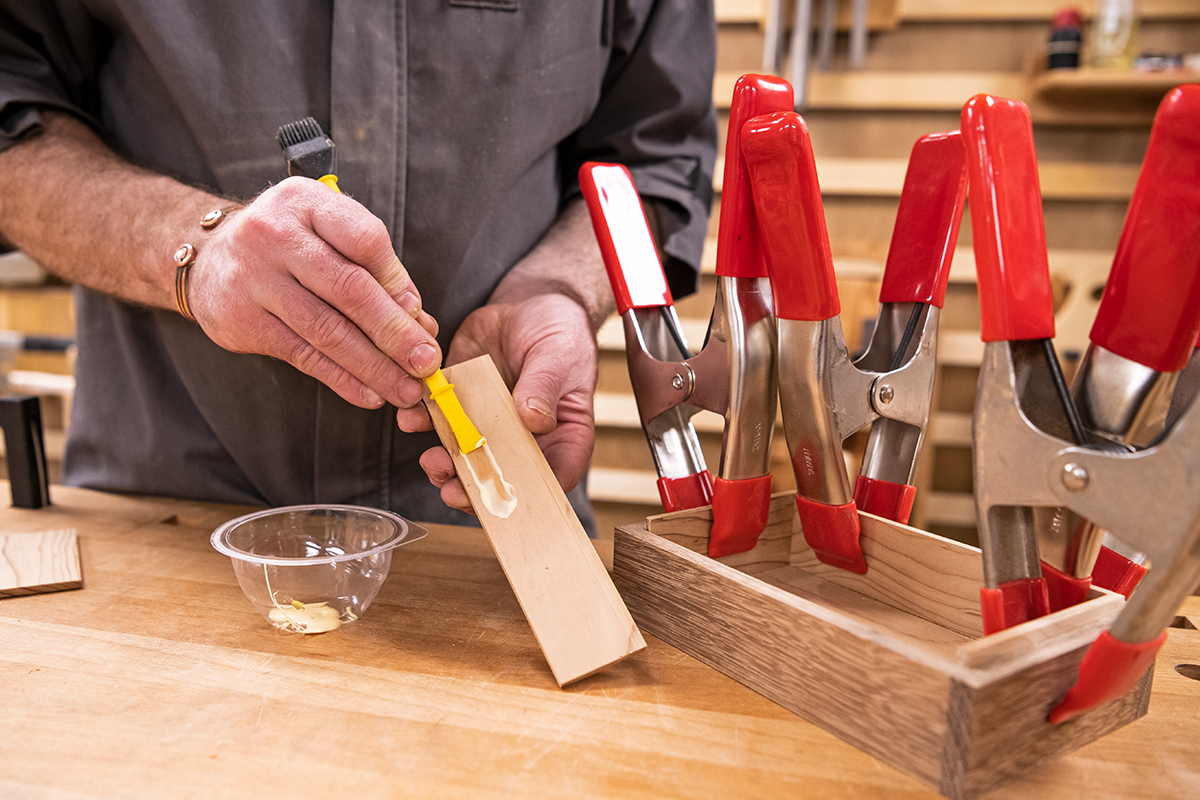
Glueing up
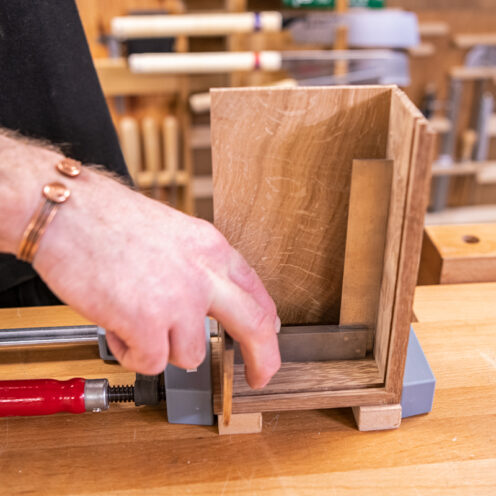
Glue up the box in two halves, this is easier to do and more controlled. Do a dry run first to see what is needed, how the clamps work, and where you need to apply pressure.
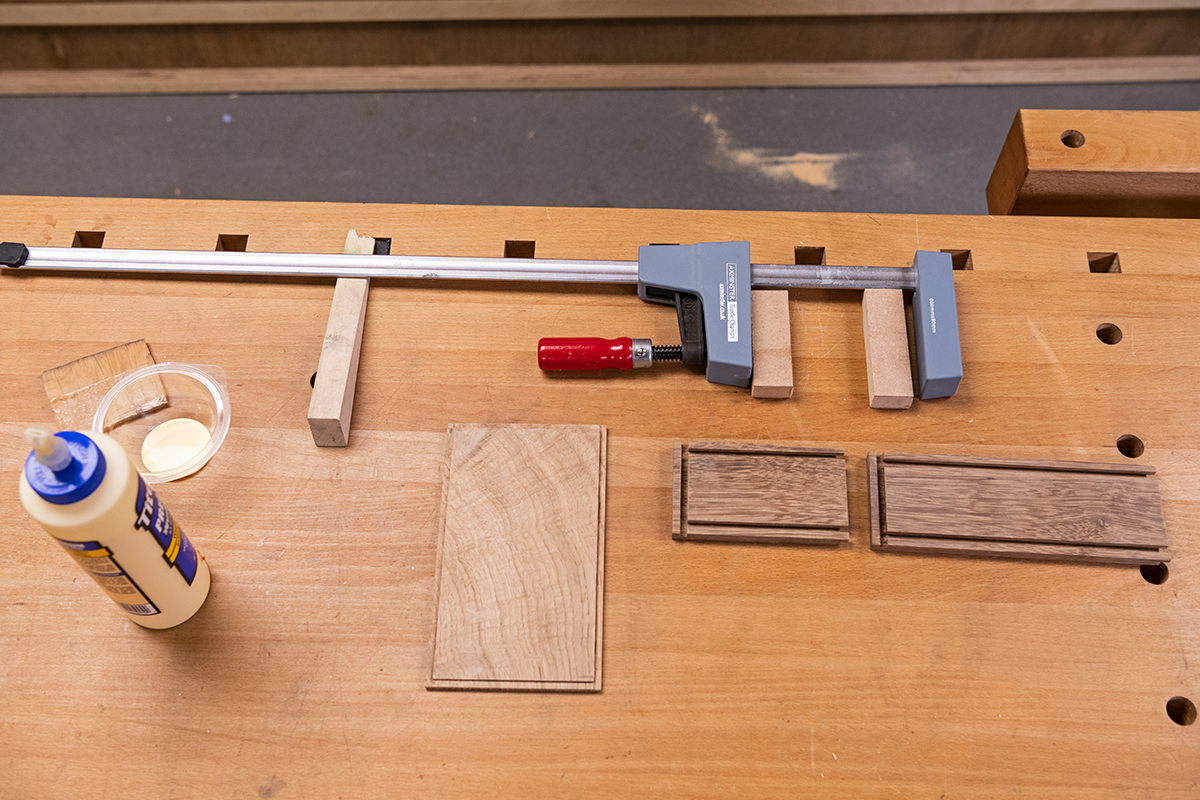
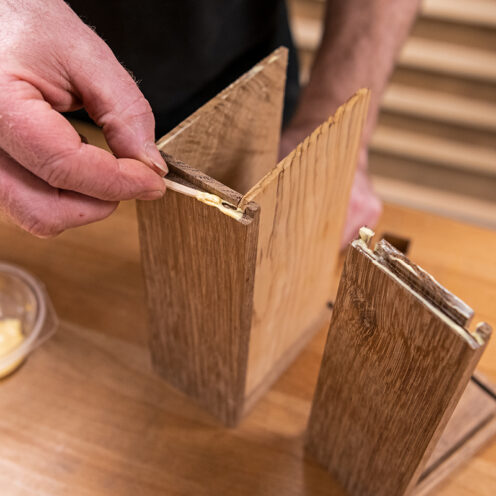
Spread a little glue onto the tenon part of the joint.
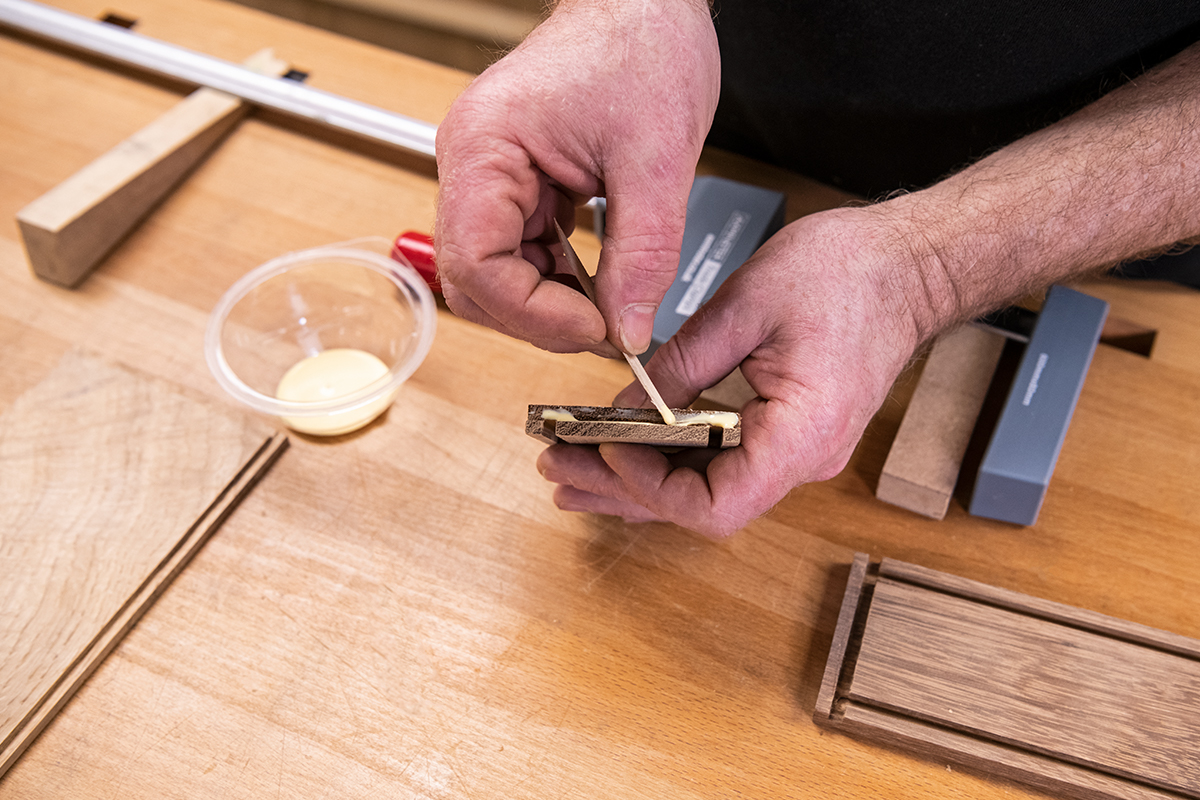
Clamp this in place. Raise the clamp and workpiece on blocks to support the clamp and create a square corner. Insert the top or bottom to help keep this square, but do not glue at this stage. The two right angles can be glued up and left to dry.
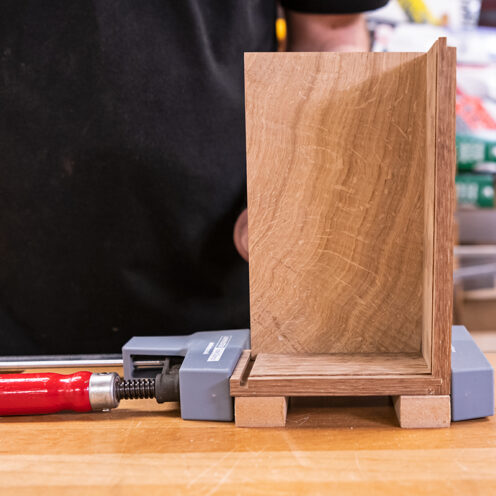
Once the two corners have dried the box can be fully assembled. Insert the top and bottom into place, adding a small spot of glue to secure them. Spread the glue onto the tenon points of the joints, and clamp together and dry.
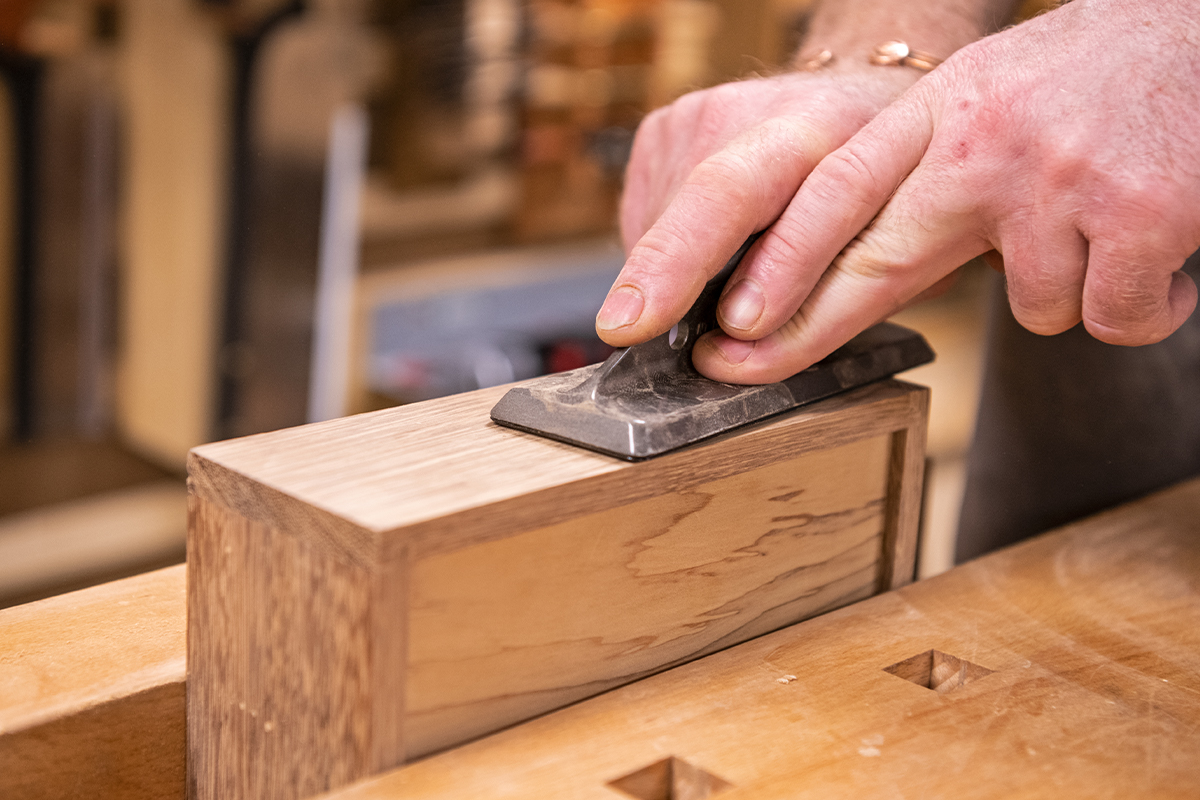
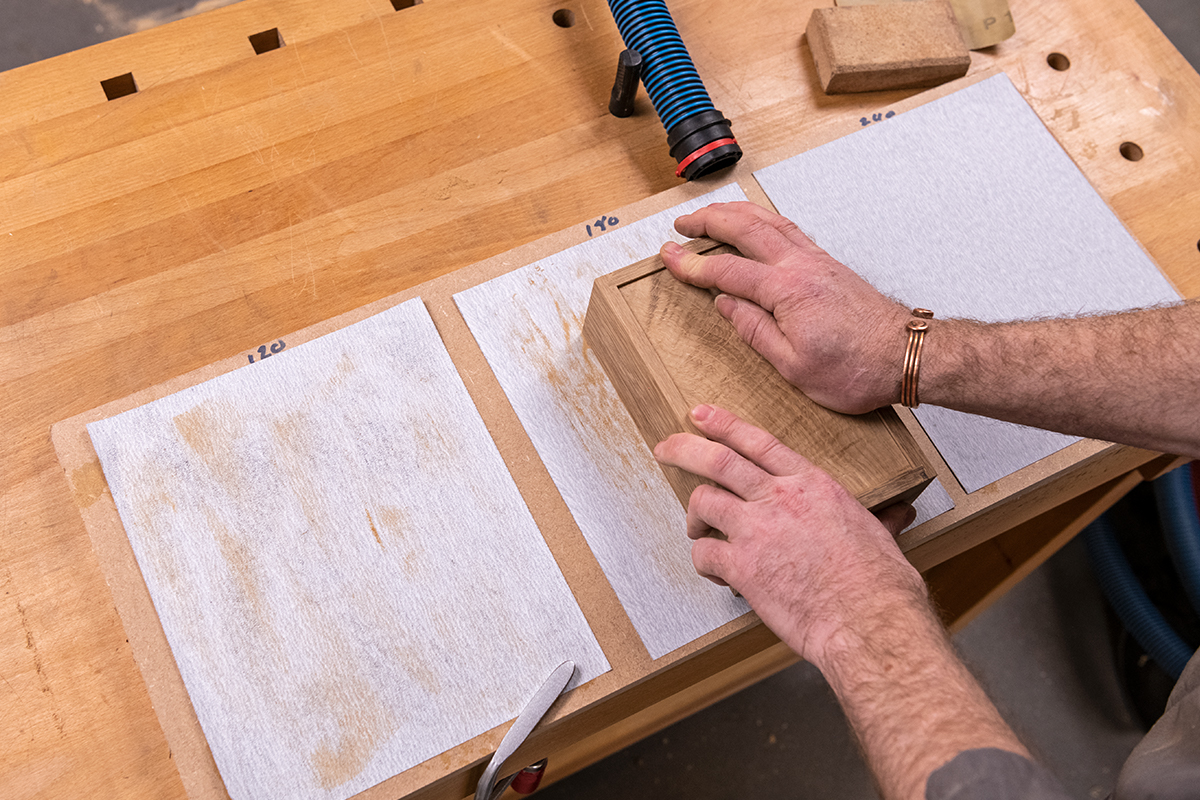
Cleaning up the outside
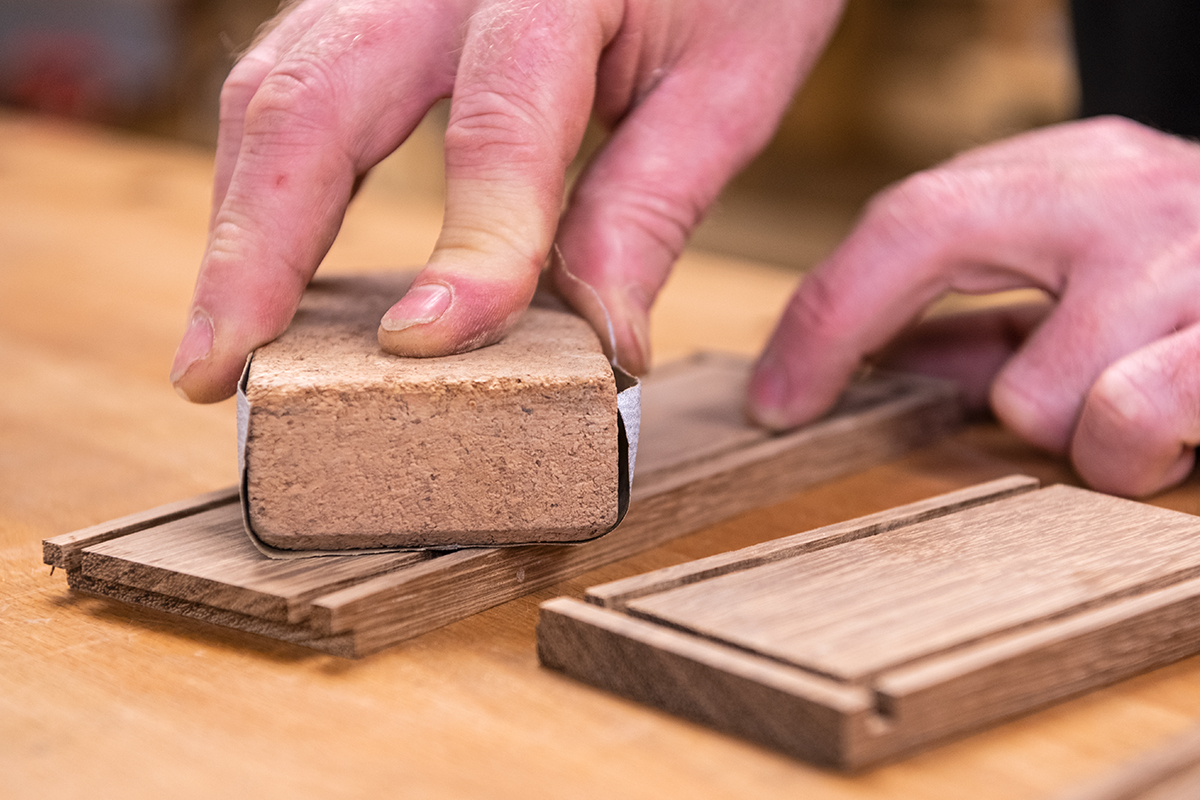
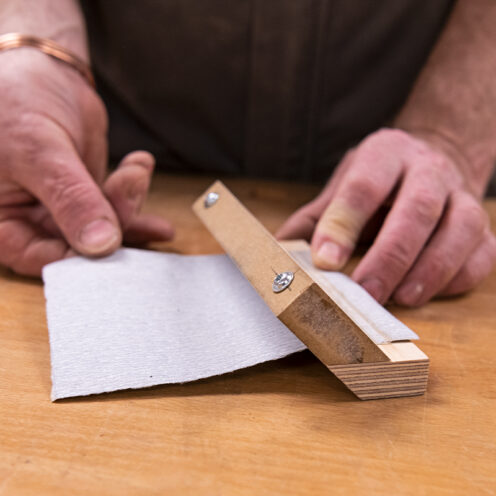
Once dry, clean up the glued joints. Jason used a NT sanding plate to level these back.
To level and clean up the top and bottom of the wooden box, make up a simple sanding board. Use spray mount glue to fix sanding sheets to a flat substrate. Rub the box on this. This keeps it flat. Jason used three grades - 150, 240 and 320.
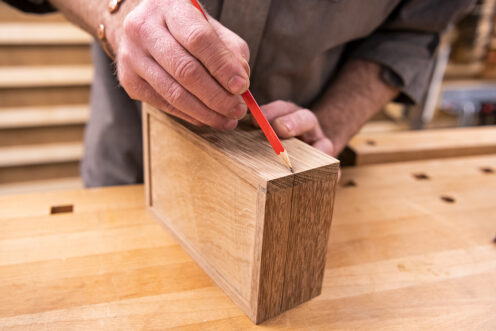
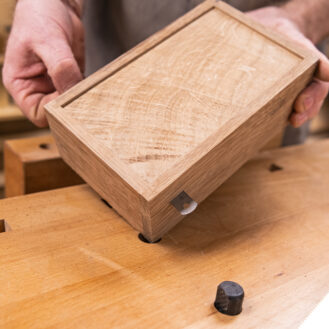
Create the lid
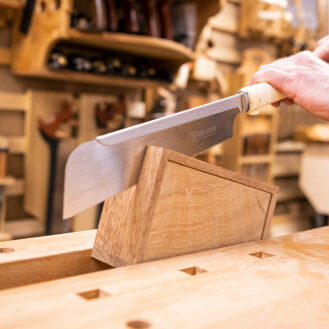
Cut the box. Set up a cutting wheel gauge and mark a scribe line around the box.
Position the box within a vice at an angle so that you can see one corner. Position and use a saw to start the cut. Take your time. Work down that corner and then move the box around within the vice to work the cuts further around the box.
Towards the last corner, use a steel rule and insert it into the cut. This will help to keep the width of the saw cut open and stop the vice pressure pinching the saw blade.
To clean up the saw cuts use the sanding board, working through the grades.

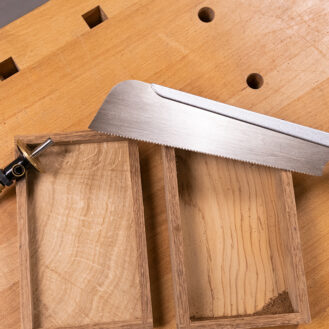
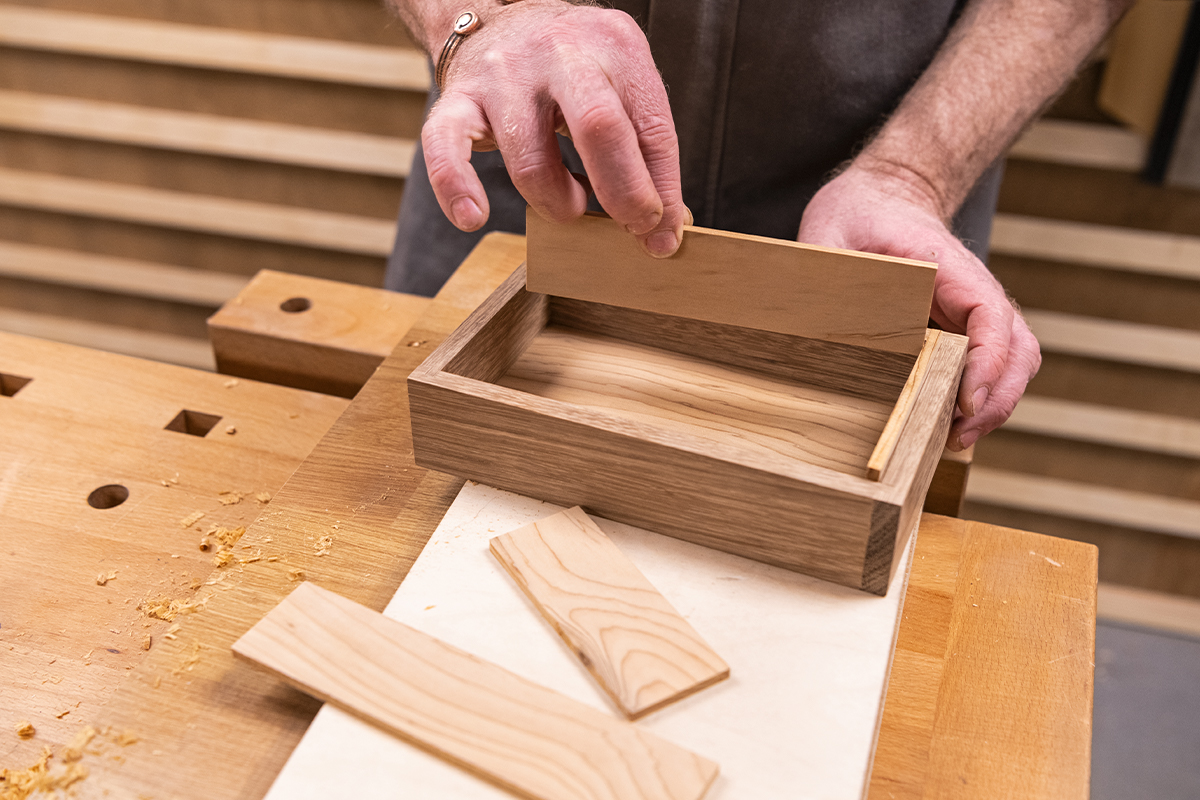
Line the box
Next line the inside of the wooden box with timber to create a lip to hold the lid on.
Cut the bits to width, planing the edges, and then square up one end using the shooting board. Cut these just over length and shoot to get an accurate fit. Do the short short lengths first.
Having fitted the internal lining, hand sand to clean up the internal face that shows.
Glue and clamp these in place.
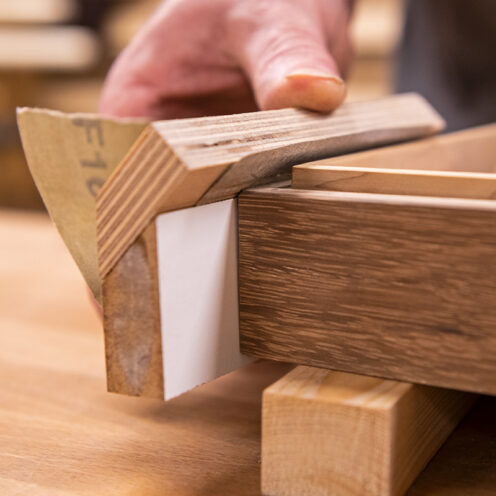
Adjust the lid to fit once dry. To do this, Jason made a sanding block, which is planed so that it is about five degrees out of being square. The abrasive is attached with double sided tape.
The base of the block is smooth and runs on the jointing face, the taper allows the block to remove material from the top of the internal lining. Sand around the four sides. Test fit the lid to get the desired fit.
To create a nice face where the top and bottom join, Jason made a sanding block that creates a nice sanded 45 degree face angle. Use on all the edges to soften the sharp edges.
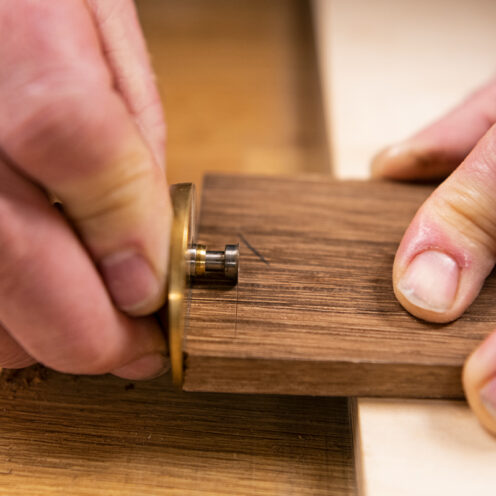
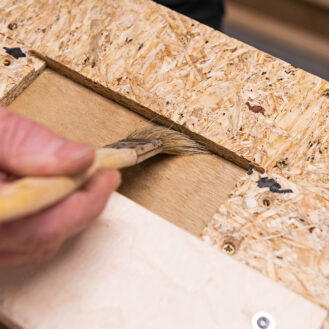
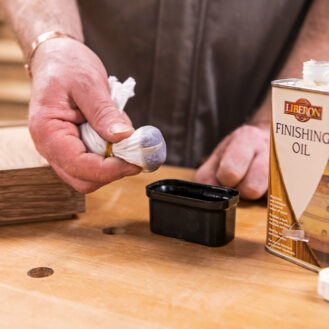
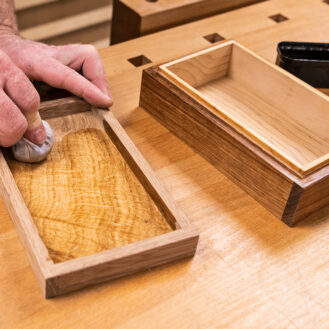
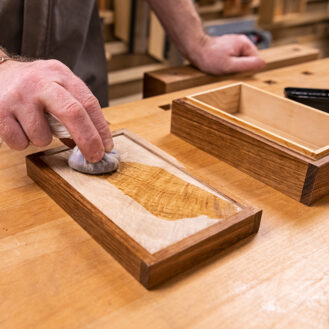
Having cleaned up and sanded the joints, apply your finish. Jason used a finishing oil.
Apply light coats to build up the finish, working around the box. Apply the oil using a polishing rubber, similar to those used to apply french polish. The final stage is a touch of wax, and a buff.
You now have a beautiful wooden box, perfect for storing sweets, jewellery, or other hidden treasures and keepsakes.
Make it and share it
Did you make this project? We would love to see it! Share with us on social media images of your finished project and tag @axminstertools.