The Resourceful Woodworker looks at offsets and corners

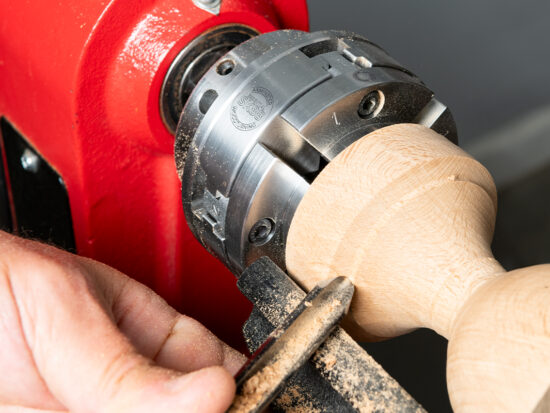
Continuing with my adventures using the UJK Technology router bushes, this week I have been mostly trying to understand more about template routing, offsets and the sorts of things that can be achieved.
Last time I reproduced a simple finger pull by making a circle jig for the router and then using a bush and cutter to finish the job, but I wanted to explore a little more what would happen if a template with straight sides was used. This might be particularly relevant if someone was making, for example, a doll’s house where a number of identical window openings were required. Rather than make a simple square or rectangle, I went for a trapezoidal shape in some 3mm mdf, which is a bit too thin for this sort of exercise.
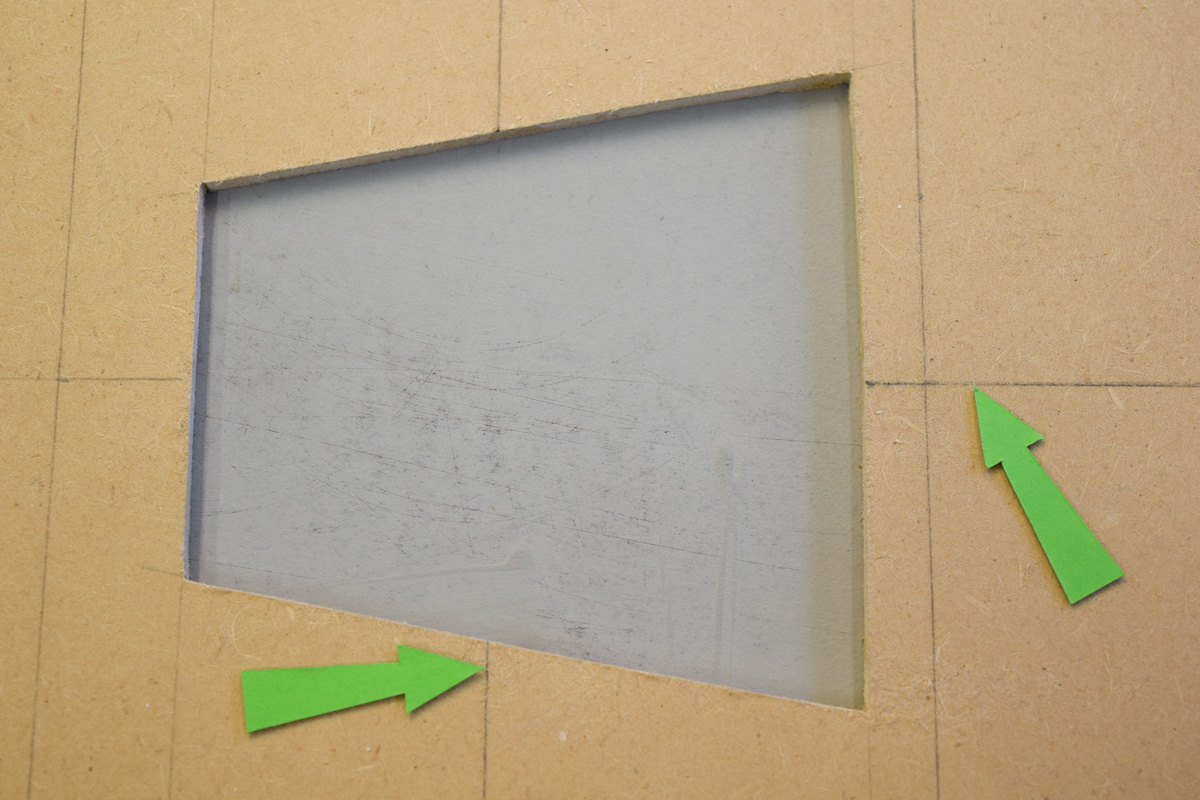
It’s worth noting that the depth of the bushes (given inside the lid) varies from 7 to 10mm, so the template material ideally ought to be a smidgen thicker or else the same packing will be required later on underneath when routing commences...which is what I had to do.
I also drew some pencil cross hairs, or centre lines (arrowed), which would enable the template to be lined up identically each time if it were used in a real life situation. A scroll saw is probably the ideal way of cutting out this sort of shape, but I did it the ‘handraulic’ way by using a coping saw, files and sandpaper to refine the shape.
With the template completed, I used some double-sided tape (a must-have in any workshop) to stick it to a piece of 6mm mahogany ply, after which came the process of selecting the router/bush combination.

Where the template has a sharp internal corner, the finished job is bound to end up with a rounded corner (yellow arrow) which is a product of the bush and cutter used. A smaller bush and cutter will produce a tighter corner in the workpiece and vice versa, which needs to be taken into account. After routing, the small internal corner is easily made square by using a selection of files and other hand tools.
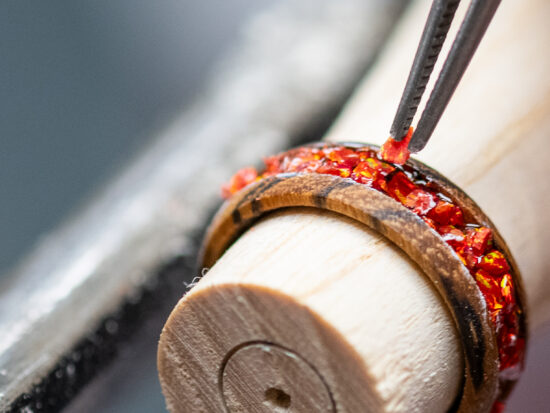
In order to achieve a tight internal corner, I picked a 4mm router cutter and a 10mm bush, giving an offset of 3mm which can be clearly seen in the picture. However, the choice of a 4mm cutter for this sort of work isn’t recommend as it’s single edged and possibly a bit delicate, bearing in mind that it’s got to be plunged through 6mm ply (or thicker, as the case may be).
At the same time, the machining will produce an internal matching template with an offset of 7mm (green arrows) being the width of the cutter (4mm) added to the cutter/bush offset (3mm). Next time I mostly hope to show that it’s then possible to use this new internal template to machine a matching insert that will fit exactly into the mahogany shape originally produced, which is one of the tasks on the Beginner's Course in Routing in the Axminster Skill Centre.
It’s also apparent that a small router cutter for this sort of template work is desirable as there’s much less material removed during the machining process and consequently, there’s less strain on the router. A 6mm cutter is ideal as it’s then easy to work out the offsets for each bush, as can be seen in the chart.
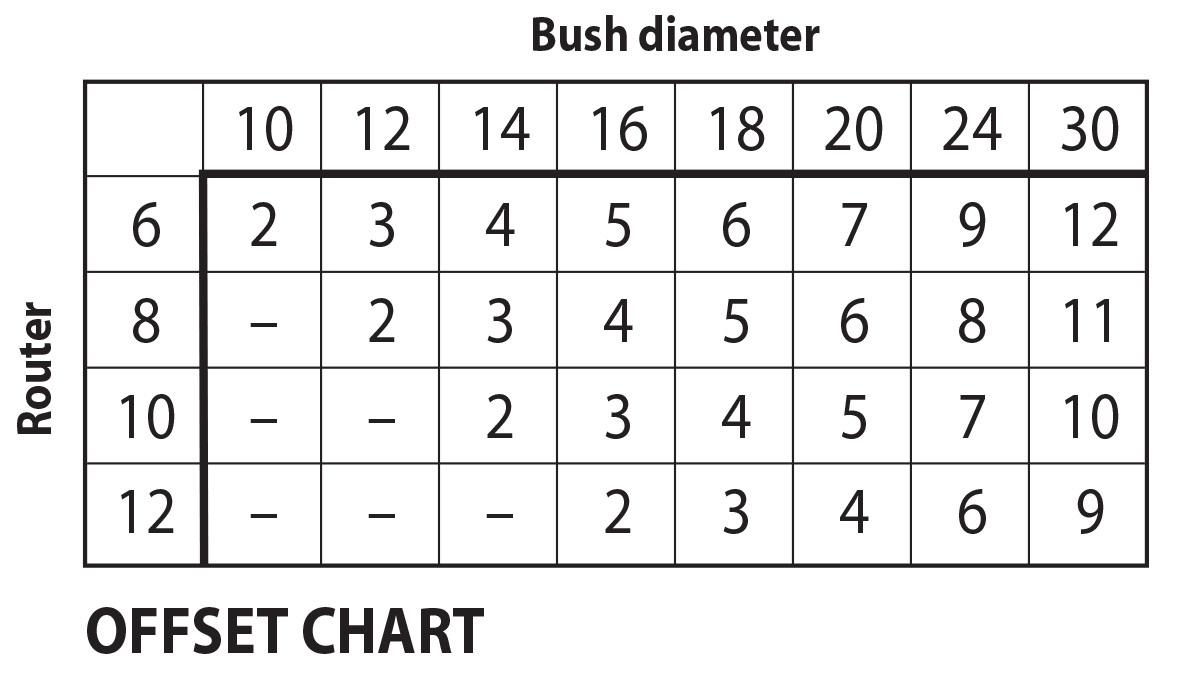
An 8mm cutter could be used for most of the work if required, but if an 8 or 11mm offset is needed, then it must be used as there’s no other combination that will achieve that result. Similarly, a 10mm offset can only be achieved with a 10mm cutter and 30mm bush.
Comments, as ever, much appreciated.