How to Make a Sundial
What you'll need
This sundial project is an excellent opportunity to expand on your scroll sawing and utilise a number of simple woodworking skills to produce an elegant garden feature that also tells the time!
Watch Ben in our Woodworking Wisdom video, or follow the steps below, to create your own beautiful horizontal sundial.
Prep your timber
Timber selection is key for this project, as you will need to choose timber that can withstand the elements and will not rot as easily. Opting for a hard wood such as oak, chestnut or cedar, would give you a sundial that can withstand the test of time. For our sundial we have chosen to use chestnut.
Cut your timber to your required shape and size. There are no limitations here. We have opted for a semi circle shape.


Marking your time lines
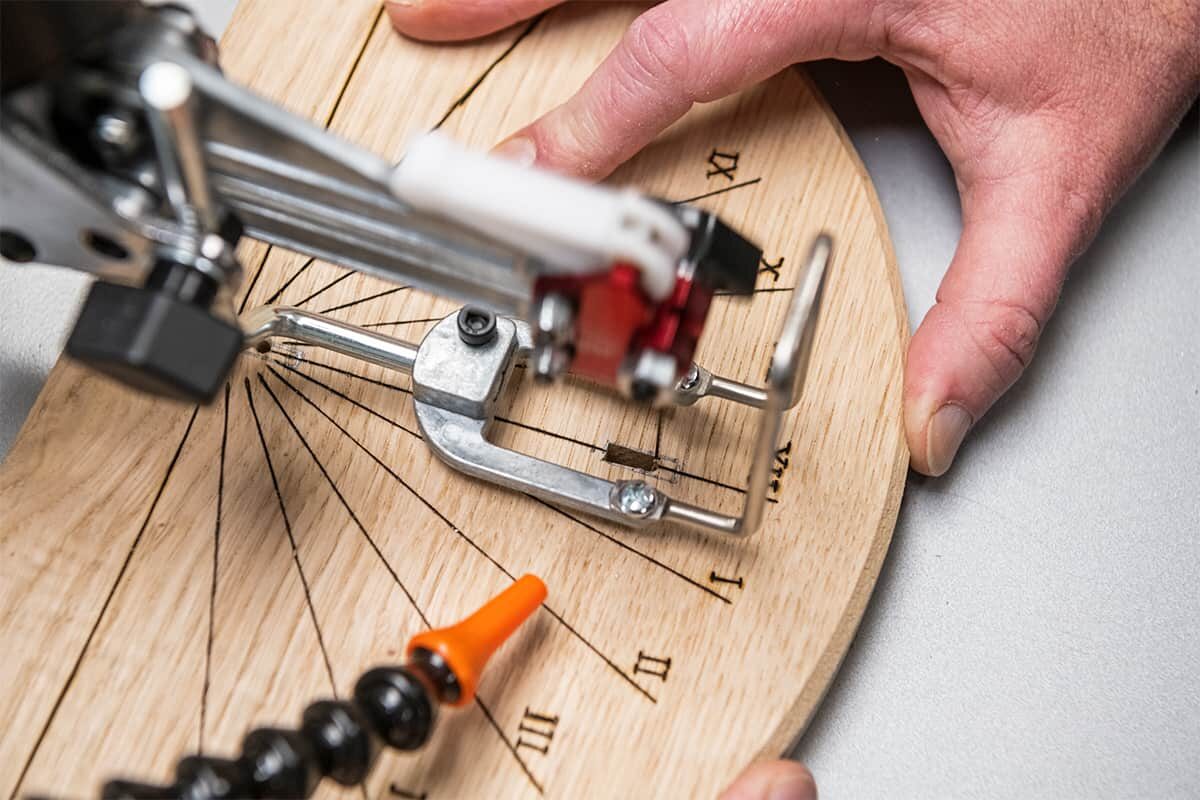
Next, you need to mark out the time lines. But before doing this you need to consider the angle of your gnomon, the triangular blade that marks the time as the sun falls and creates a shadow.
It is important to get your mathematics right at this stage, as it can affect how accurate your sundial is.
In order to mark your time lines, and cut your gnomon accurately, you first need to understand your latitude position on the earth, as this will be reflected in the angle of your gnomon. A simple Google search can tell you what your latitude position is. For example, London’s latitude position is 51.1 degrees.

In order to ensure your time lines are accurate to your gnomon angle, you need to calculate the angles of each line in order to mark their position. There are online calculator tools to help you achieve this - simply input your latitude position, and they will calculate the time line angles.
Once you have these angles, you can mark them out and, using a pyrography pen, burn them onto the timber.


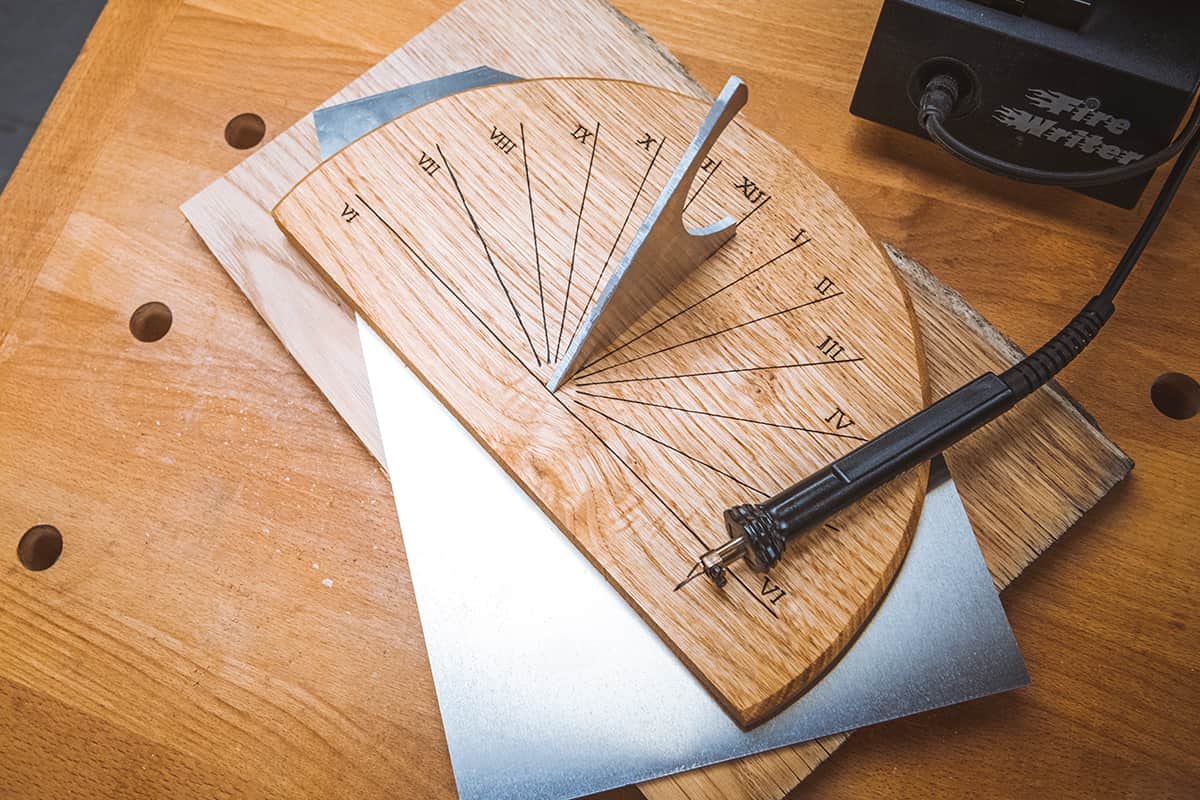
Cut the gnomon
Once you have calculated the angle of your gnomon based on your latitude position, you can measure and cut the gnomon to the same angle. We used a 4mm thick piece of aluminium.
On the scroll saw, and using a metal cutting blade, cut the gnomon, ensuring you add tenons to the base so that it will slot into your sundial face.


On your sundial face, measure and mark along the 12 noon line two slots for the gnomon tenons. Drill then cut these on the scroll saw and slot the gnomon into place to check the fit and position.


Finish by adding a coat of external finishing oil with UV protection to the sundial face, to ensure it has long lasting protection outside. Once dry you can assemble the face and gnomon.


You could also make an optional stand, similar to a bird table, if you wanted.
And there you have your finished sundial!
Placing in position
When placing outside, it is important to point your sundial facing true north (towards the North Pole - also known as geographic north) as opposed to magnetic north, which is where a compass points.
One way to locate true north, in the northern hemisphere, is to point your sundial gnomon towards the North Star (Polaris). To locate the North Star, first locate the Big Dipper. The two stars that form the side of the ‘cup’ point towards Polaris.
There are mobile phone apps to help you identify the stars if you are struggling.
Please note this sundial design is a horizontal sundial, meaning it must be placed flat, as opposed to vertically. If attached vertically, to the side of your shed for example, the sun dial will not work.
Had a go?
If you have had a go at our sundial project, we would love to see it. Share your pictures with us! Tag us in your photos on social media with @axminstertools and show us what you’ve made. Find us on Facebook and Instagram.