
The Bandsaw Buddy Ensures Fence And Blade Alignment
Over the years, I’ve had several bandsaws in the workshop. To my mind, they’re one of the essential machines. I can quite easily do without a table saw, but a bandsaw is a ‘must have’.
The first one I had was a French-made Euro 260. I bought it in the 90s from the original Axminster Tools shop on Chard Road. It did sterling duty in both my original ‘shop and the current one. But like all good things, it was getting a bit tired after nearly 20 years or so. It was replaced last January with one of our new Trade Series BS11 machines.
Straightforward Setup
Bandsaws look complicated to set up, but provided the correct sequence is followed, they’re pretty straightforward. Having slackened the tension and taken off the old blade, my routine when I fit a new one is to back off all guides, thread the blade onto the wheels and then apply around half pressure to check the tracking adjustment. Once the blade is sitting squarely in the middle of the bandsaw wheel tyres, the guides are repositioned with the correct clearances and full tension is applied. I then spin the wheels freehand watching the tracking of the blade. The last thing to do before the doors are closed is to give the bearings a good squirt of dry lubricant. Then it’s time to switch on. Provided I’ve done everything correctly, the blade usually spins perfectly without too much bother.
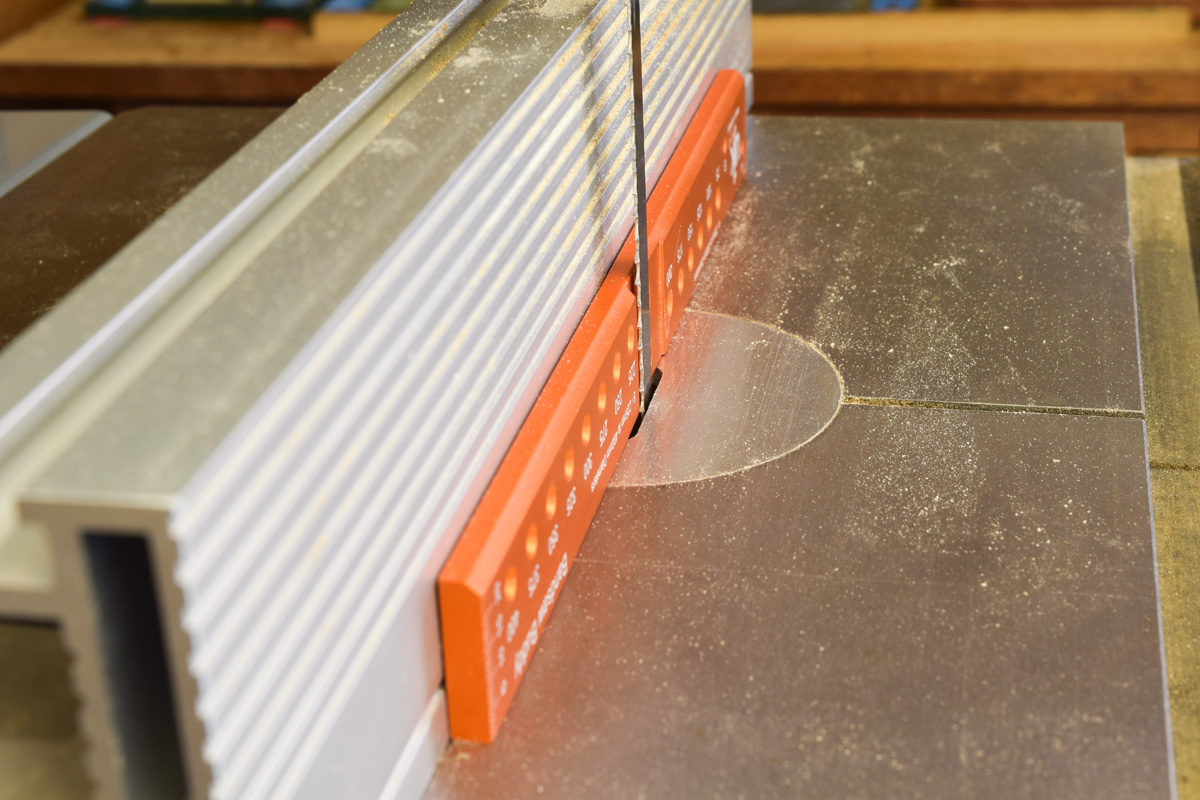
However, what I’ve never done is to check the alignment of the fence against the blade. I’ve always made the assumption that the fence will be set up by the manufacturers. Having bought the UJK Technology Bandsaw Buddy to check for this very thing, I was quite surprised to find some ‘toe out’ on the fence.
The effect of this misalignment is to upset the way the saw blade tracks. It won’t naturally want to follow a straight line cut, but will instead tend to veer. The inevitable result is the user has to make an extra effort to keep it cutting true. At worst, the blade may deviate from its intended line.
Simple adjustments
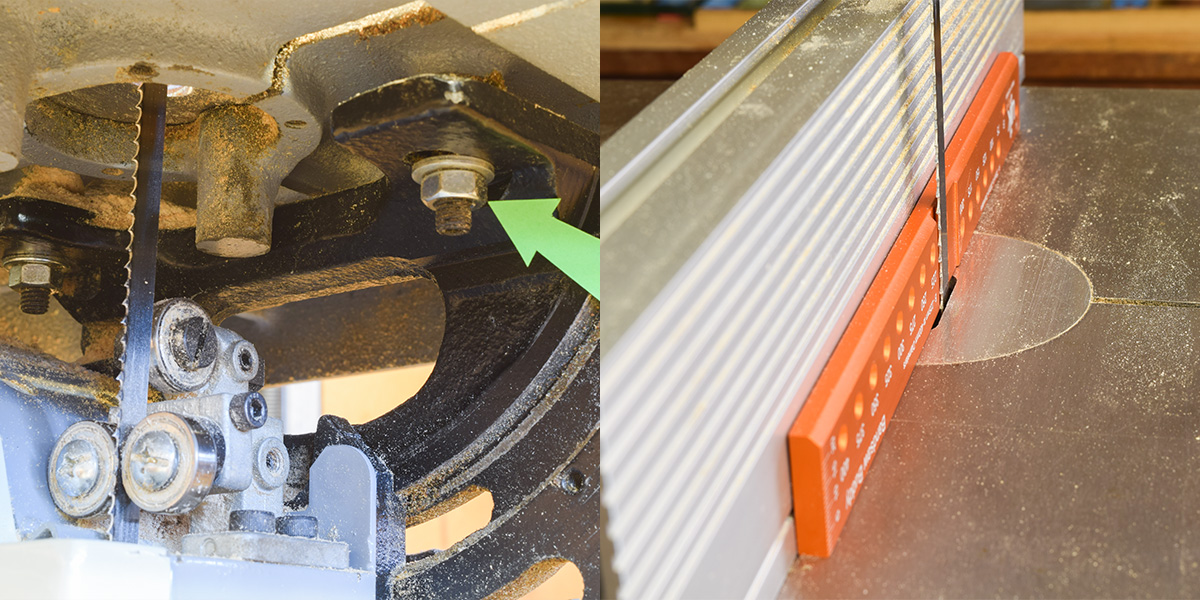
Having realised some adjustment to the fence was needed, I had a look through the excellent User Manual and there it was on p17…a pic of the Bandsaw Buddy in place. To make the adjustment, all I needed to do was to slacken off the four nuts (arrowed), nudge the complete table into the right position and then re-tighten. The fence was then aligned spot on with the saw blade.
Having sorted out the BS11, I then turned to my big Startrite and was again slightly surprised to see that the fence wasn’t parallel to the blade.

Unlike the BS11 where the table is moved slightly, on the Startrite, it remains stationary. It’s the fence rail which is adjusted. It’s the work of a few moments to adjust the rail bolts (arrowed) at either end. Before adjusting your fence, refer to your particular bandsaw’s book of words.

This has the effect of swinging the fence round a so that when it’s tightened up again, it’s parallel to the blade.
Apart from its main use of checking the fence alignment, there’s also a matrix of holes which can be used to mark out circular turning blanks as well as a nifty little rule across one end for setting the thickness of cut on the bandsaw.
If you haven’t invested in a Bandsaw Buddy, I would definitely recommend getting hold of one!
Rob, basic blade alignment with this guide is only the start as the set or wear of the blade may work one way or the other. Only test cuts can determine the true alignment