How to Make a Crescent Pen Holder

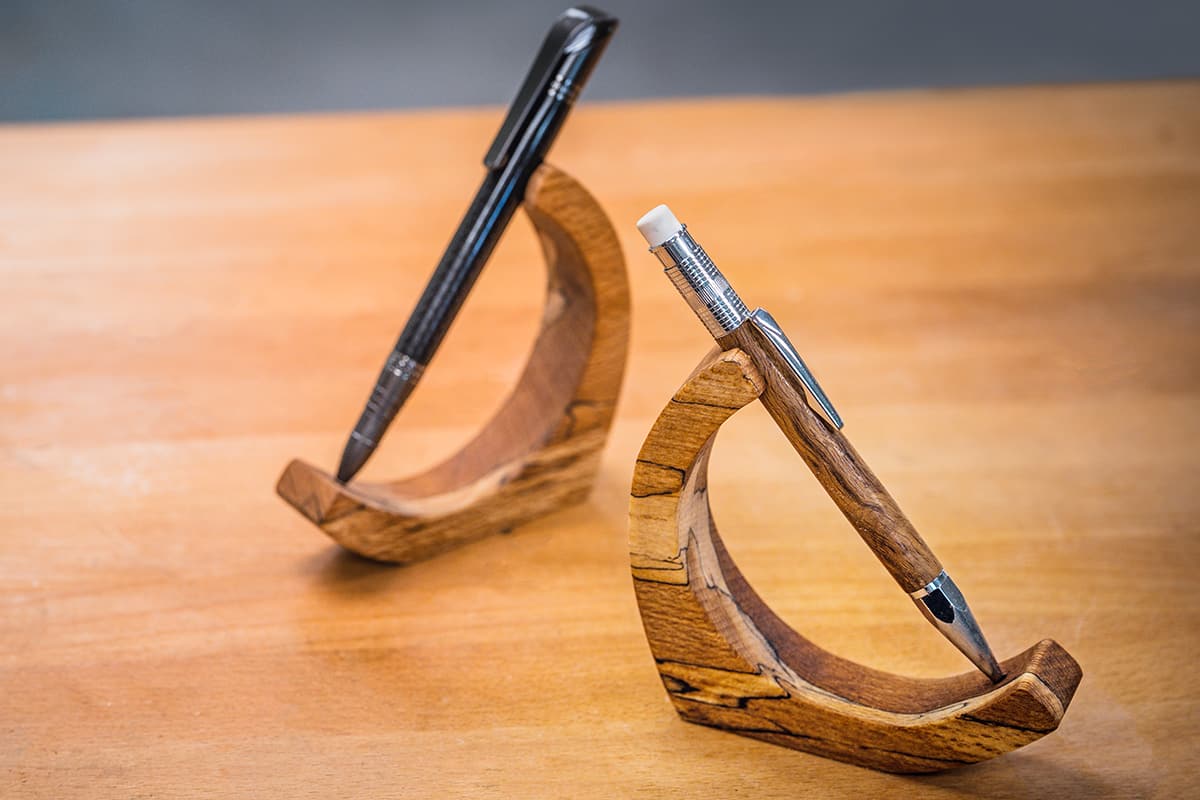
Make an elegant crescent pen holder out of your off cuts. Simple to make and a stylish addition to any desk, this project is a perfect way to use up scraps of wood and is a great way to display your pens at craft fairs.
Join Ben in this Woodworking Wisdom demo as he shows you how to make this pen stand using a simple template, a scroll saw and a drill. It is so quick and easy, you can batch make them to sell online or at fairs.
Watch our video, or follow our guide below.
Make your template
First you need to make a template. Find two suitable circles, one smaller than the other. Draw around each, the smaller inside the larger, ensuring the distance between each is equal all the way round.
Next, elongate one side of your circle to form the crescent shape. Using a rule, draw a straight line across the bottom. Top tip: using paper with squares on with help with this.
Then, mark the angle for where your pen will sit by using a rule and lining up the top and bottom of your arc.
Mark out your pen holder
Cut out your template and position on your timber with the straight edge lining up along the straight edge of the wood. Draw around it.
Make sure you mark out where your pen will sit. Measure the depth of the timber (ours was 25mm) and mark halfway - this will be where you will drill later.
Using a drill bit 2mm bigger than the pen that will sit in the holder, begin drilling a circle before leaning the drill back at the angle you want the pen to sit at, following your pencil lines as a guide. You can use a sliding bevel to help you if needed.
Drill until you are past the top of the pen holder. This will create the cradle where your pen will sit.
Next cut out the pen holder using a scroll saw. You could also use a bandsaw.
Finish your pen stand
Next create the pen holder by trimming across the hole drilled earlier, curving the edges as you go.
Sand the finish the edges and remove any cuts marks.
At the bottom of the holder, mark where your pen will sit. Place your pen in the holder and mark where the nib will sit using a bradawl.
Using a smaller drill bit, approximately 4mm, drill to create a slight recess.
Once you have sanded the edges, apply a finishing oil wiping off any excess.
And there you have your finished pen holder.

Made it? Share it?
If you have made our pen holder project, we would love to see it. Simply snap a picture and share on social media tagging @axminstertools. Find us on Instagram and Facebook.
Why not use your offcuts to make some pen blanks? You could create a matching pen and holder set. Read our useful article on how to turn a pen to find out more.


