How To Build A Hand Plane: Part 1
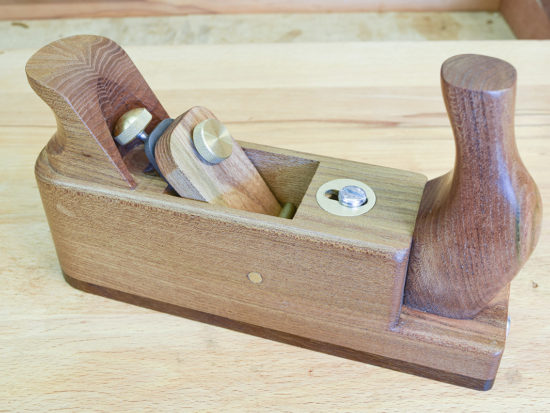
Making your own laminated planes has become increasingly popular over the last few years and it’s now possible to build a plane with a fully adjustable cutter using the Veritas Wooden Plane Hardware Kit. The Continental style plane build detailed here uses the same techniques, but in addition there’s a fully adjustable mouth insert.
It’s recommended to view the Veritas video clip on the Hardware Kit page.
Download and print the working drawings here.
If required, convert the imperial measurements given in the Veritas instructions to metric. Alterations may be needed to the size of the components as the build proceeds.
Greenheart is used for the sole, but other very hard wearing timbers may be used, such as sugar (or rock) maple, hornbeam, hickory or lignum vitae.
Tool Menu:
A comprehensive selection of hand tools for wood and metal, some of which are indicated:
- Steel rule 300mm
- Adjustable square
- Protractor
- Siding bevel
- Block plane
- Jack plane
- Router plane
- Scraper plane
- Spokeshave
- Chisel set
- Cabinet rasps & files
- Drum sander
- Mirka sanding block
- Forstner bits 15mm, 22mm & 25mm
- HSS drill bit set
- Hacksaw
- Scriber
- Centre punch
- Router cutter
- Bandsaw, planer thicknesser, router table, disc sander, Proxxon mini drill, router and pillar drill
- A selection of clamps
- Wood glue (Titebond III recommended) and quick setting epoxy
Also needed:
- 6mm inserts for wood
- 2 x 6mm pan head bolts, 75mm long
- 3mm brass strip
- 2 x 8mm dowels 40mm long
- Parcel tape
- Lengths of bicycle inner tube
- Panel pins
- 2 x 3.5mm Woodspur torx screw
Step 1
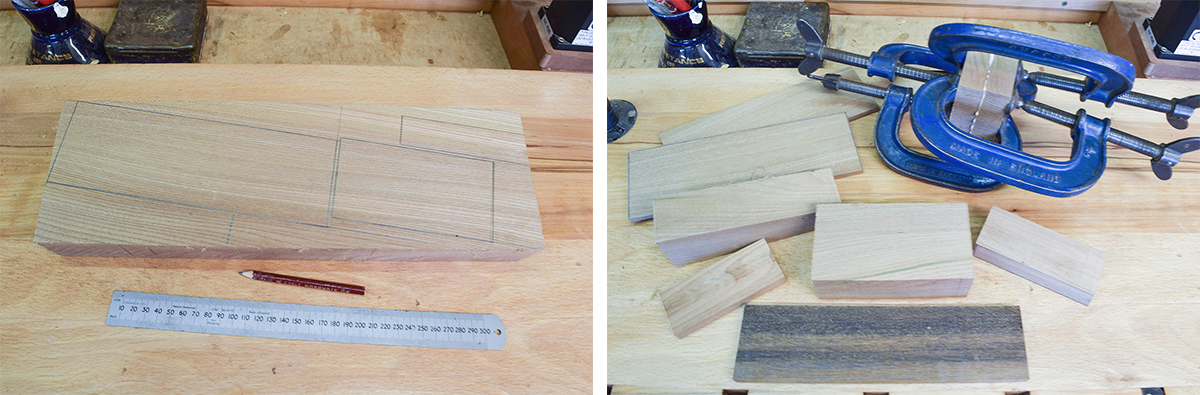
Prepare the block of material (elm used here) to 43mm thick. Mark out the various sections as required, leaving an excess for waste. Parts needed will be two cheeks (8mm thick), rear block, front sections(s) wedge, front horn and rear tote. Some sections may need to be laminated. Prepare greenheart sole oversize in length (60mm) and width, 8mm thick.
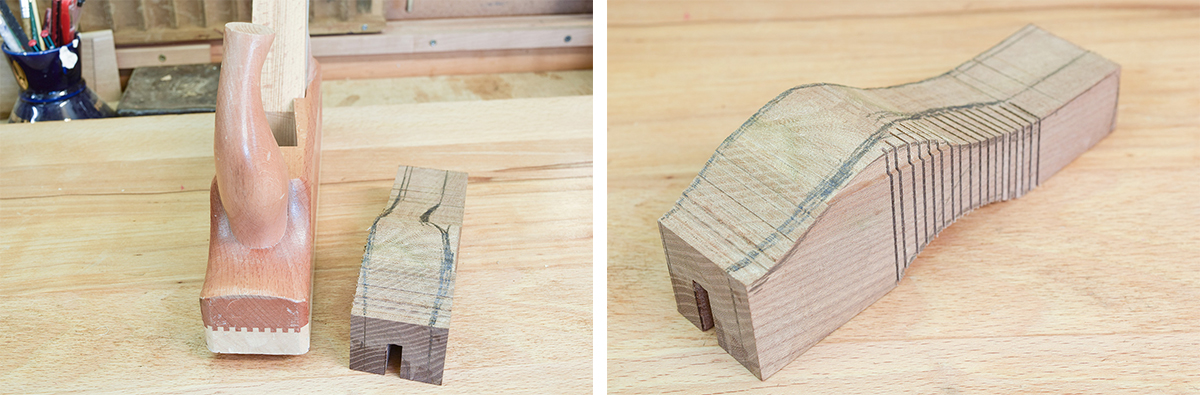
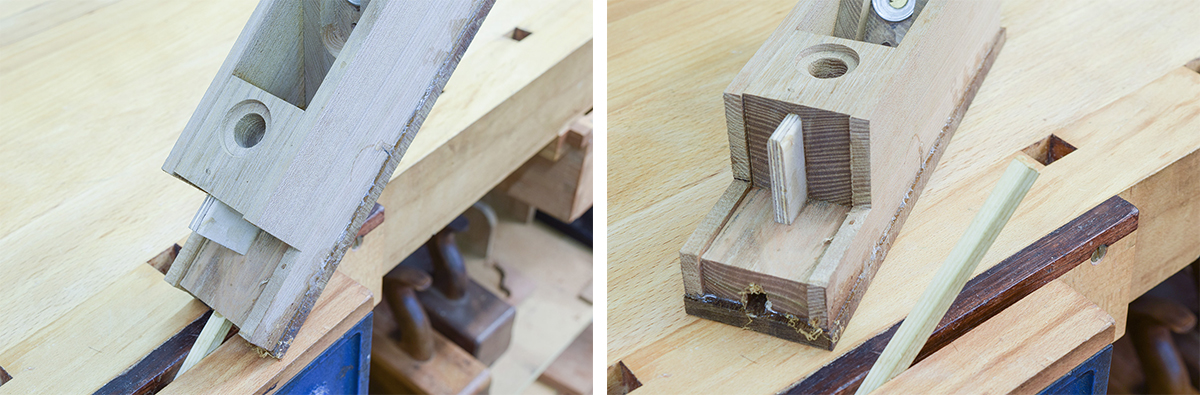
Step 2
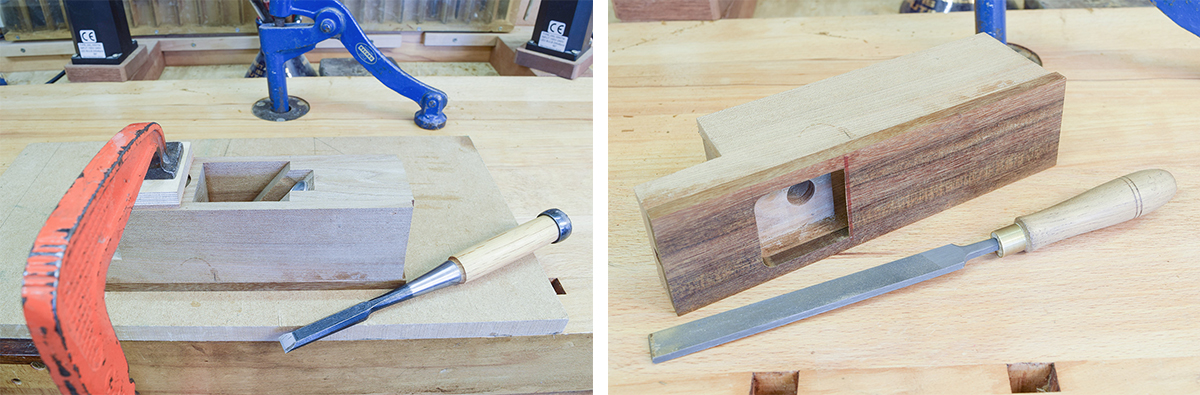
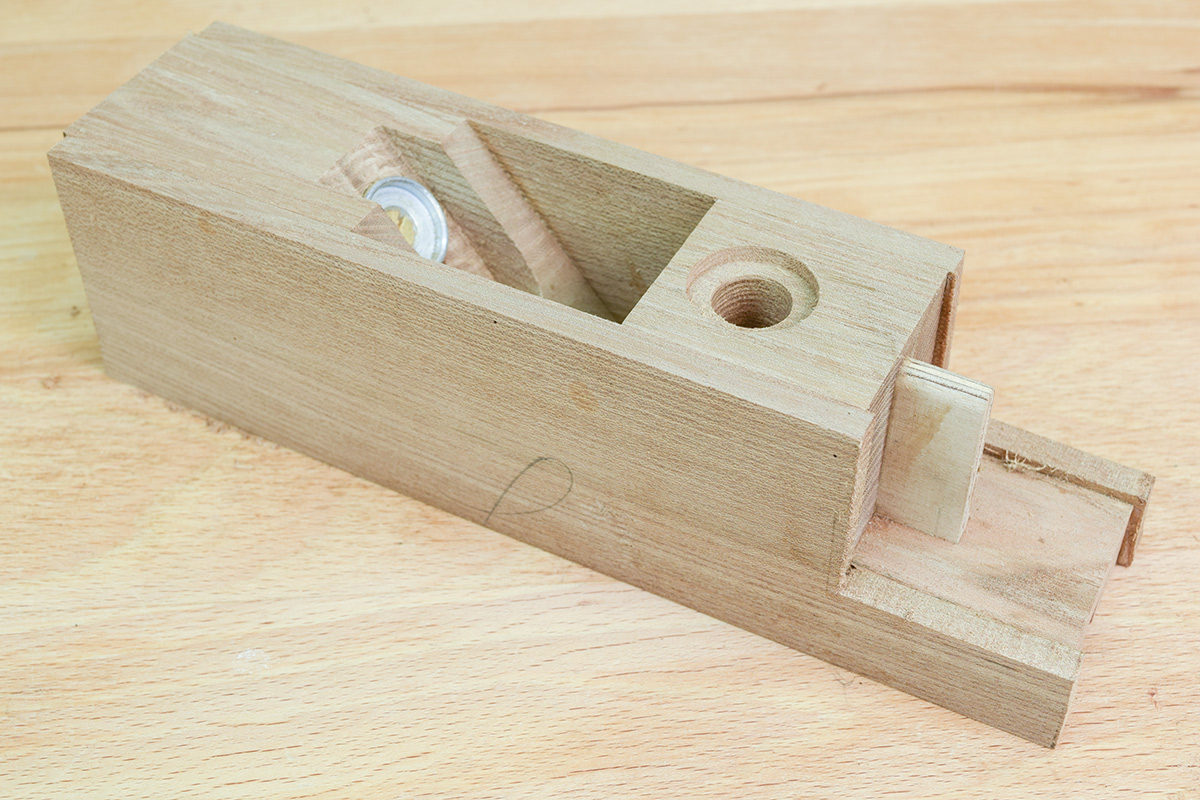
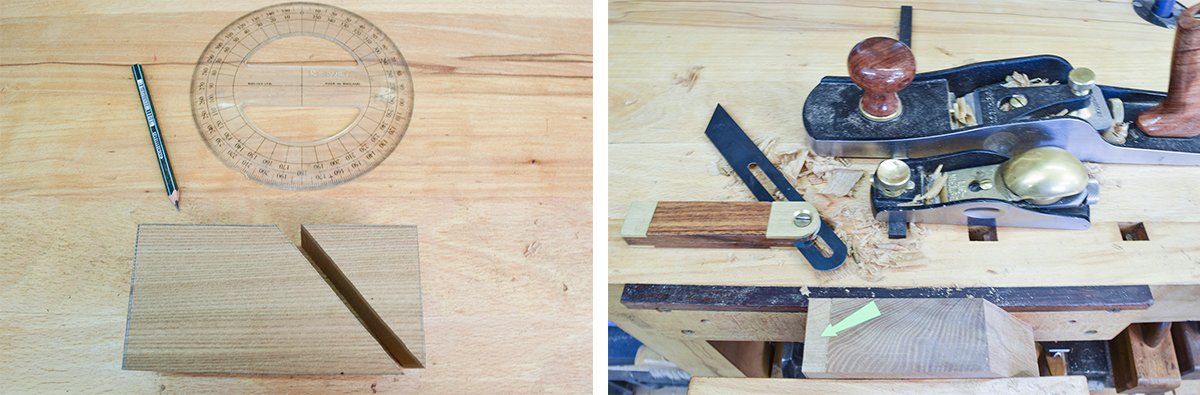
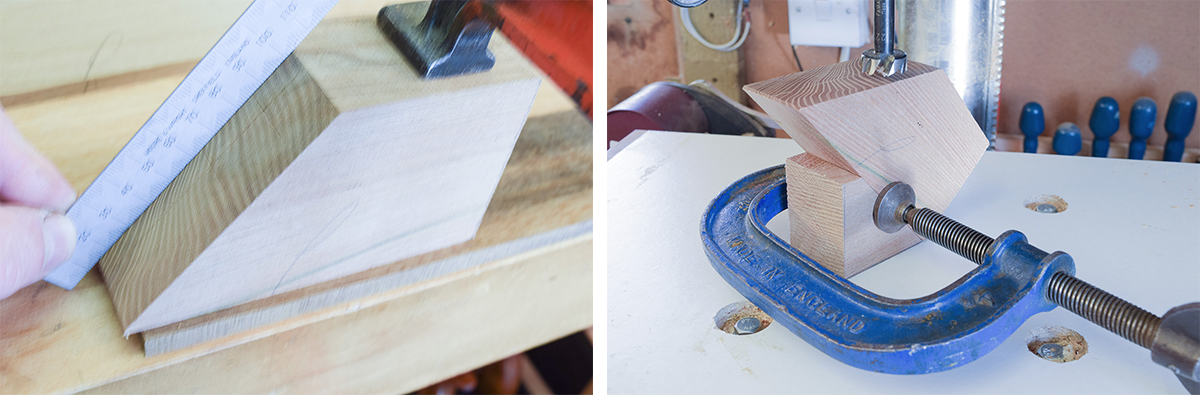
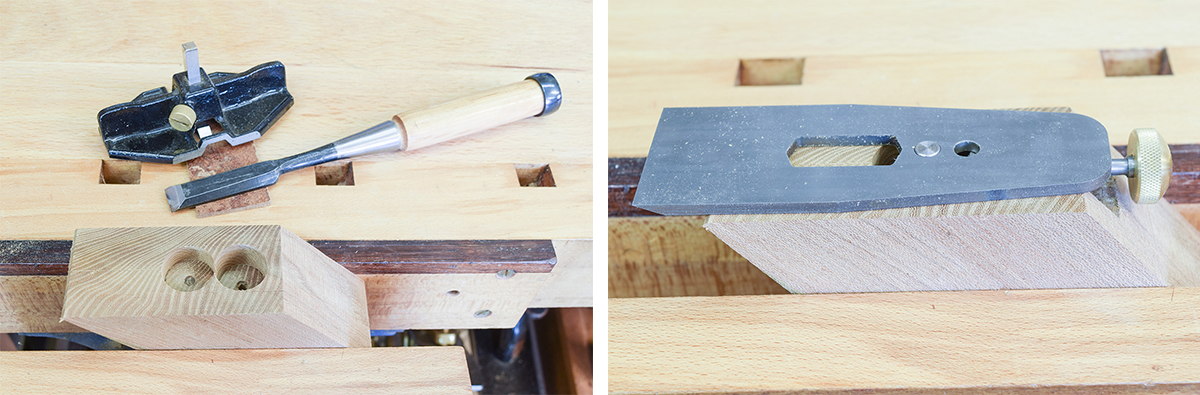
Mark out and cut the blade bed to 50° on Rear Block (Item 4) using the bandsaw. Plane flat with a block plane, check for squareness and the correct angle. Use an offcut (arrowed) to prevent breakout.
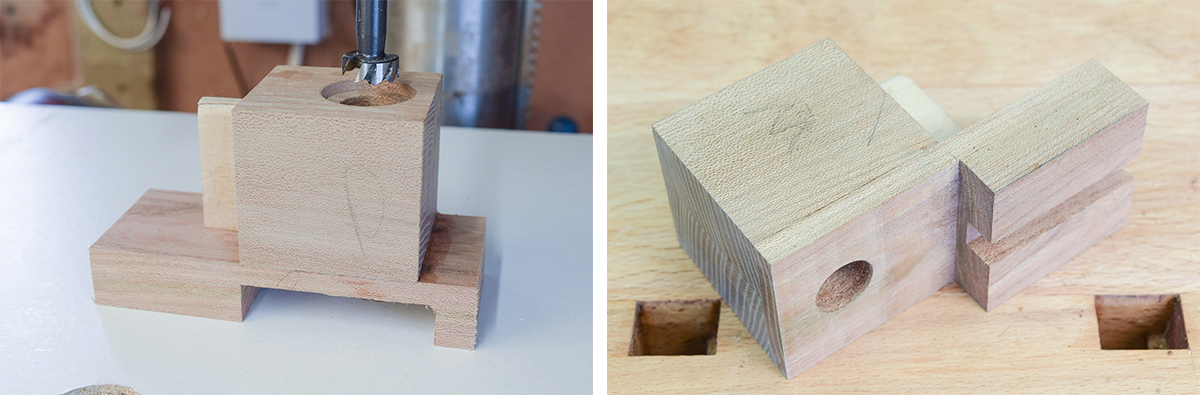
Step 3
Using the Veritas instruction leaflet, measure out the dimensions for the two holes needed for the adjuster. Drill holes on pillar drill using 22mm Forstner bit (tight fit).
Step 4
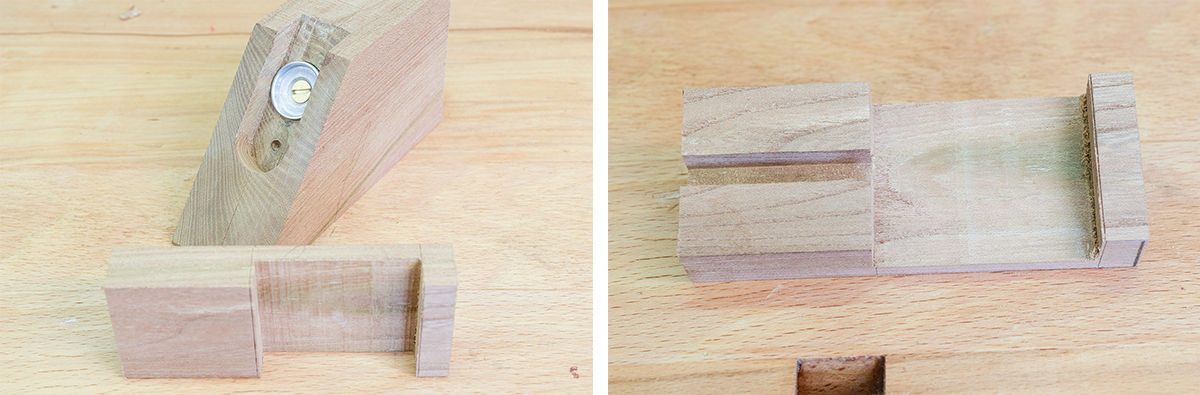
Enlarge the two holes to create the adjuster pocket. Fit the Adjuster Cup in place with the brass screw provided in the kit. The blade should sit flat on top of the bed.
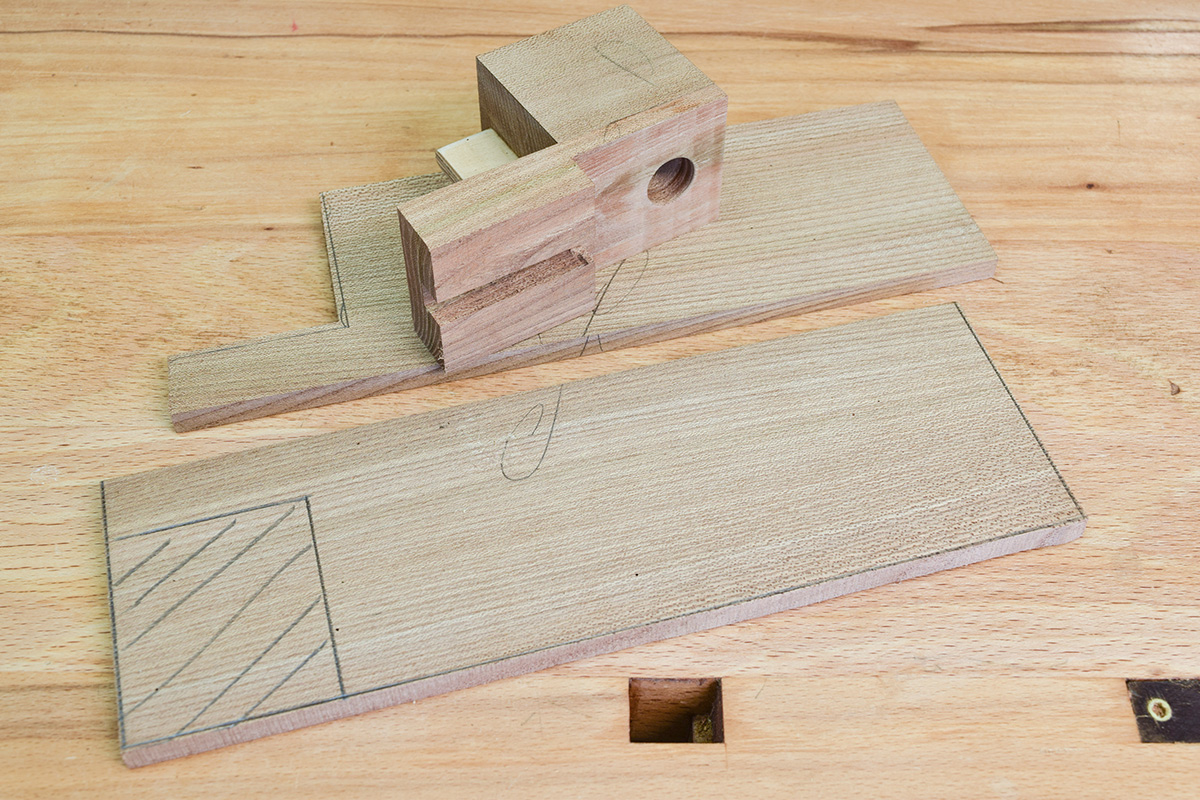
Step 5
Rout the recess on the Horn Base (Item 3) then rout an 8x8mm groove down the centre. Note the allowance for waste on the right hand side.
Step 6 - Optional
If required, glue an additional section onto the Horn (Item 1) to build up its thickness.
Route a groove in the Horn and Front Block (Item 5) to accept a birch ply tongue.
Step 7
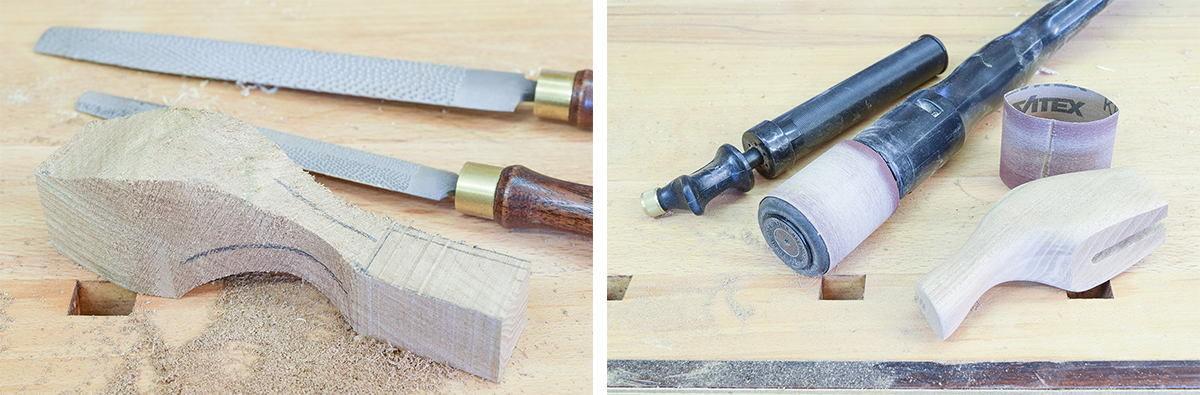
Mark out and bandsaw the Horn to shape.
Top Tip! - where the curve is tight, make close perpendicular cuts to finish near the line.
Step 8
Use rasps, a drum sander and sandpaper to complete the Horn.
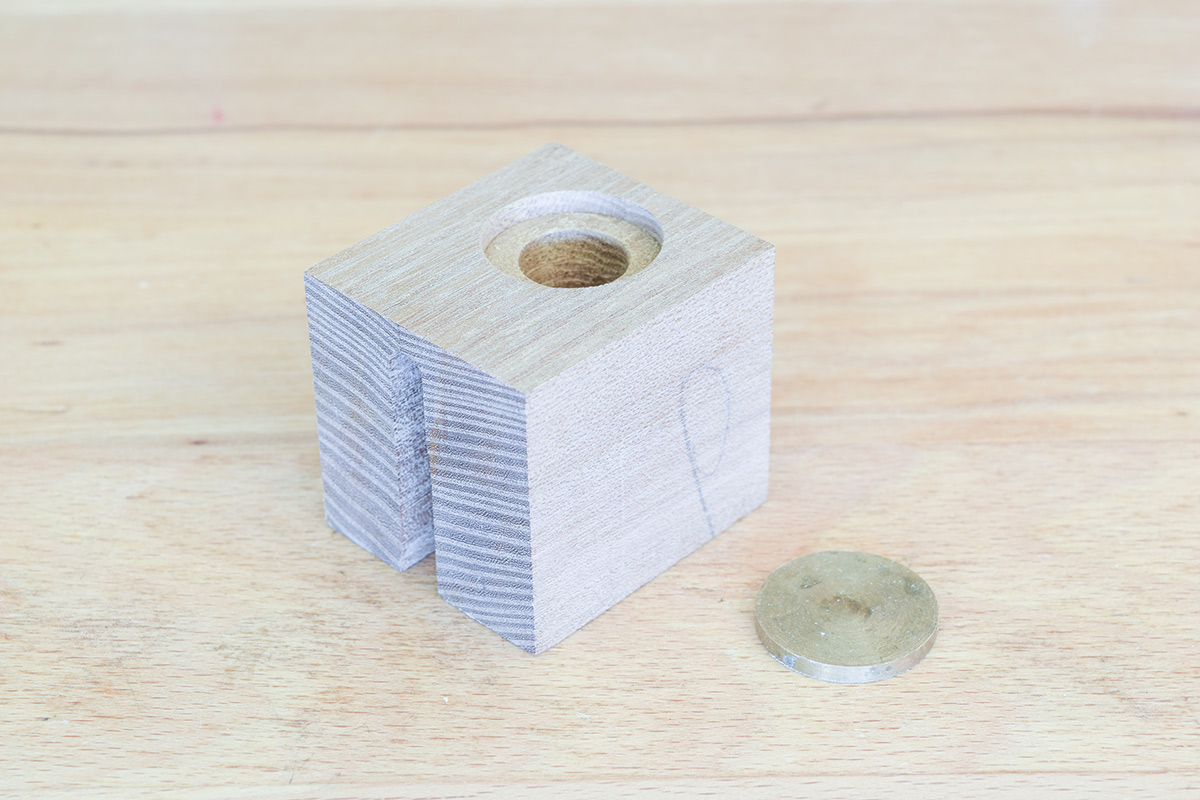
Step 9
Drill the Front Block for the 25mm diameter Brass Disc using a 25mm Forstner bit, next drill through the complete block with a 15mm Forstner bit.
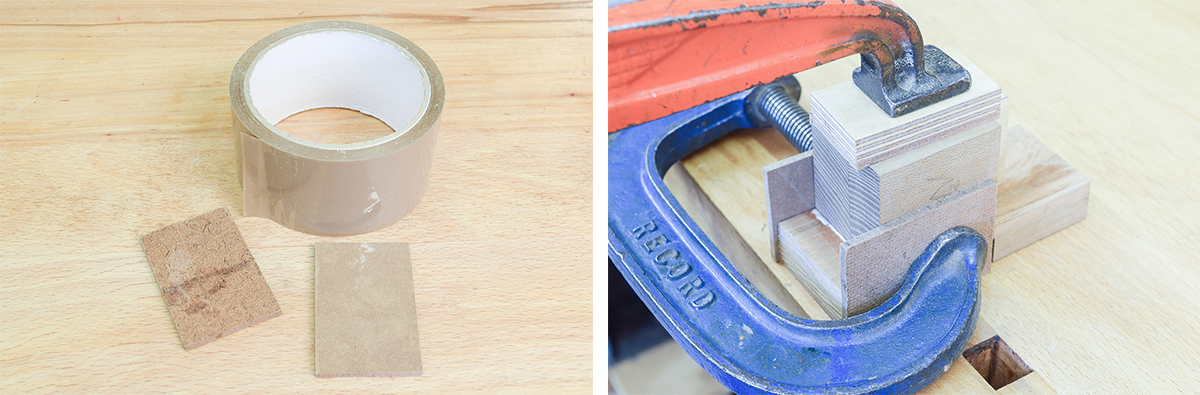
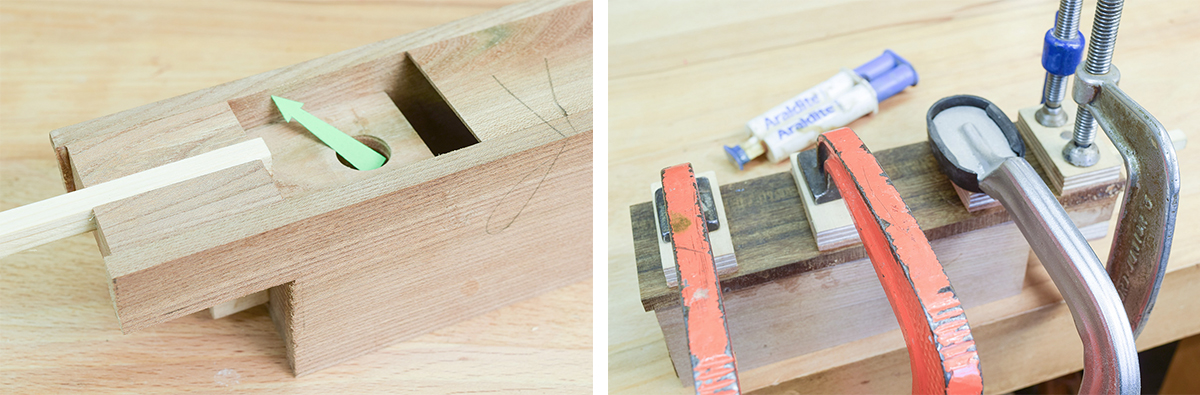
Step 10
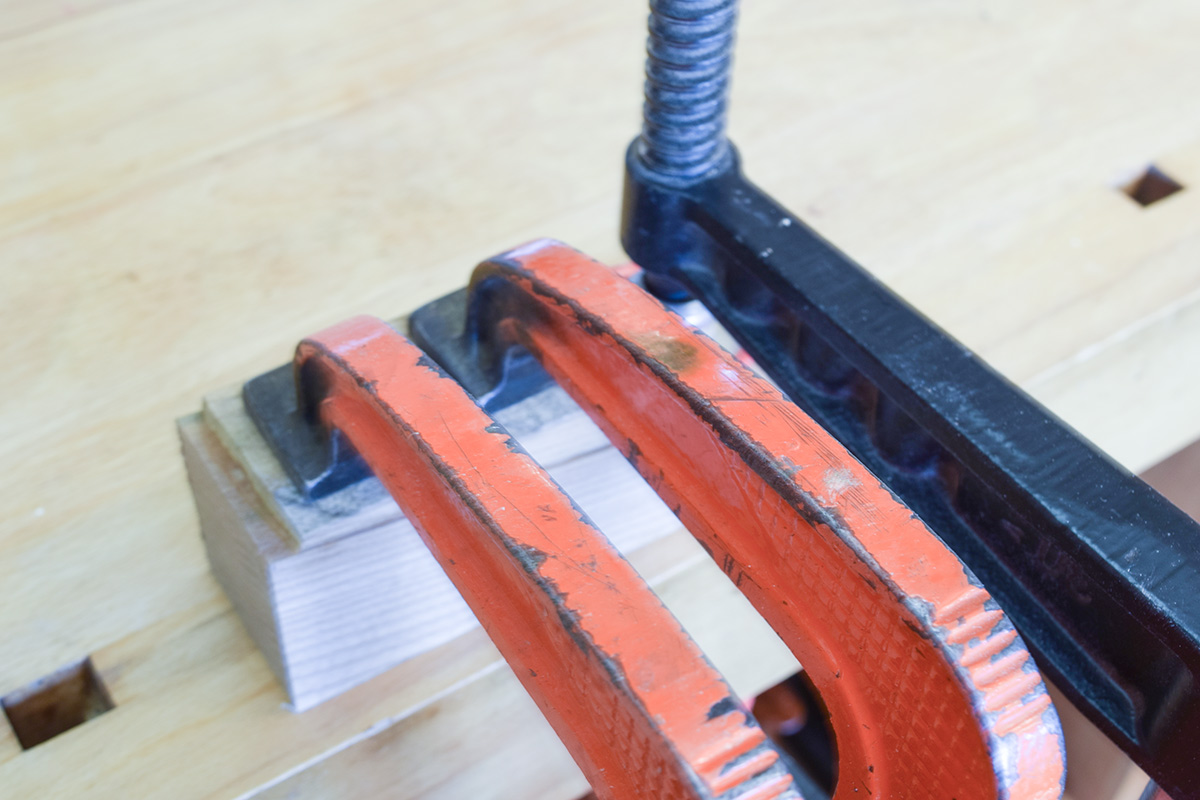
Prepare two clamping blocks, cover with parcel tape (prevents glue adhesion). Glue and clamp Front Block to Horn Base. Glue ¼” ply insert.
Step 11
Drill through the Horn Base with a 15mm Forstner bit. Remove waste piece on right hand side and plane flat.
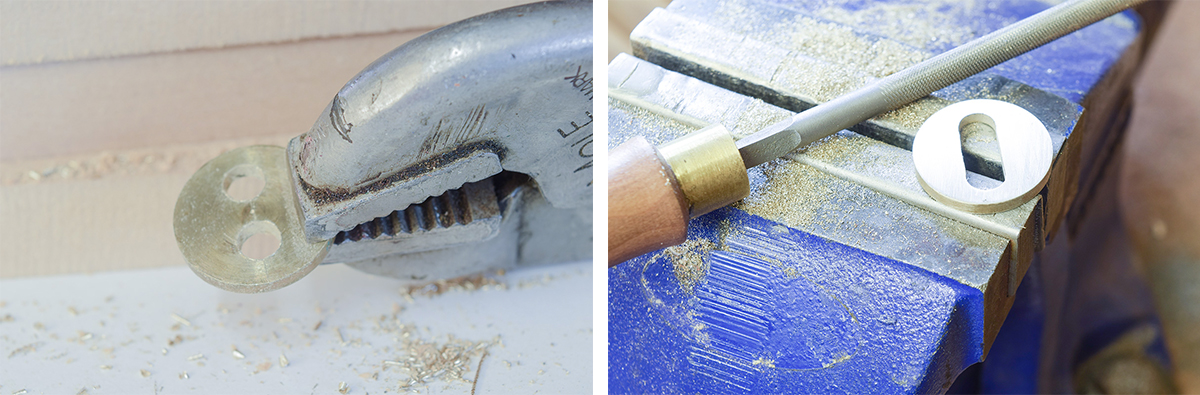
Step 12
Mark out and drill two ¼” holes in the Brass Disc, elongate with metalwork files to fit 6mm pan head bolt.
Step 13
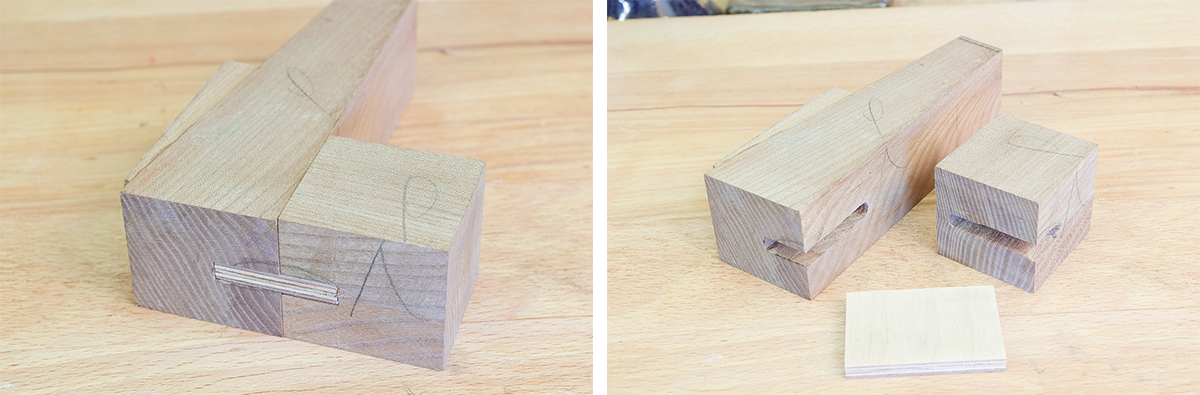
Mark out and cut the Side Cheeks (Item 2) leaving an allowance for waste all round to be removed later.
Step 14
Glue and clamp Side Cheeks to Front Block/Horn Base and Rear Block, leaving a 16mm gap between them. Remove all traces of glue from the interior.

Step 15
Clean up the underside of the assembly with a jack plane. Wax the interior of the recess (prevents glue adhesion), prepare a strip of waste material to fit the 8mm groove. Thoroughly wax the strip of waste material. Glue the greenheart base using epoxy.
Step 16
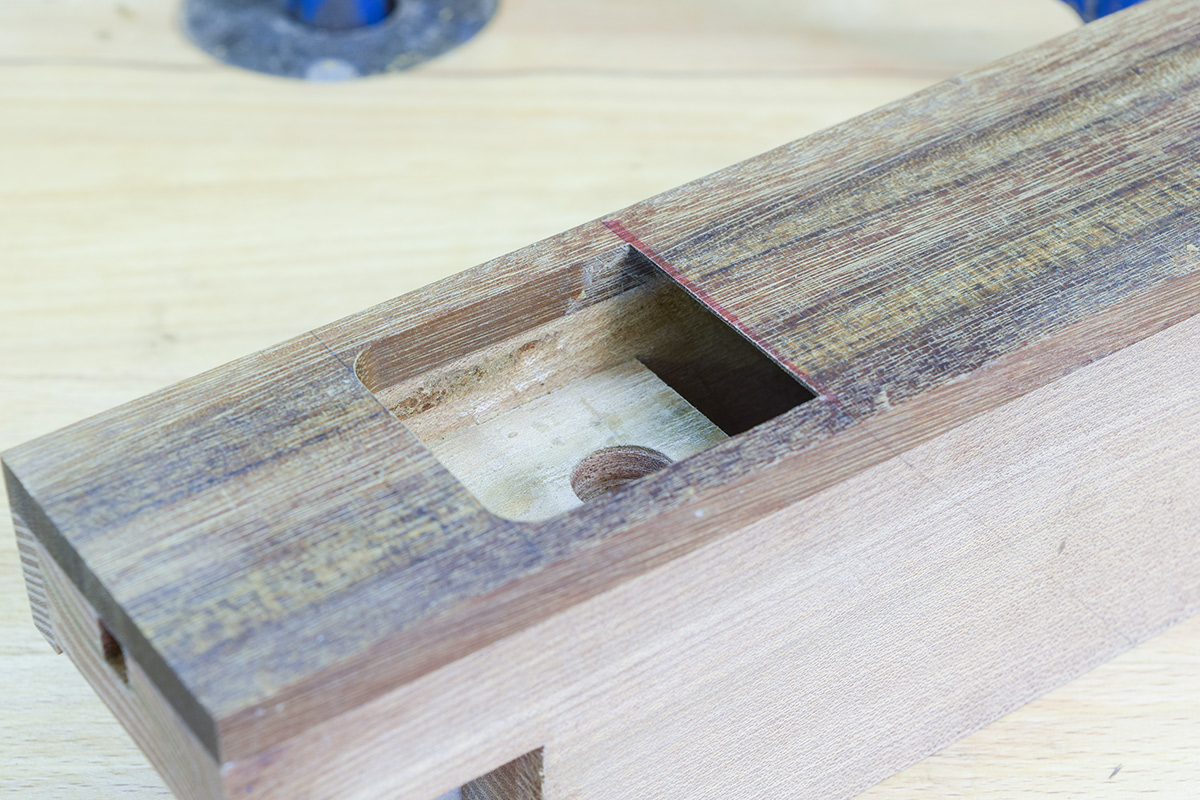
Use a 15mm Forstner bit to drill through the sole and bearing cut the cavity with a router. Mark the limit of the cut (arrowed).
Step 17
Remove waste material.
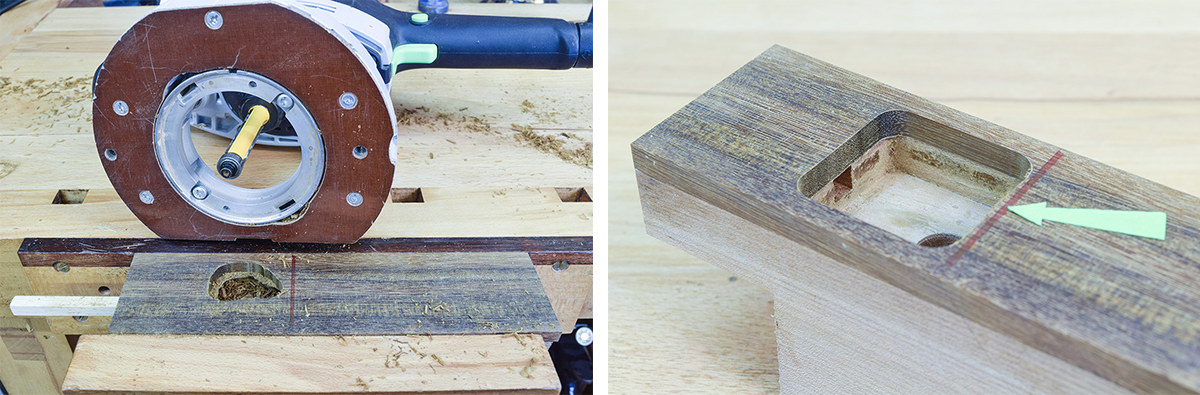
Step 18
Using chisels and files, level the blade bed to the cut line indicated in Step 16.