
How to build a small garden tool shed
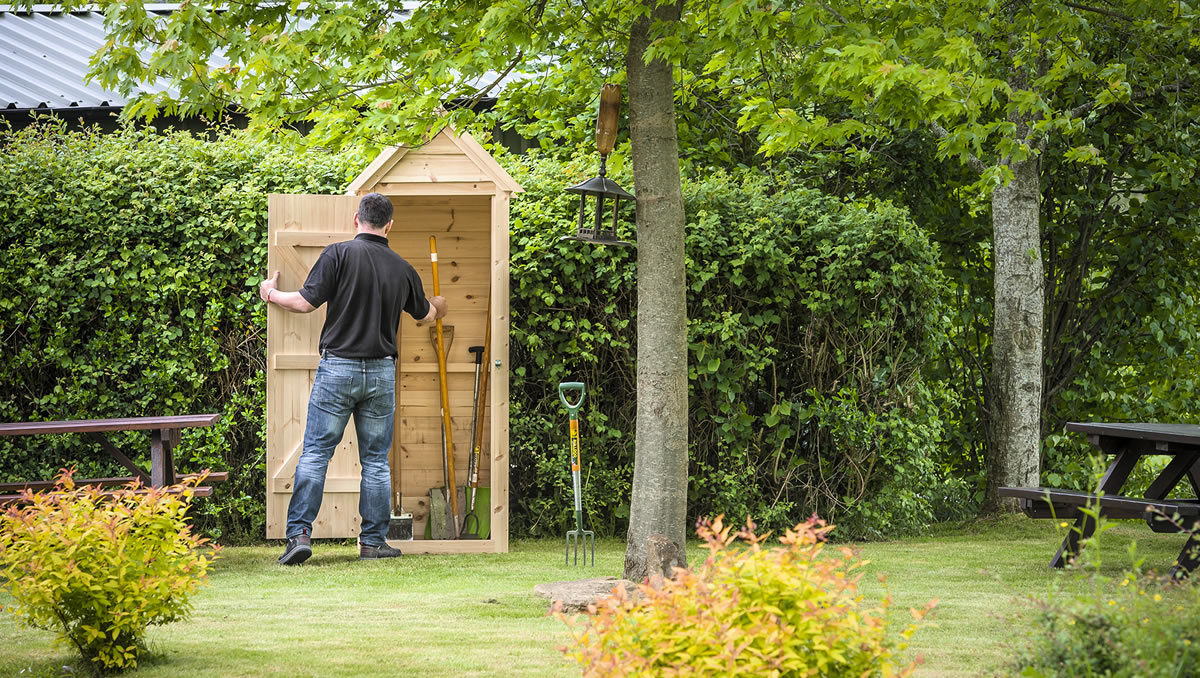
Building a shed will give you as much satisfaction as creating the garden itself; our small and neat shed will fit perfectly into any garden and is perfect for storing your essential garden tools. How do you build it?
Here’s the how... 28 steps later
Our guide will run you through all the tips and tricks of how to make a small shed - or use the guide to size up for a larger shed!
Tool Menu
- 1x Axminster Mitre Saw
- 1x Mitre Saw Stand, compact with wheels
- 1x AW50N Nail Gun 50mm
- 1x 18 gauge 35mm nails
- 1x Compressor
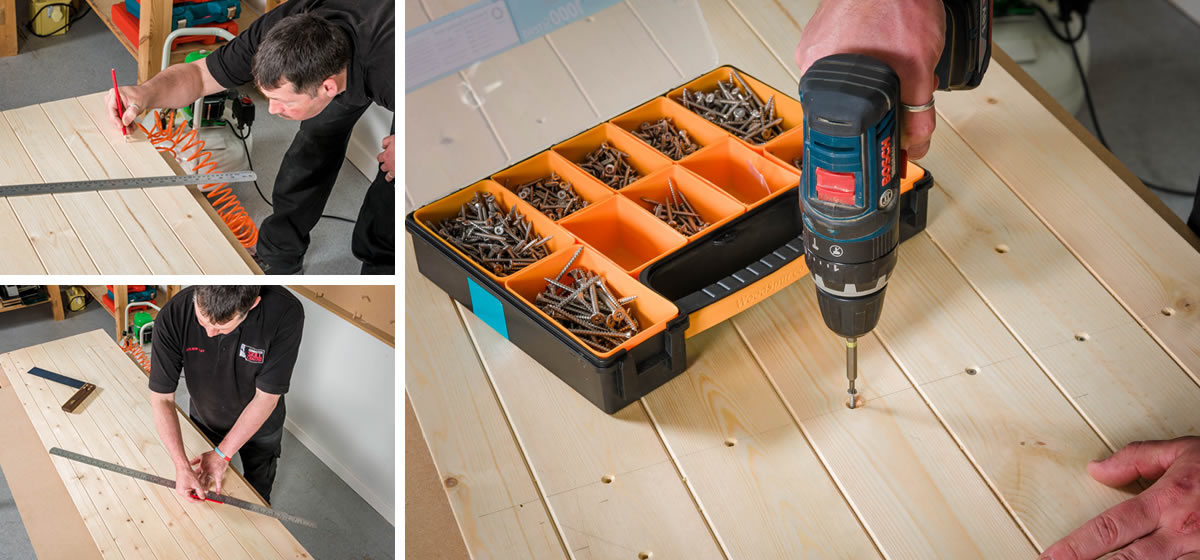
- 1x Stainless Steel Screws
- 1x Square
- 1x 3mm Twist Drill Bit
- 1x 2-5mm Countersink
- 3x F Clamps
- 1x 18v Combi Drill
- 2x HD Parallel Jaw Clamps
- 1x Osmo UV Oil
Cutting list
Dimensions of each piece of prepared wood
- 8x Frame uprights - 45 x 45 x 1,770mm
- 10x Cross members - 45 x 45 x 600mm
- 50x Shiplap - 150 x 15 x 770mm
- 2x Shiplap - 150 x 15 x 620mm
- 2x Shiplap - 150 x 15 x 360mm
- 2x Cover strip - 45 x 18 x 1,840mm
- 2x Cover stip - 70 x 18 x 1,840mm
- 2x Cover strip - 70 x 18 x 600mm
- 4x Roof cover strip - 45 x 18 x 640mm
- 2x Roof cover strip - 70 x 18 x 860mm
- 7x Standard tongue and groove panels - 1,700mm
- 3x Door braces - 70 x 18 x 540mm
- 2x Door braces - 70 x 18 x 770mm
- 1x Roof ridge - 45 x 45 x 680mm
- 4x Roof angles - 45 x 45 x 470mm
- 1x Door stop - 25 x 25 x 1,710mm
- 3x Floor bearers - 45 x 45 x 780mm
Shed furniture
- 2x Galvanised T hinges
- 1x Galvanised bolt
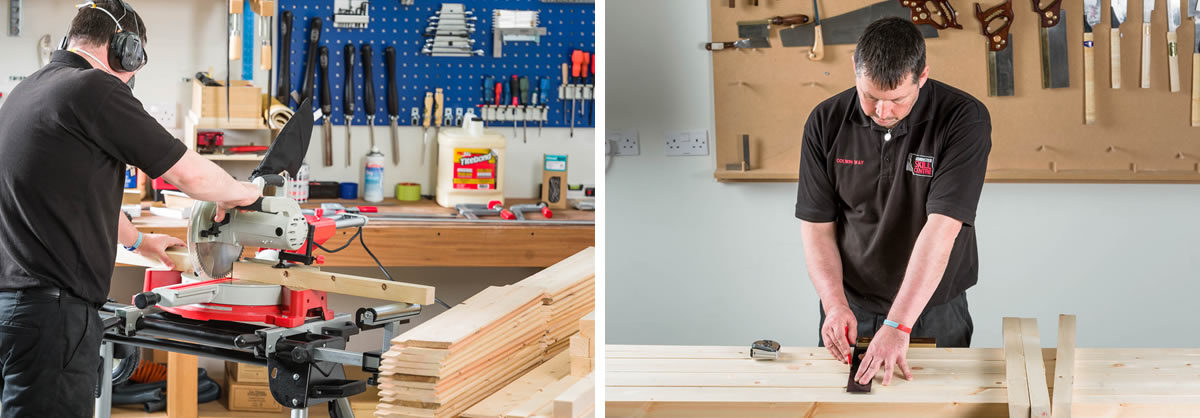
Step 1
Cut all pieces as per cutting list.
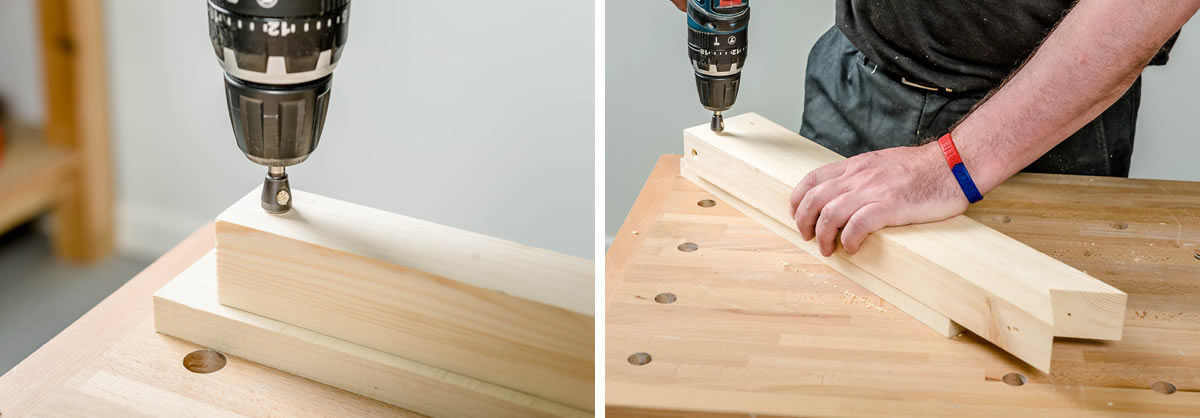
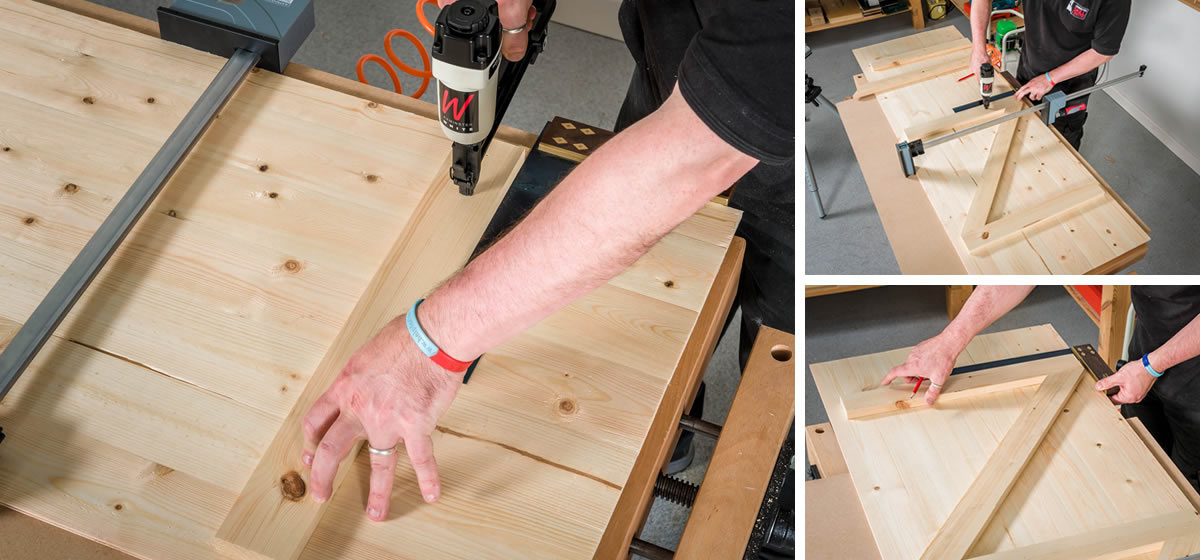
Step 2
Take all 8 uprights to mark screw holes. Mark halfway on six and 22mm in from either end on all eight. Use a woodworker’s square and pencil to mark drilling positions.
Step 3
Drill and countersink all marked holes. We used a 3mm drill bit and 2-5mm countersink.
Top Tip! Use props to raise uprights off of your bench when drilling.
Step 4
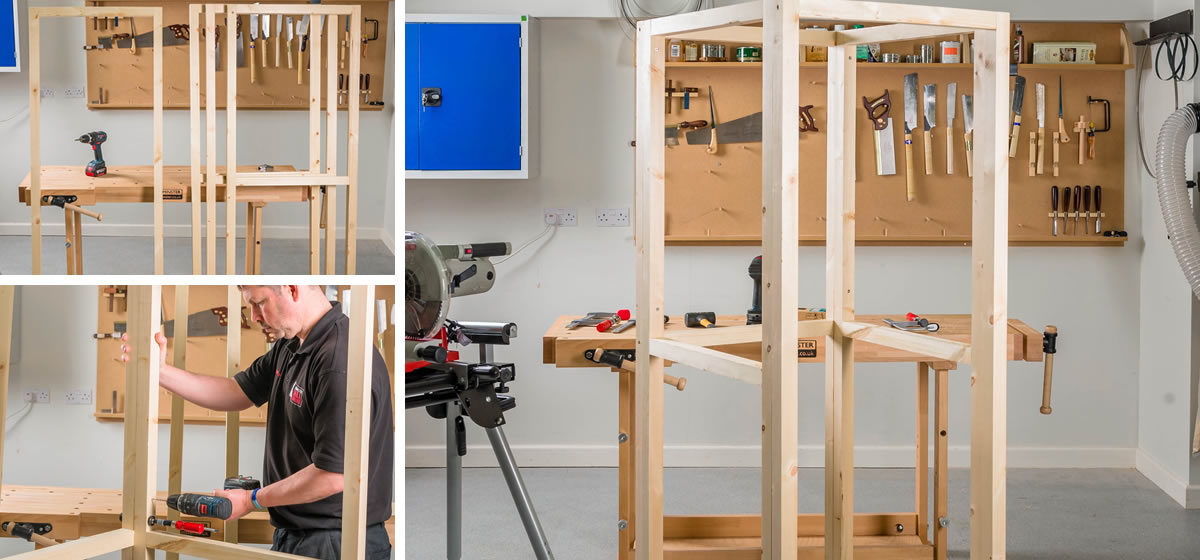
To make the side and the back frames, take one upright and three support struts, line up with holes and screw into place.
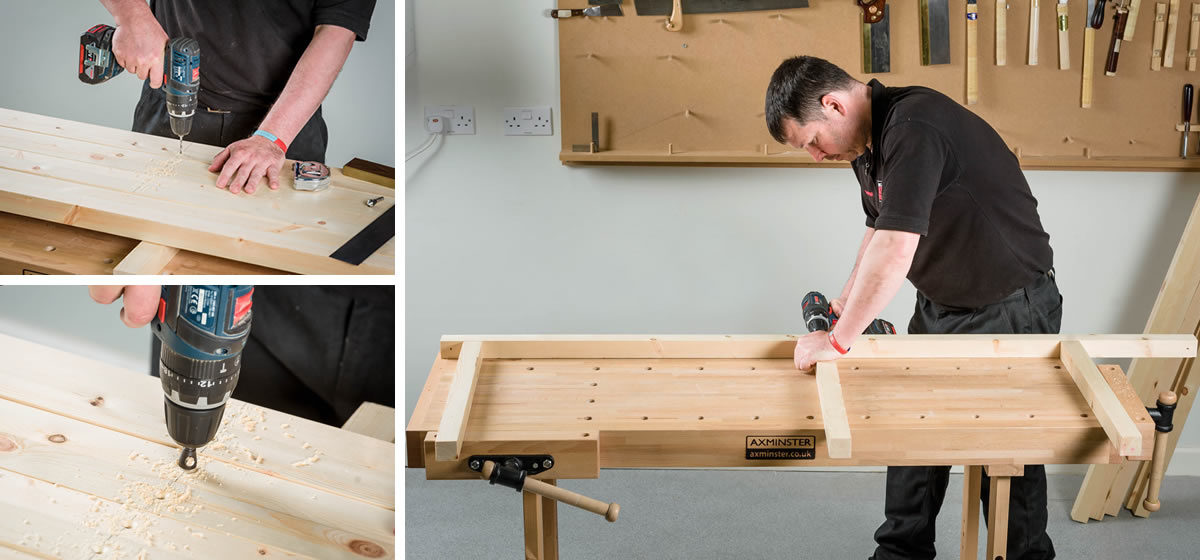
Step 5
Screw second upright to the three support struts to complete frame. Before final fixing of middle strut measure to make sure it is positioned centrally. Repeat the process to create the two remaining frames.
Top Tip! Use a clamp to hold the frame in place when screwing.
Step 6
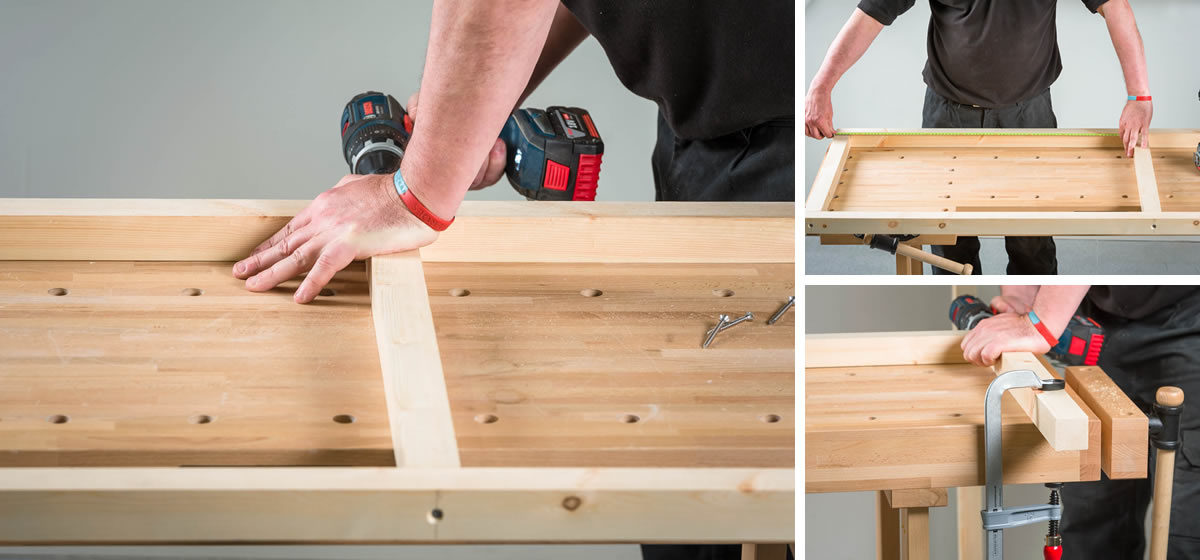
For the front frame repeat minus the middle strut. This space will be occupied by the door.
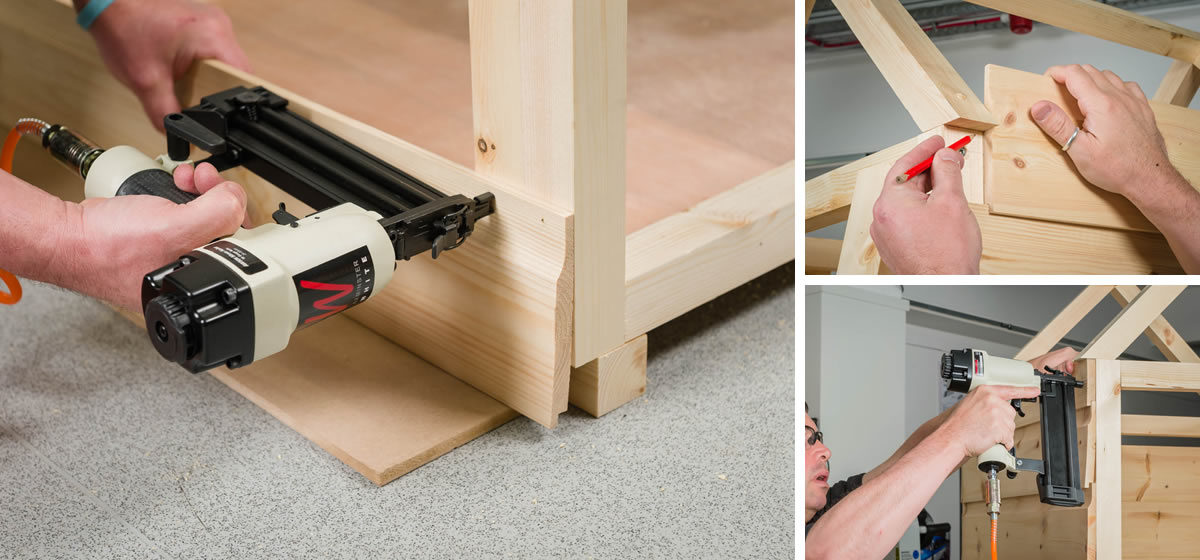
Step 7
We are now ready to join all frames together. Take a side and the back frame and clamp together. Drill and countersink 75mm from the top strut, 75mm up from the middle strut and 75mm up from the bottom strut. Screw frame together.
Top Tip! Always drill and screw from the inside. This allows the shed to be taken down and moved easily.
Step 8
Repeat step 7 until all frames are screwed together.
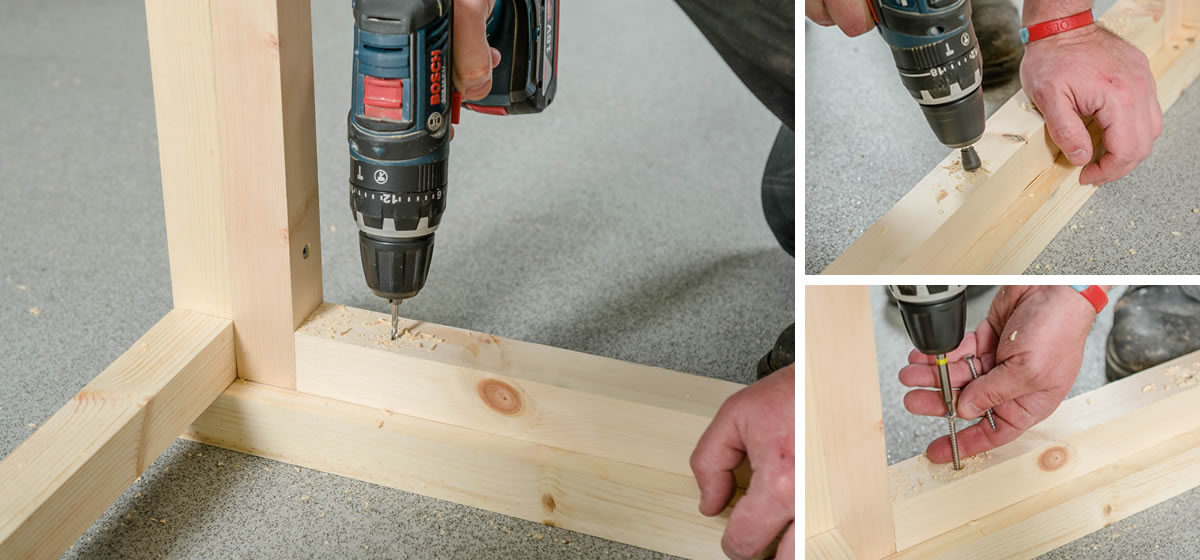
Step 9
Mount the frame on the three floor bearers. Drill and countersink the frame 75mm in from each upright and in the middle of the frame. You will need to drill three holes for the side bearers and two for centre bearer. Screw into place.
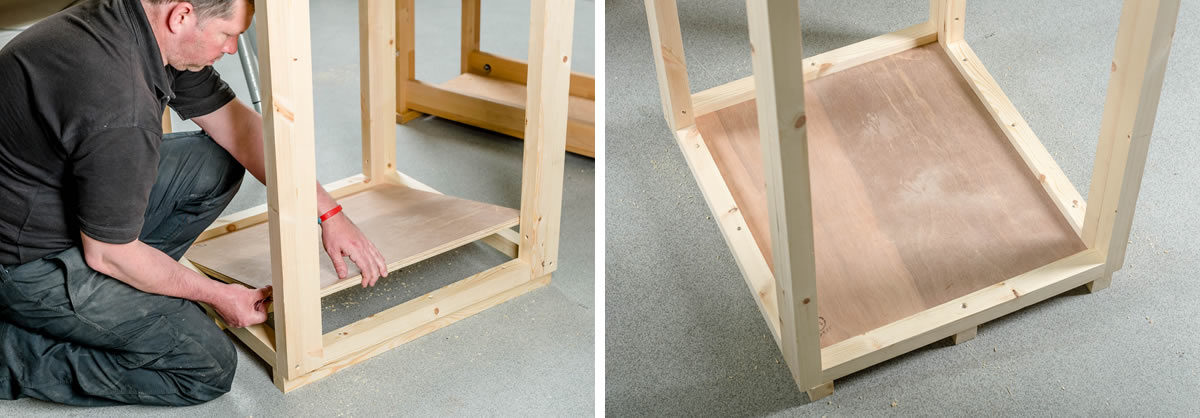
Step 10
Insert pre cut ply floor.
Step 11
Take the four roof supports and cut a 45 degree angle on one end. Drill and countersink the 45 degree end at a slight angle on all four pieces.
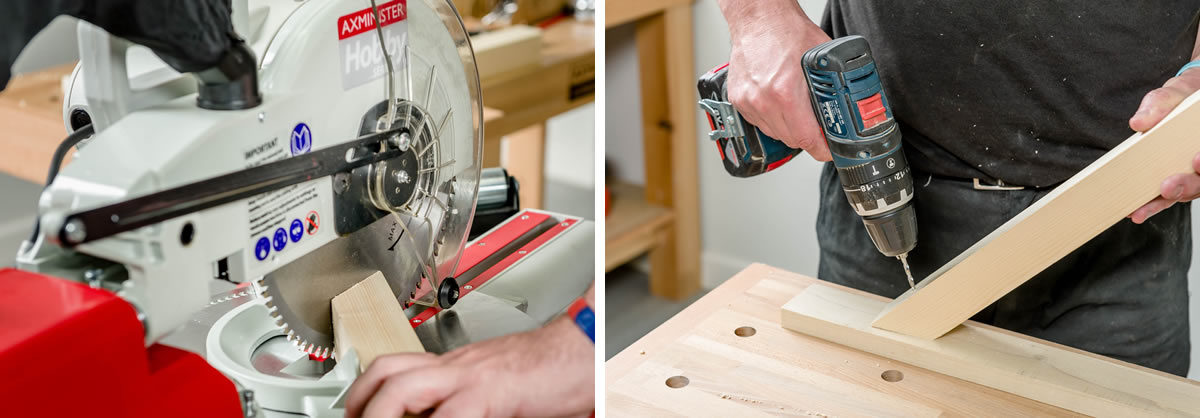
Step 12
Take the the longer two pieces and drill and countersink the opposite ends. On the side face of roof support drill and countersink.
Step 13
Screw roof supports together. Then screw both roof supports to frame before screwing centre support into place.

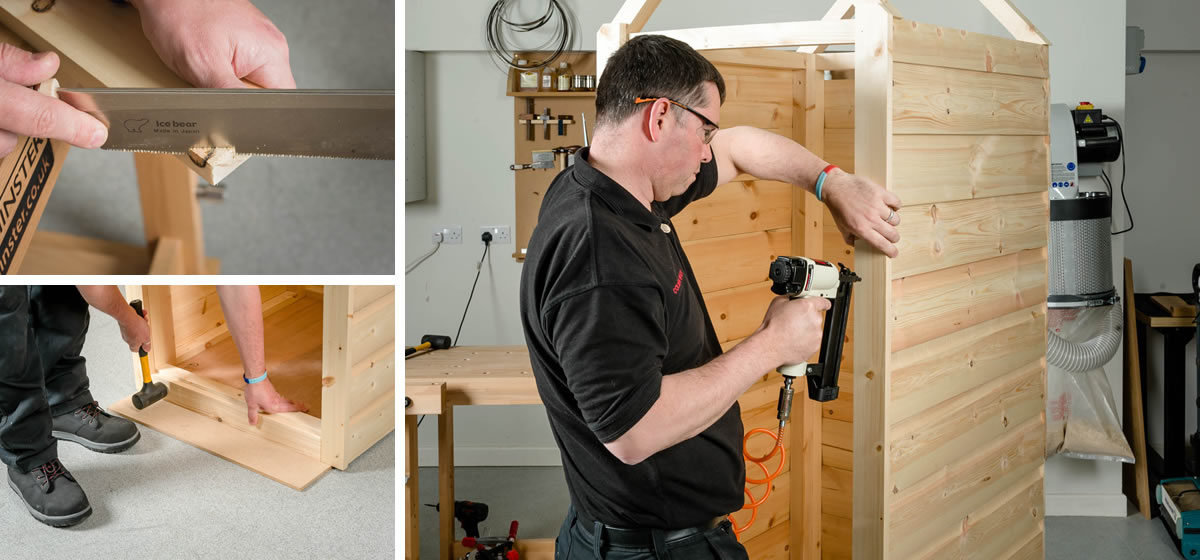
Step 14
Starting from the bottom of one of the sides of the shed frame, nail the shiplap to the frame. Continue process until the last piece. Here you will need to cut to size. Offer final piece in place and mark cut line. Using either a handsaw or table saw cut to size. Repeat on the other side and back.
Top Tip! We used a piece of 9mm MDF to raise the shiplap an even distance from the floor.
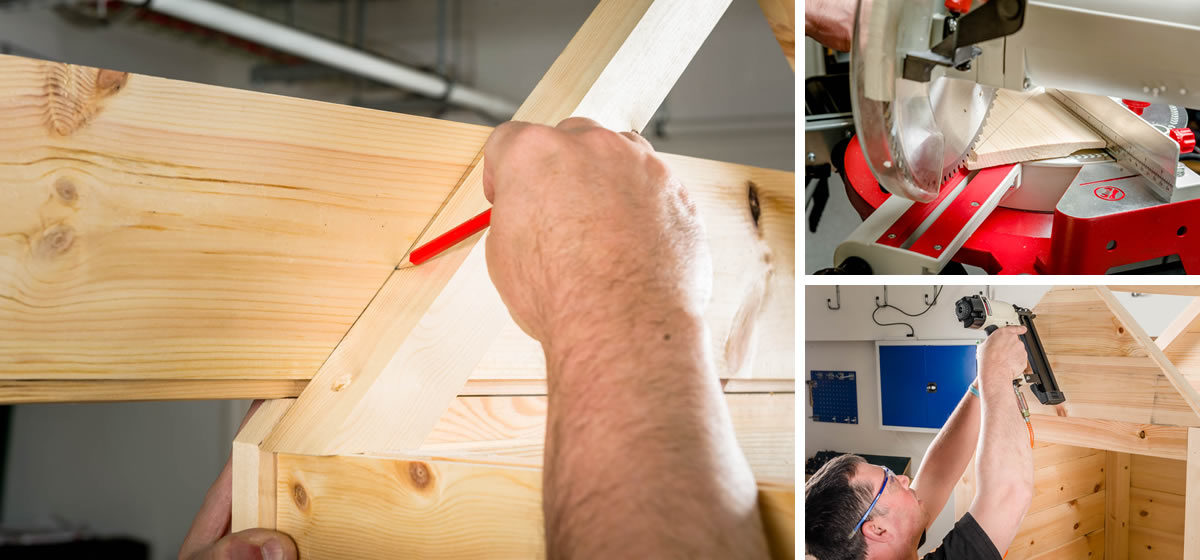
Step 15
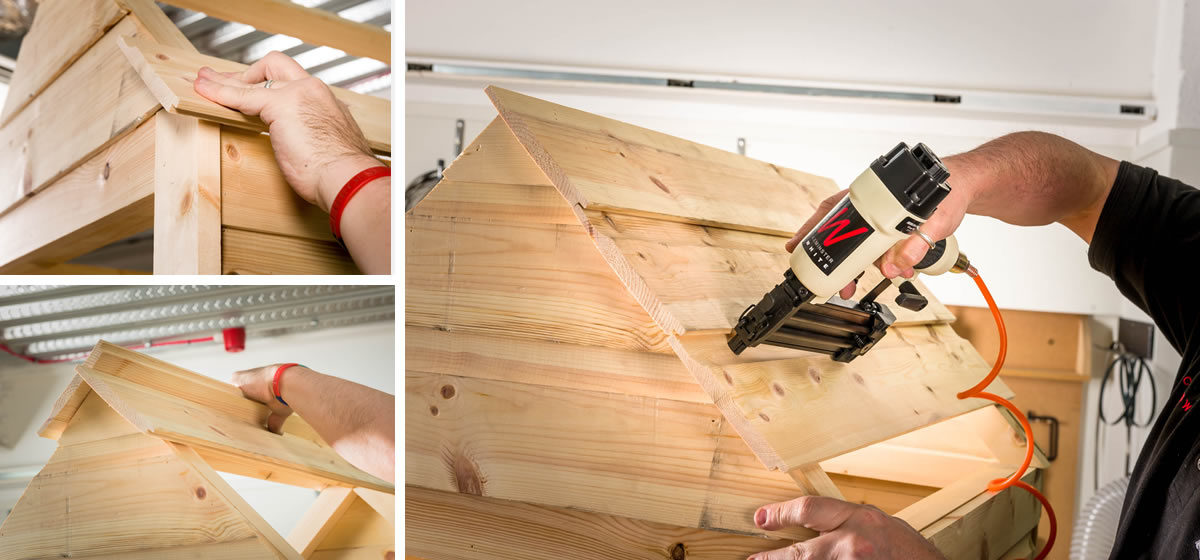
Offer the two side strips to the the frame and mark where it meets the 45 degree roof support. Cut and nail into place. Next take front cover strips and nail the bottom and top pieces to the frame.
Step 16
Measure and cut shiplap for front and back of the roof. Then nail into place. Repeat until front and back are complete.
Step 17
Next shiplap the sides of the roof, making sure there is sufficient overhang at each end to help keep rain out. Starting from the top down, nail roof panels into place. Repeat on both sides.
Top Tip! Use a spare bit of timber to locate top of ridge.
Step 18
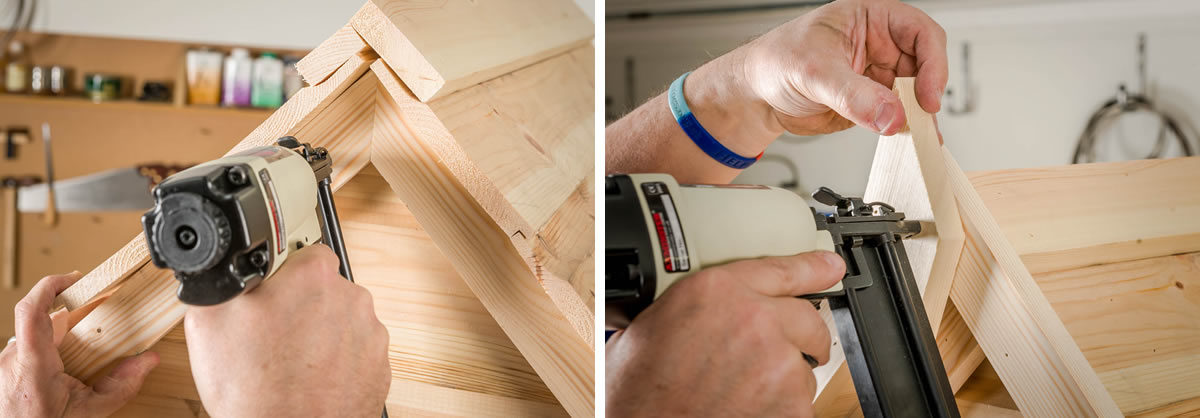
Cut two roof cover strips and nail into place.
Step 19
Measure and cut all remaining cover strips. Our strips are 640mm in length. Nail into place. Repeat the same process on the back of the shed.
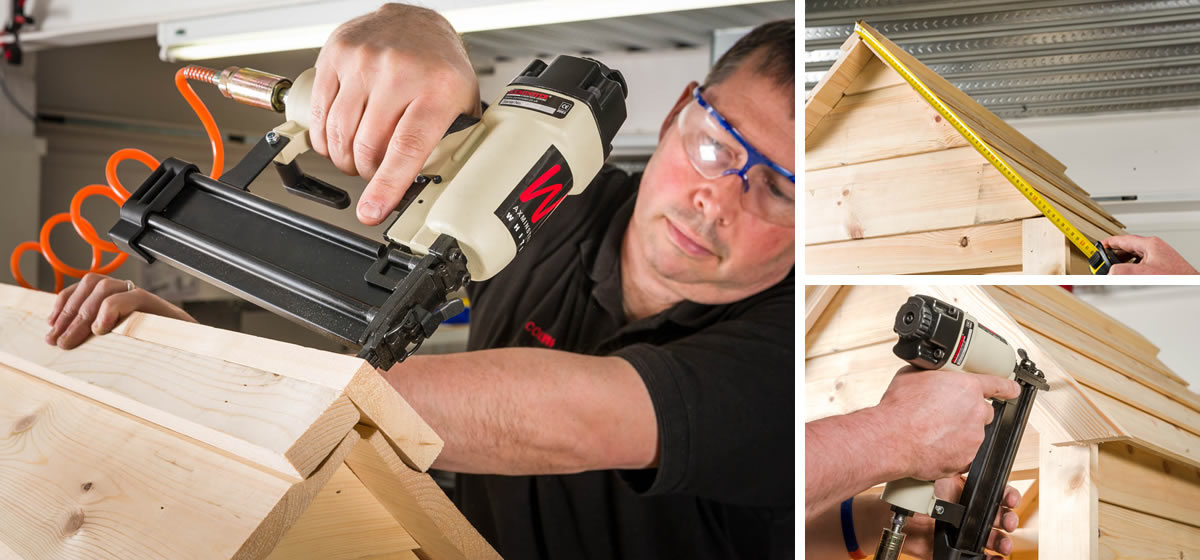
Top Tip! For purely decorative reasons you can add a cover strip to the underside before fixing the top strips. We also capped off the joins of the cover strips with a decorative diamond shaped piece.
Step 20
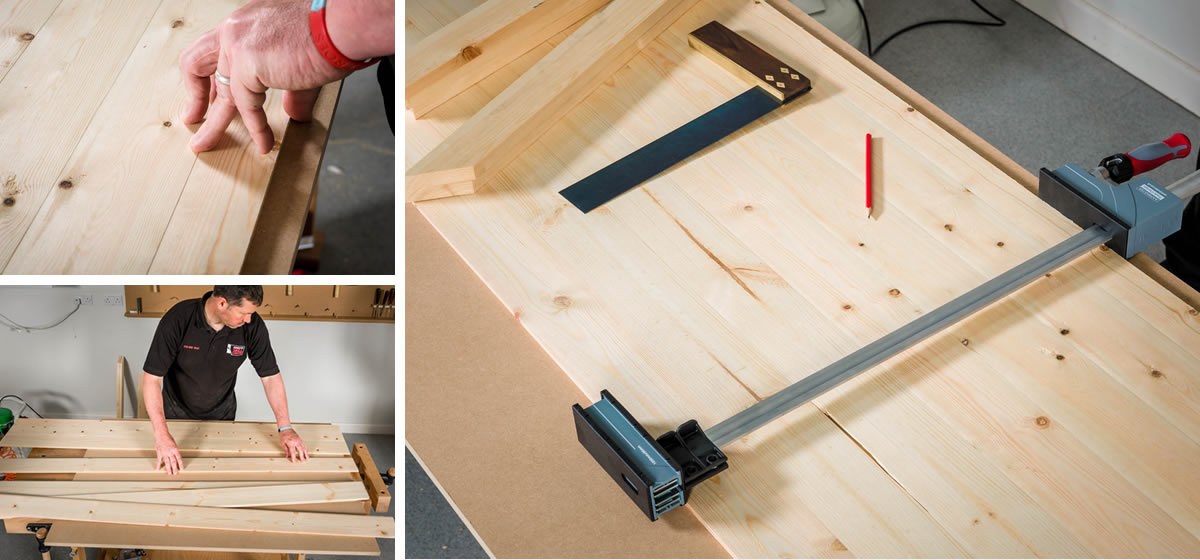
Measure up your door opening and cut the tongue and groove pieces to length. Unless your shed has been made to exact widths of tongue and groove panels you may need to cut one panel widthways also. Lay door pieces on a workbench. Using two parallel jaw clamps, clamp into place.
Step 21
Cut three straight supports and two 40 degree angled cross braces.
Top Tip! It is important to cut straight supports 50mm short of total door width to allow space for the door to open and close.
Step 22
Make a mark 220mm from the top of the door and with the aid of a square tack with nails into place. We can now lay out other supports and tack into place.
Step 23
Turn the door over on the bench, and with a pencil, square and rule transfer where the support braces run. We can then determine where we need to screw together. Drill and countersink before screwing together.
Top Tip! We screw instead of nail the door to add strength.
Step 24
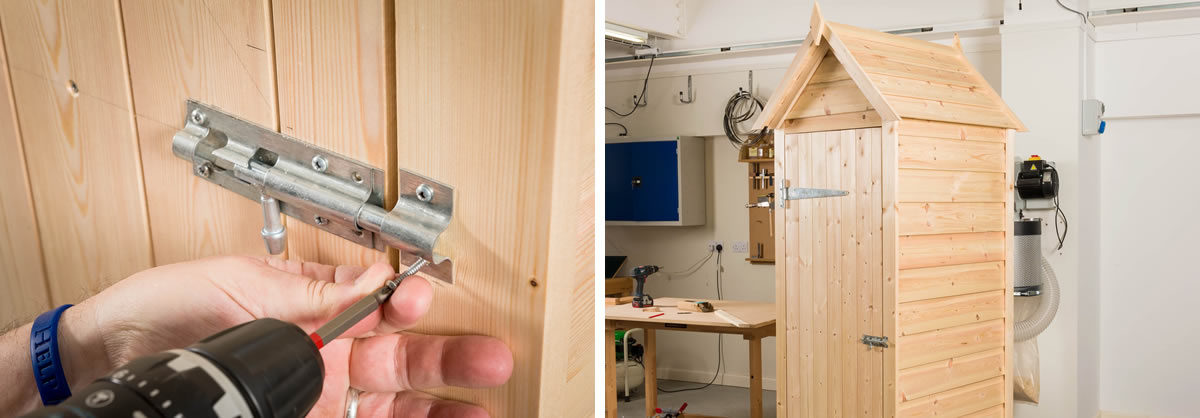
Take your door furniture, 2x Galvanised T hinges and 1x Galvanised bolt. Align with top and bottom support braces and screw into place. On the opposite side of the door screw the bolt into the middle support brace.
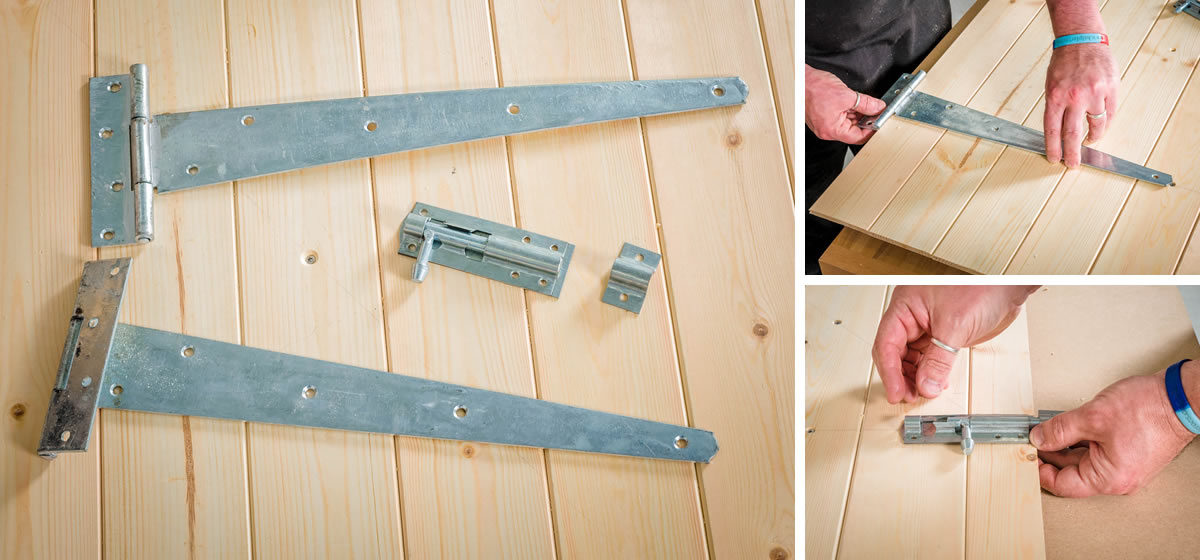
Step 25
Take door stop and nail 10mm in from the face, allowing the door to shut flush with the front of the shed. (see pic)
Step 26
Offer the door and hinges to the frame and make a pencil mark in the hinge holes. Screw into place.
Top Tip! To hang the door by yourself use some wooden wedges.
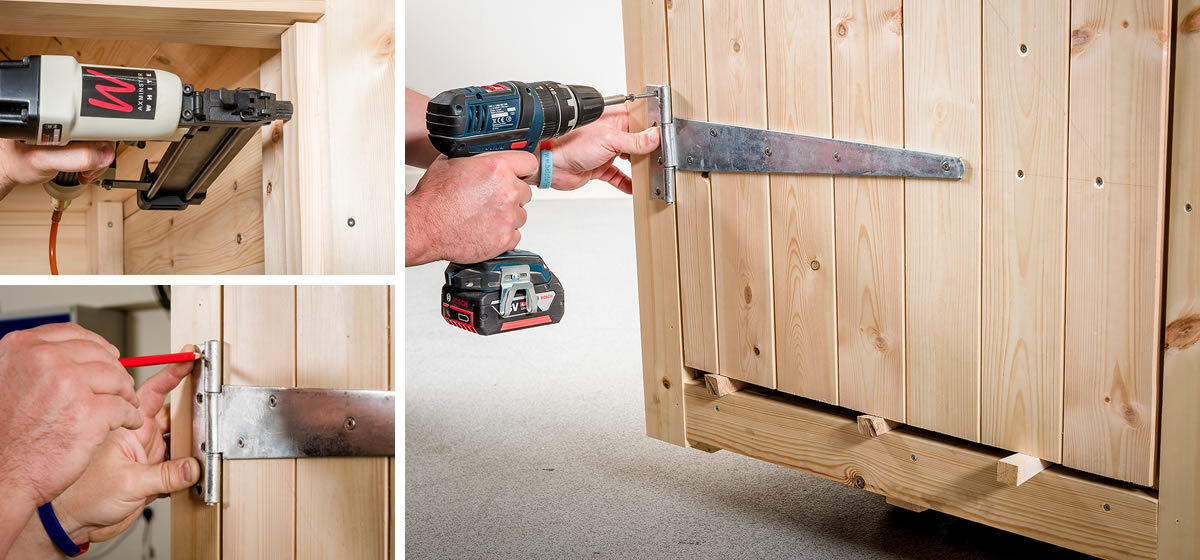
Step 27
Close the door screw bolt latch into position.
Step 28
Finish with Osmo UV and start using your new tool shed.


That's not a shed its not even big enough to be called a sentry box
my thoughts exactly! A lot of effort for not much storage space, and no mention of how to site it, mind you its small enough to build then move, rather than build on site. i also personally doubt the apex joint of that roof would be watertight either, without a felt over or membrane underneath...
That ship lap board on the roof David it’s designed to let water run off.
It says tool shed, not workshop or potting shed. I think it's a really nice tool storage place and it wouldn't take a genius to scale the plans to your needs. Whats with all the negativity, its a free set of plans, you aren't forced to use them.
That is the worst ever set of plans. Cross members or support struts? make your mind up, 11 of them needed not 10 whatever you wish to call them. No mention of the plywood floor in the parts list. Roof supports or roof angles? Either way you list 4 the same length and then say take the longer two and drill and countersink them. I gave up at that point there may be more problems but I have binned the whole project as an abstract failure. Very disappointed in you.
Read the title
It’s free! Not like you’ve paid for the plans ! It’s great that they’re available and you don’t have to use them!
My first rule for building sheds - use pressure treated timber!
To those planning to build a shed that suits their limited space, this is great guide to follow. Very informative article.
Wow, that's really cool! You even put photos of every step for us to follow. Thank you so much for giving us an idea of how to make a DIY shed.
Hello there! I'm glad you like it! Good luck with your project!
Great plans ! Will be using In the near future !
Not tried it but ignore comments complaining about the size . It’s only meant for garden tools and the title has the word “SMALL” in it .
Hi again! Could you please tell me what dimensions I need to cut for the plywood floor ?
Thanks