How to Make a Wobble Box
What you'll need
Make a box with a difference, with this unique wobble box woodturning project. An interesting project that tests your work holding and shaping skills, this wobble box uses numerous jaws to create a lidded box with a spherical wobbly bottom.
Watch Jason in our Woodworking Wisdom demonstration or follow our step by step guide below.
The blank for the main body of this starts as a 100mm x 50mm bowl blank. The lid section starts as a small 40mm square spindle blank that is about 60mm long. Both pieces of timber need mounting on the lathe to create the holding tenon, this can be done in your own order.
Prepare the box lid
The lid blank is mounted between centres and roughed down to a clean cylinder. On the tailstock end, add a dovetail tenon to suit the 38mm O'Donnell Jaws. This is then set aside till later.
Mount the box blank
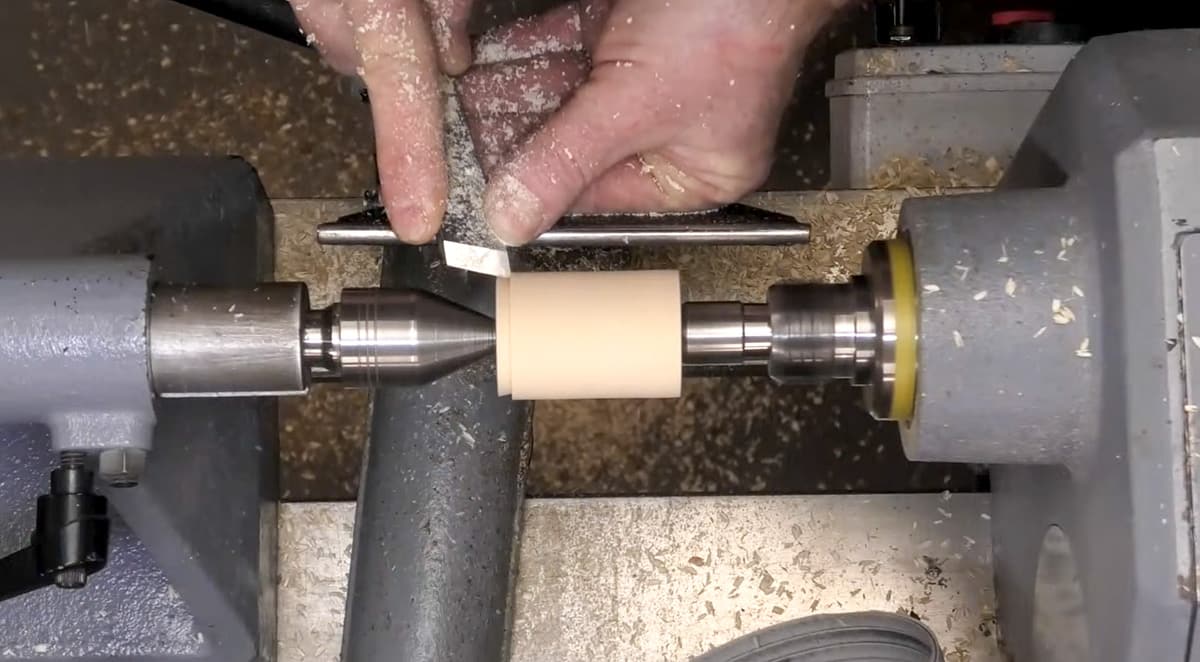
Using a 75mm Face Plate as a friction drive, and a Revolving Tailstock Ring Centre, mount the bowl blank disc onto the lathe. Using a Bowl Gouge, turn this to a clean cylinder. On the tailstock end, cut a large diameter dovetail to suit the A Plus Jaws.


With a set of dividers mark out a scribe line 20mm diameter from the central tailstock point, and using a pencil, draw a line across the scribe line. This creates the offset point. Mount this back onto the lathe, mounting the tailstock onto the offset point. Lower the lathe speed and create a tenon using a parting tool. This needs to fit the 38mm O'Donnell Jaws.


Create the box neck
Load the work in the 38mm O'Donnell Jaws. Next, set up a drill chuck with a 25mm Forstner Bit. On the shank mark a 25mm depth line. Then. lower the lathe speed and drill to the depth. Using a round nose refinement tool, shape the bottom of this drill hole to a half round shape. Once shaped this can be sanded through the grits starting at 150 working through to 400. Then seal and wax.


Using a 1/4 inch bowl gouge, cut across the face, stopping 6mm before the hollowed section. Take 4-5 passes to create a lip that is 5-6mm high around the hollowed section. The lip can then be refined using a 3/8 inch beading tool. Aim to finish about 3mm wide and 4-5mm high. The flat face can then be sanded, holding the abrasive around a flat block. Seal and buff inside with wax.


Shape the 'wobble' bottom
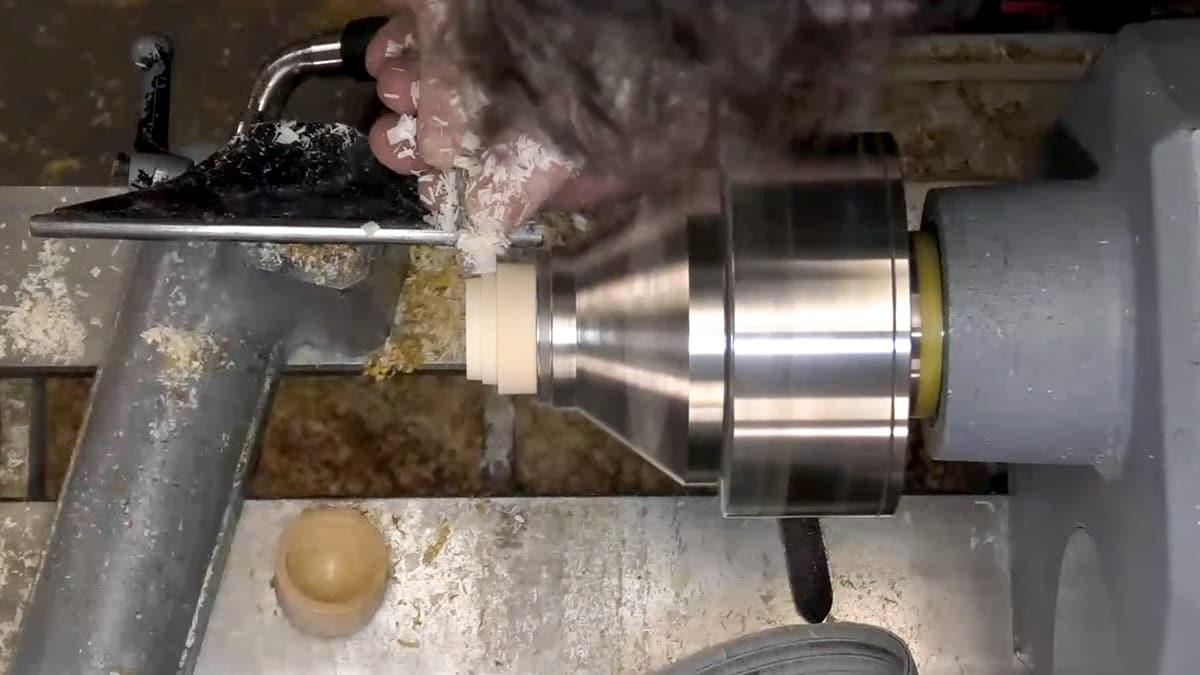
Change the chuck Jaws to the A Plus Jaws and load the workpiece. Using a mixture of the bowl and spindle gouge, shape as much of the exterior half ball shape. The important bit at this stage is the top rim, as this needs to be a clean shape and sanded to a finish.


To clean up the base use a set of Wood Plate Jaws, but leave out the last jaw when loading these. The recess in these is cut to match the overall diameter of the wobble box (this can be done with all four jaws in place). Hold the box on the rim, bring up the tailstock and Ring Centre to add more security, then remove as much of the bulk as possible. Then withdraw the tailstock to finish the shaping. Sand this, blending into the already sanded section, and seal the surface.


Turn, hollow and finish the lid
Swap the jaws back to the 38mm O'Donnell Jaws. Load the lid blank and clean up the face with a bowl gouge. Measure the diameter of the lip on the base and half this measurement on a set of dividers. Mark this onto the face end of the work. Set a depth gauge to half the diameter of the lip. Use a 6mm spindle gouge to drill a depth hole, then hollow from centre out to remove the bulk. Clean up working from rim to centre resting the bevel. Refine the shape with the round nose refinement tool, working out to finish just short of the scribe line, then sand this interior section.


Using the long point of the skew, cut the recess to allow the lid to fit onto the base, this takes patience, working little by little at a time. Check the fit ensuring it's not too tight. This can then be waxed and buffed.


Measure the depth and the wall thickness, approximately 3mm. Mark this onto the outside off the box lid and using a parting tool, part this off on the waste side of this line.
The remaining section that is held in the chuck is used to make a jam chuck, Use the 3/8 inch beading tool to part down so that the recess in the lid fits onto this firmly. It can be wise to hollow through the jam chuck to allow the access to push the lid off if required.


With the lid mounted on the jam chuck turn this to the half round shape using the bowl gouge and the refinement of skew to create the shape, remove the lid to check the thickness. With the shaping done sand and seal with the cellulose sealer
A final buff with a polishing mop set up will create a shine that will last.


Made it? Share it!
If you have made any of our projects we would love to see them. Share your photos with us on social media. Search and tag @axminstertools on Facebook and Instagram. Or upload to our online gallery.