Make a Bathroom Cabinet | How to
What you'll need
Sometimes small or awkward spaces may require a DIY approach rather than buying 'off the shelf' when it comes to storage in the home. Knowing how to measure up and design your own bespoke storage solutions, can be a challenge, but is easily achievable as we show you with this step by step guide on how to make a bathroom cabinet.
This small bathroom cabinet is one example of making something to fit a certain space. In this article we guide you through a number of important things to consider when tackling a project like this, from measuring your space and materials, making templates and marking shelf positions to accommodate the things you want to store.
Watch our Woodworking Wisdom demonstration or follow our step by step guide below.
Measure up
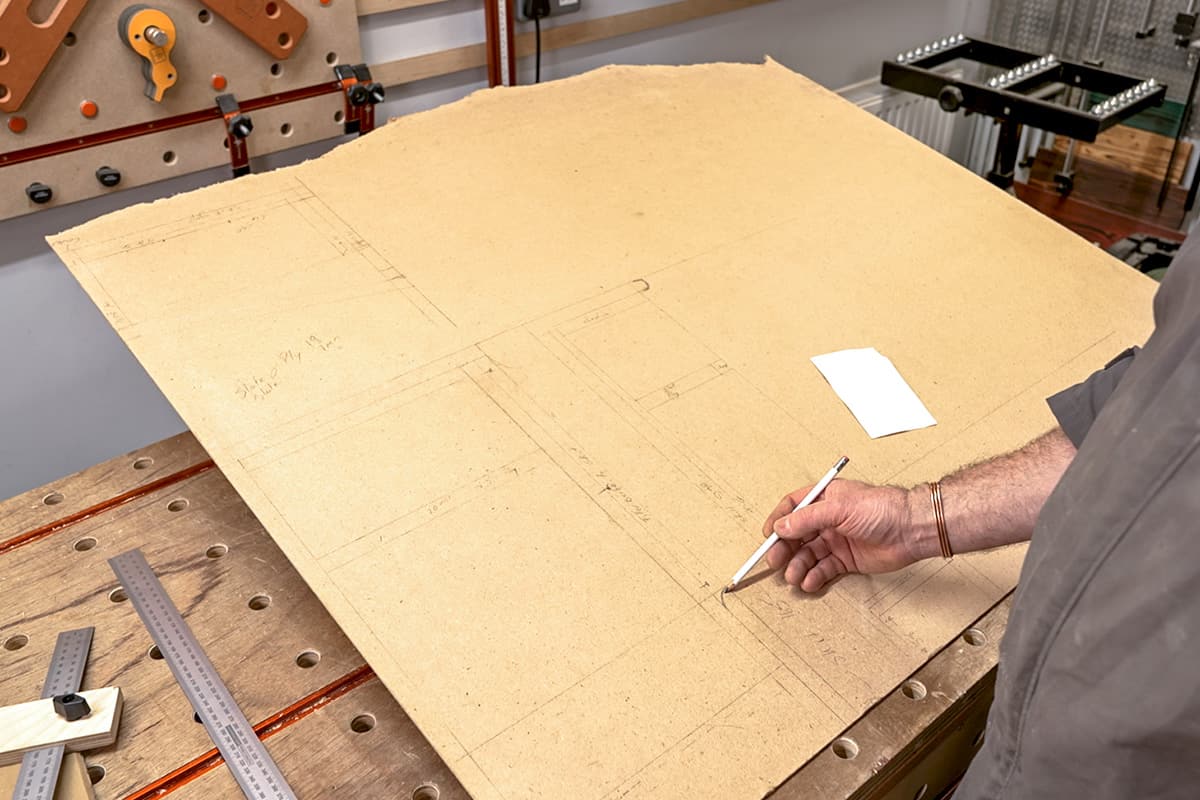
Begin by measuring your space. Your measurements need to be accurate and you will need to consider the height of skirting boards, whether the corner is square, whether the wall is flat. These all might play a part in the design of what you want to make. Making some cardboard templates can be useful.
With the basic measurements, do a few rough sketches of what you have in mind. Think about what this is going to be used for, and then measure the sizes of the items that might be stored within this. This helps to relate the shelf positions. Then, if possible, do a drawing to bring all features together and to give you something to work from. Drawing this out on thin MDF or hardboard sheet can be good. Next, select the materials to make the item from, selecting the longer, bigger sections first.
Machine your timber
The materials could be bought pre machined, or in our case rough sawn and then machined to size using a planer thicknesser. You can also do this by hand if you do not have a planer thicknesser. On the ends of the board mark a reference number that relates to which component this is in the project.


Cut the components accurately to length or size. This is where the drawing can be useful to double check this. Then start to lay the components out on the bench to form the 3D item.


Assemble your bathroom cabinet
Start to join the components together. This can range from glued and screwed to accurately cut mortice and tenons. Due to the fact this will be seen from one edge, we used a biscuit jointer to add strength and accuracy, but with no visible fixings like screws.


The back of the cabinet will need to be fixed in place. A rebate in the side means this won’t show from the viewed edge, but more importantly it adds strength to the carcass. A rebate cutter with a router table makes short work of this. The router table is also used to cut the chamfered detail into the boards for the back panel. With this done, the boards can be glued together to make the one panel.


The next stage is to plan out the vertical to horizontal jointing (sides to top, bottom and shelf). The biscuit jointer is used for these, although planning out and double checking is important. Laying out the sides and clamping together makes this easier to do and more accurate.
With the joints cut, dry assemble to ensure this comes together. Clamping together makes this easier to inspect. The front wooden edging needs gluing onto the shelf and base. The angle makes this tricky - a stop board either end stops this sliding out of alignment.


Glue together and finish
Clean up any internal faces and then glue up. Clamp this together and let it dry.


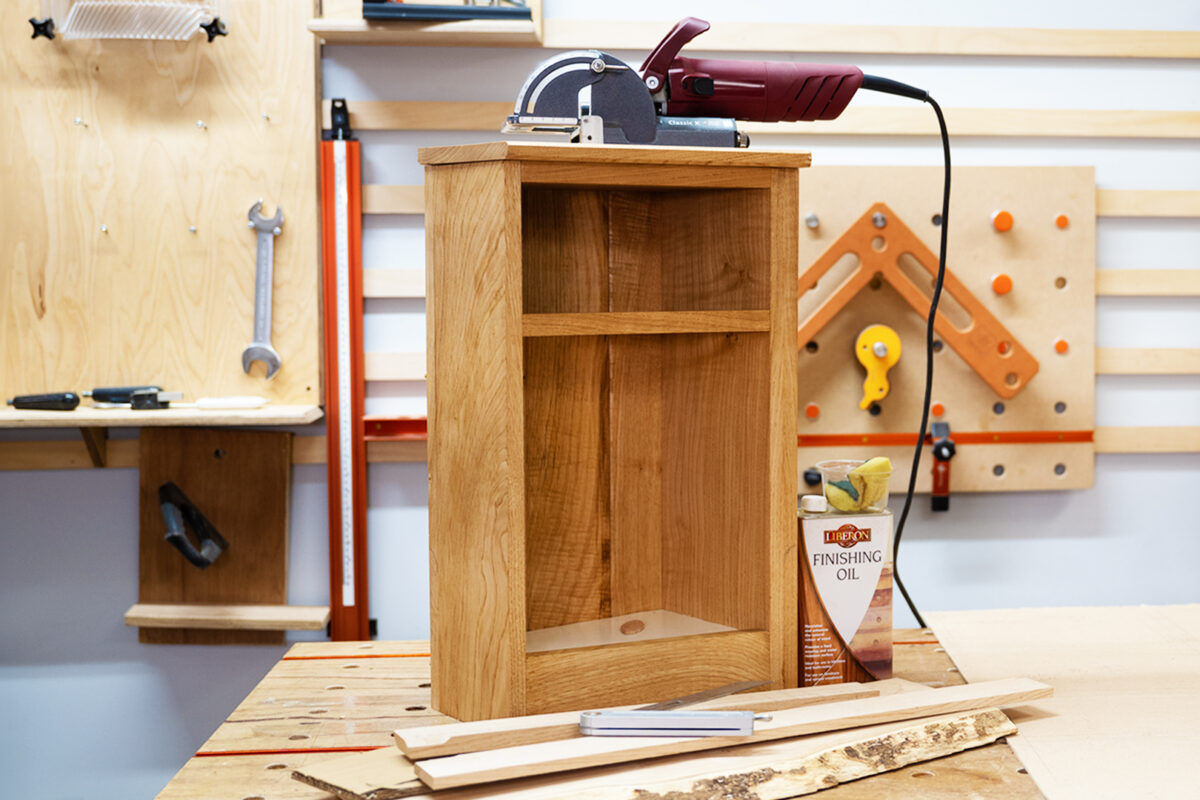
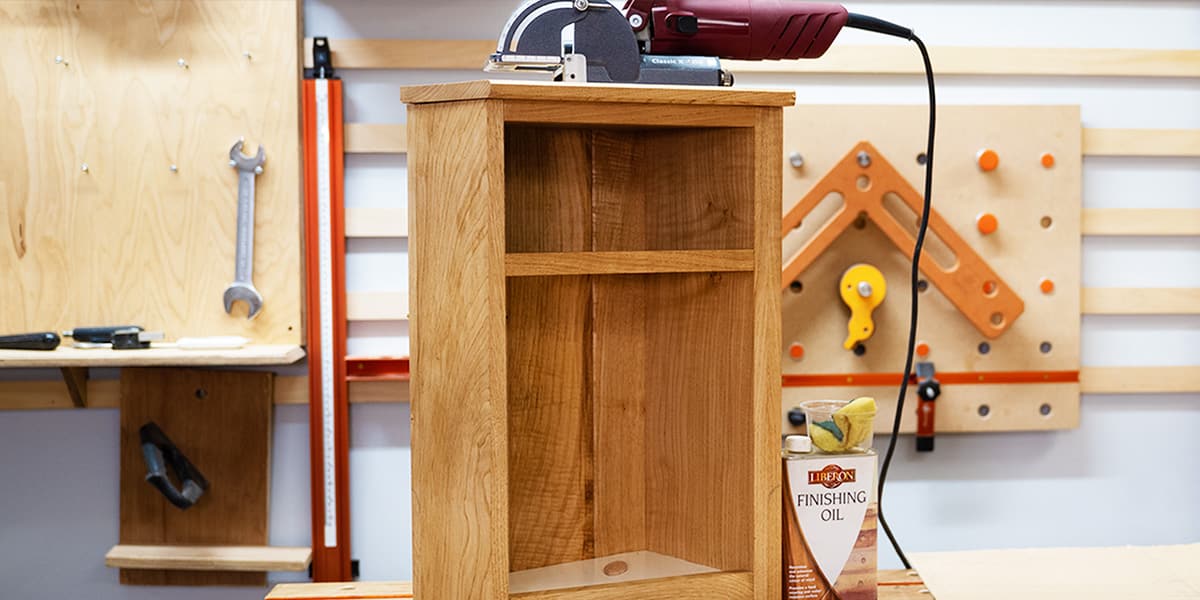
Sand the back and then fix in place using screws. This will make the carcass more stable. The top can be cut to size and a chamfered edge added to match the back, but to also soften the corner edge. Clean up the exterior, and then a finish can be added. An oil finish is a good choice for the bathroom. A few coats will add protection from the moisture.
Made it? Share it!
If you have felt inspired by this bathroom cabinet project, and have had a go, we would love to see your pics! Take a picture, and share it with us on social media. Search and tag @axminstertools on Facebook and Instagram or upload to our online gallery.