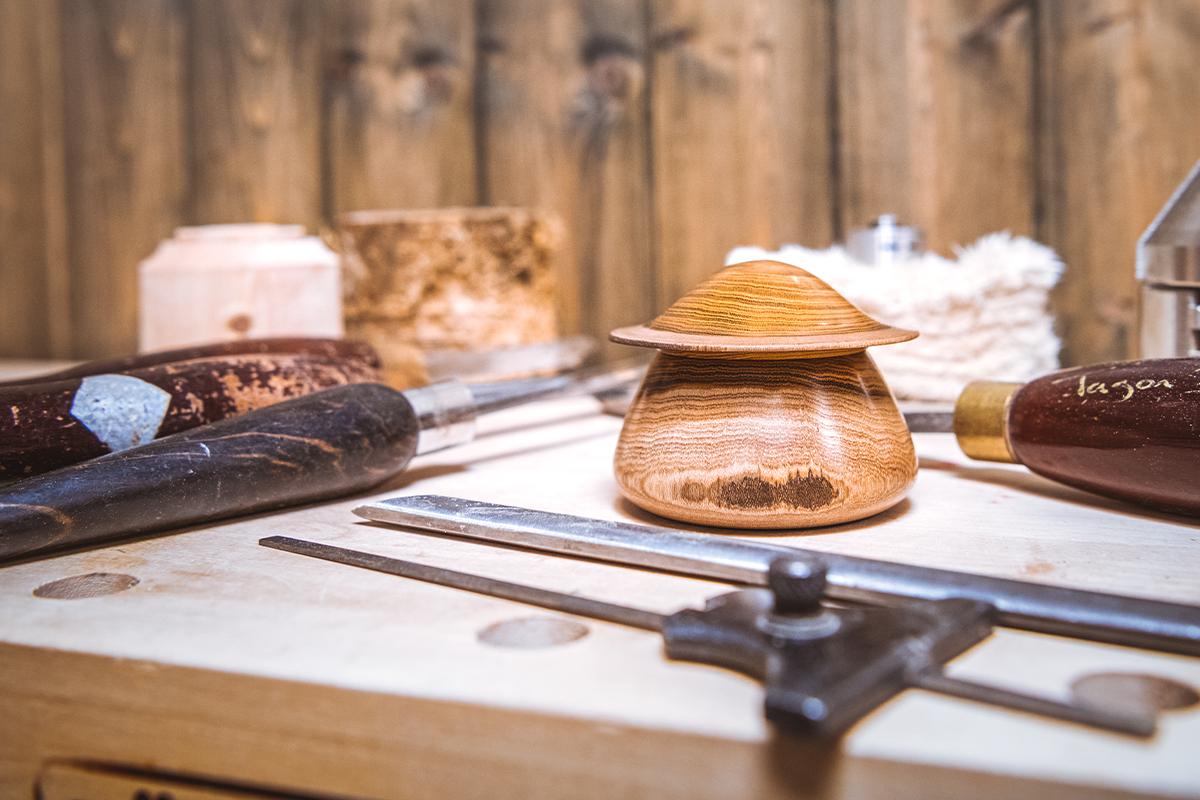
Woodturning Boxes | Sun Hat Box
What you'll need
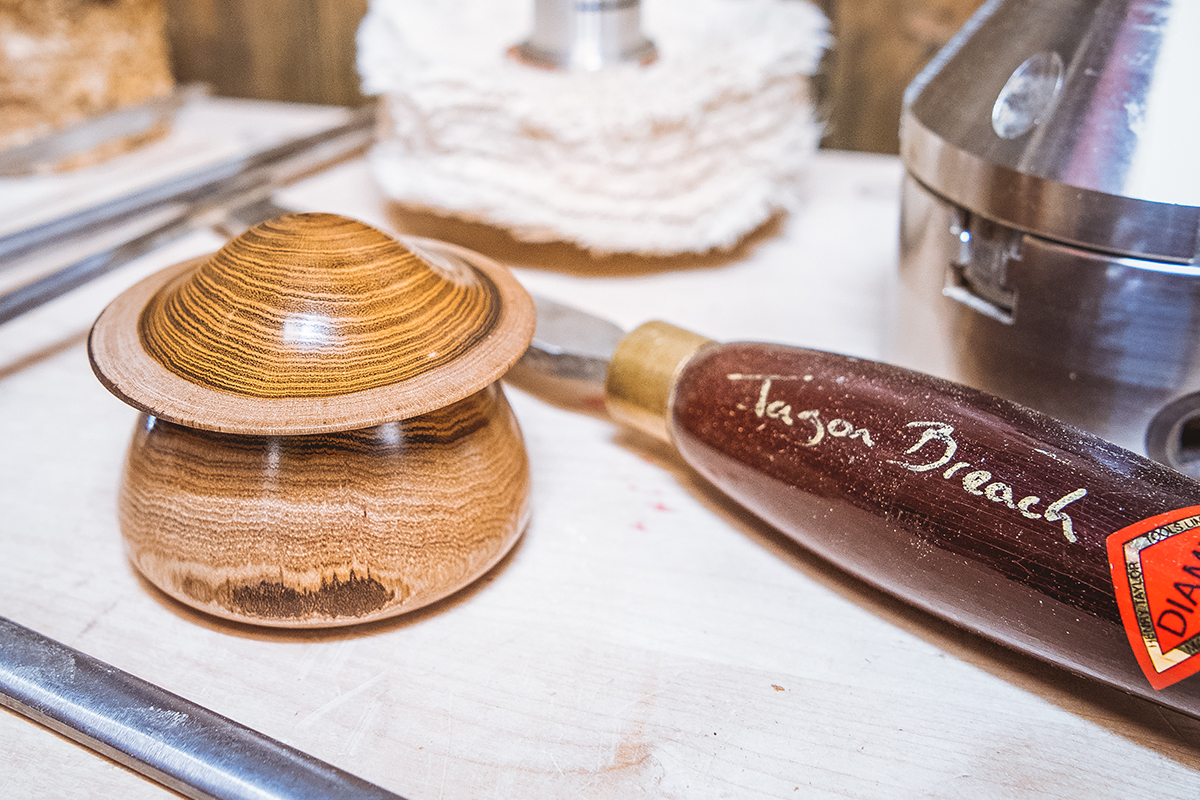
Woodturning boxes is a speciality of our very own resident woodturner, Jason Breach. One of his signature pieces from his repertoire is the 'sun hat' box, which features, as the name suggests, a sun hat shaped lid.
In this Woodworking Wisdom video, Jason shares with you his secrets for woodturning boxes successfully, and shows you how to make your own sun hat box.
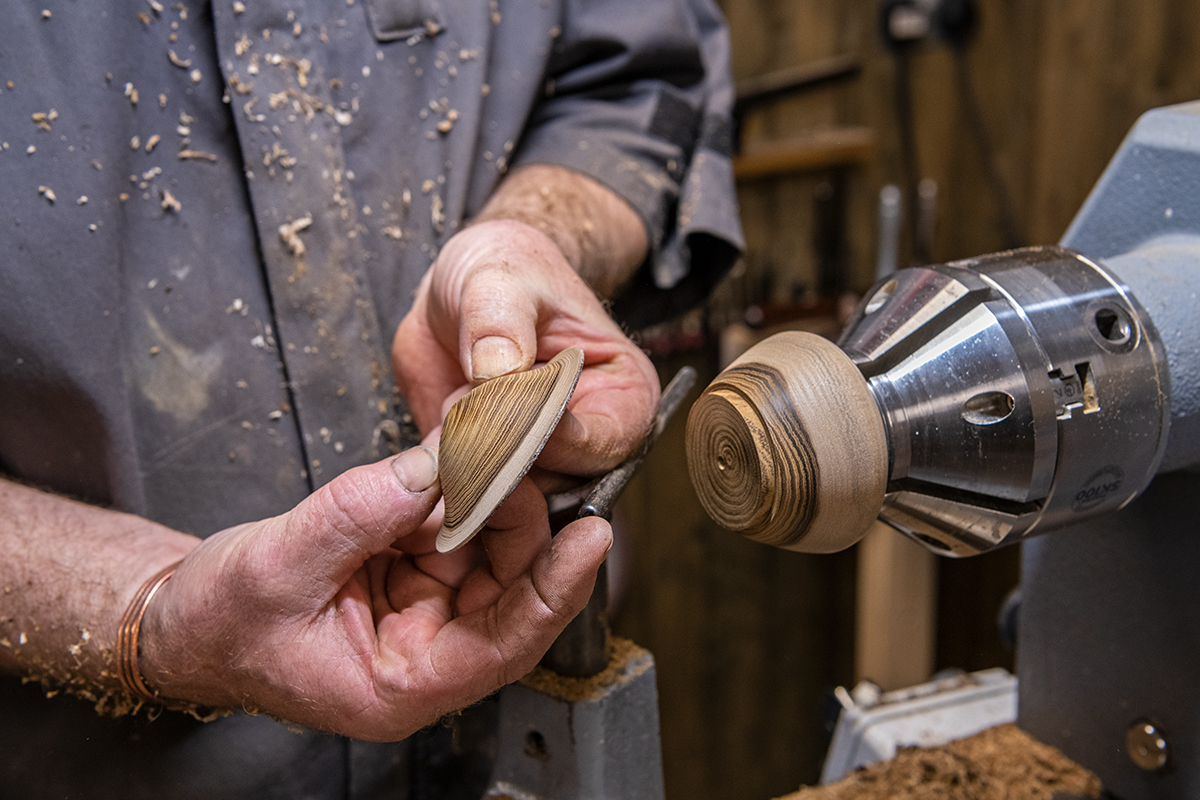
A beautiful, light shaped lid with a delicate 3mm thick section, looks daunting, but in practise is not that tricky, even for a novice turner.
The fitting of the lid and base needs patience when cutting, as the lid needs to fit tight. When material is removed when shaping the lid and base, the lid will loosen and they will fit together nicely.
Watch his demonstration, or read our step by step guide below, to give it a go.
Select your timber
The materials need to be dry and have no splits for successful turning. Sizes can be altered to suit but for this box Jason used a well dried laburnum blank that was 75mm diameter and 75mm to 80mm long. This is a spindle work project with the grain running parallel to the lathe bed.
Parting the lid and base
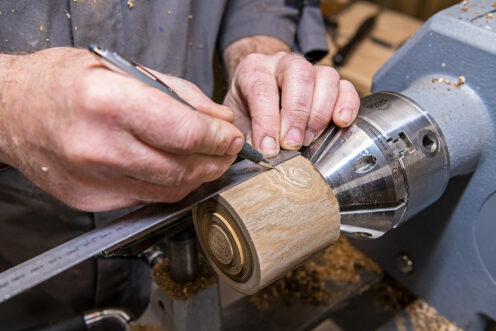
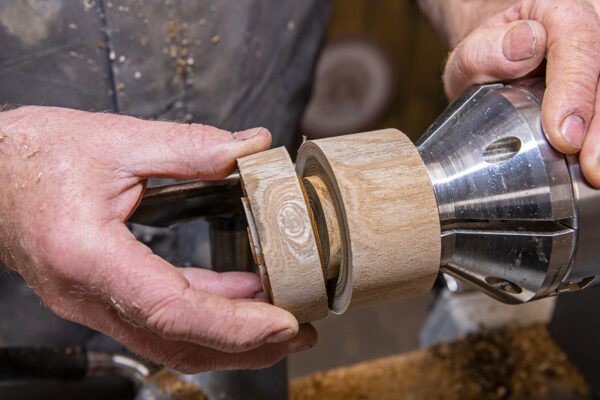
Begin by mounting the blank between centres and turn to a cylinder using a spindle roughening gouge. On either, end cut a tenon to suit your chosen chuck jaws. Jason used the Axminster Woodturning 38mm O'Donnell Dovetail Jaws to allow good access to the work. Mount the chuck on the lathe and select what will be the lid of the box.
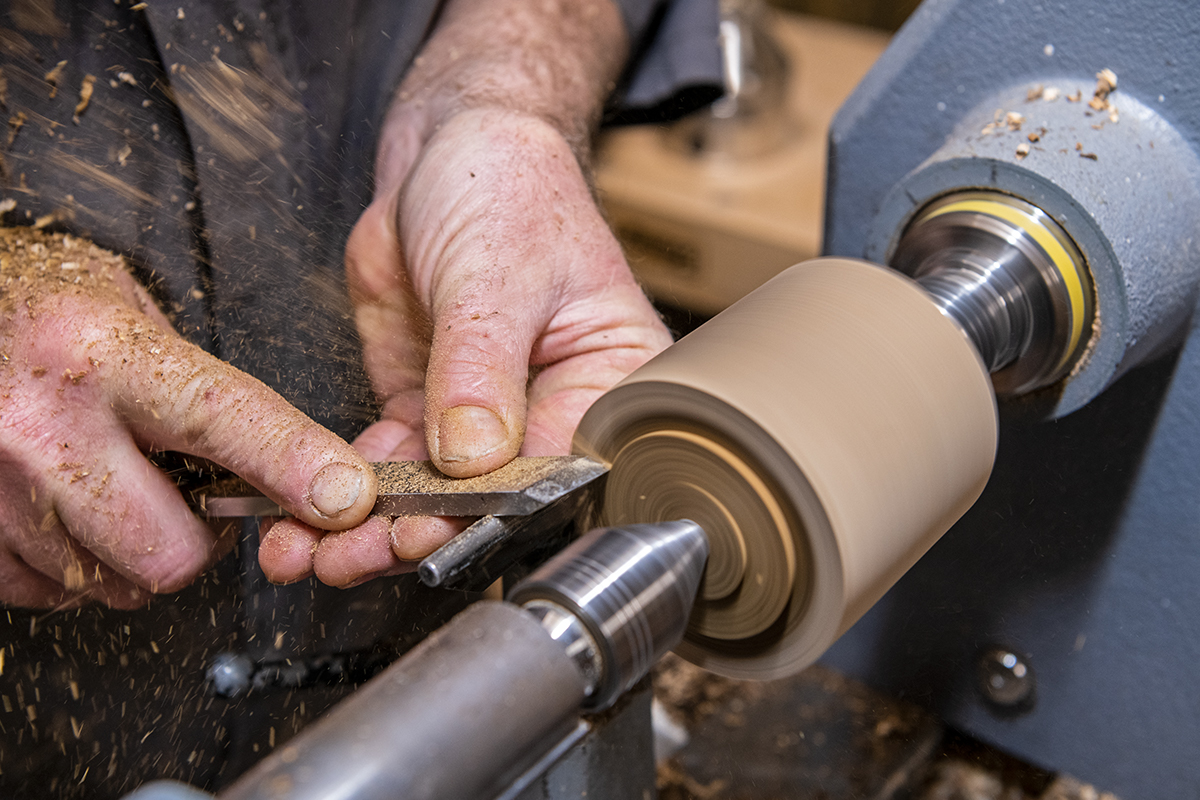
Load the work into the chuck holding the tenon on the lid end of the blank. The proportions of the box are one third for the lid and two thirds for the base. With a pencil, draw a line to highlight the parting point and use a narrow parting tool to separate the lid and base. Top tip: Do not have the tailstock in place, as this will cause pressure on the side of the parting tool which will pinch the tool and creating more heat.
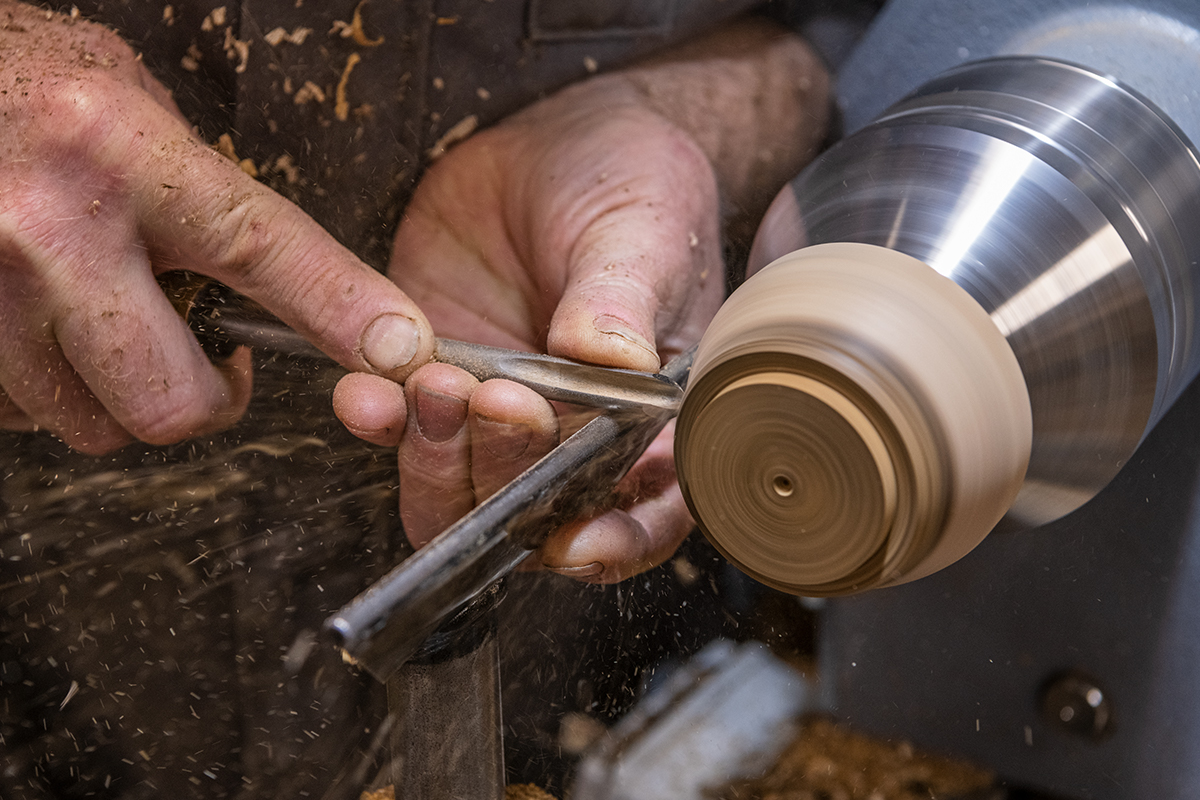
Hollow the lid
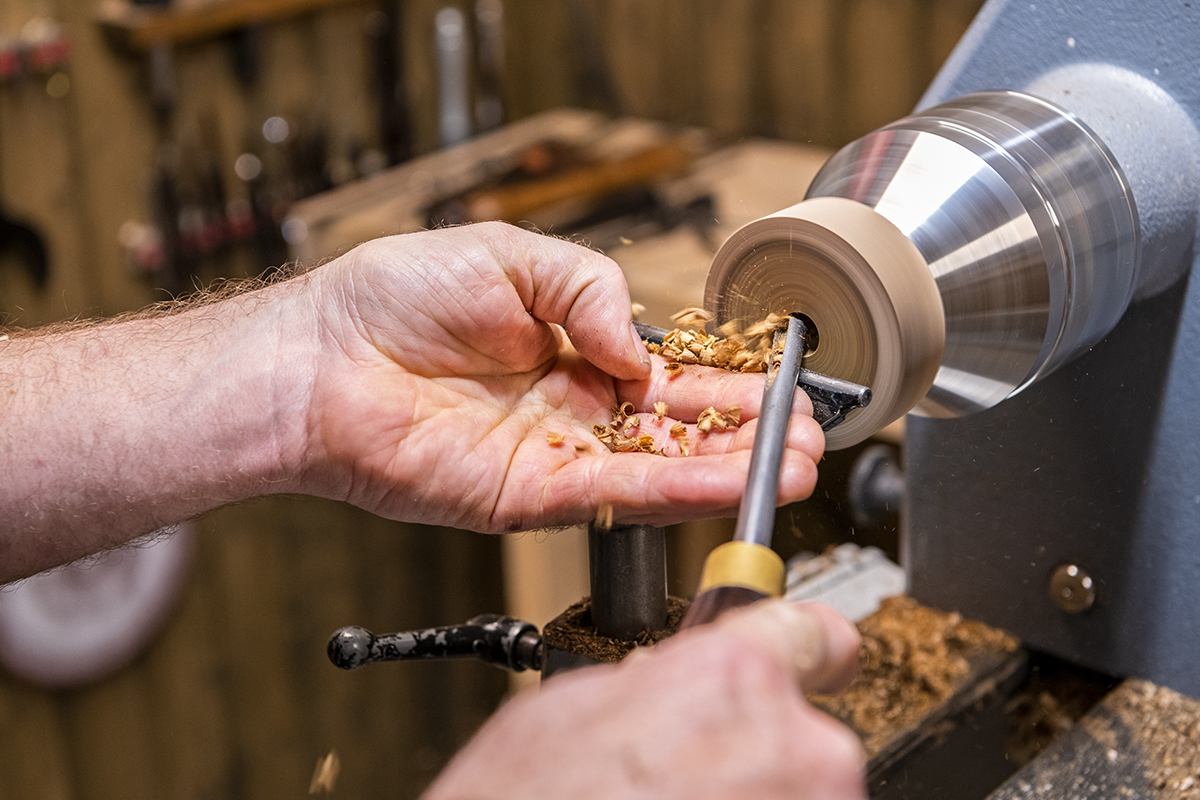
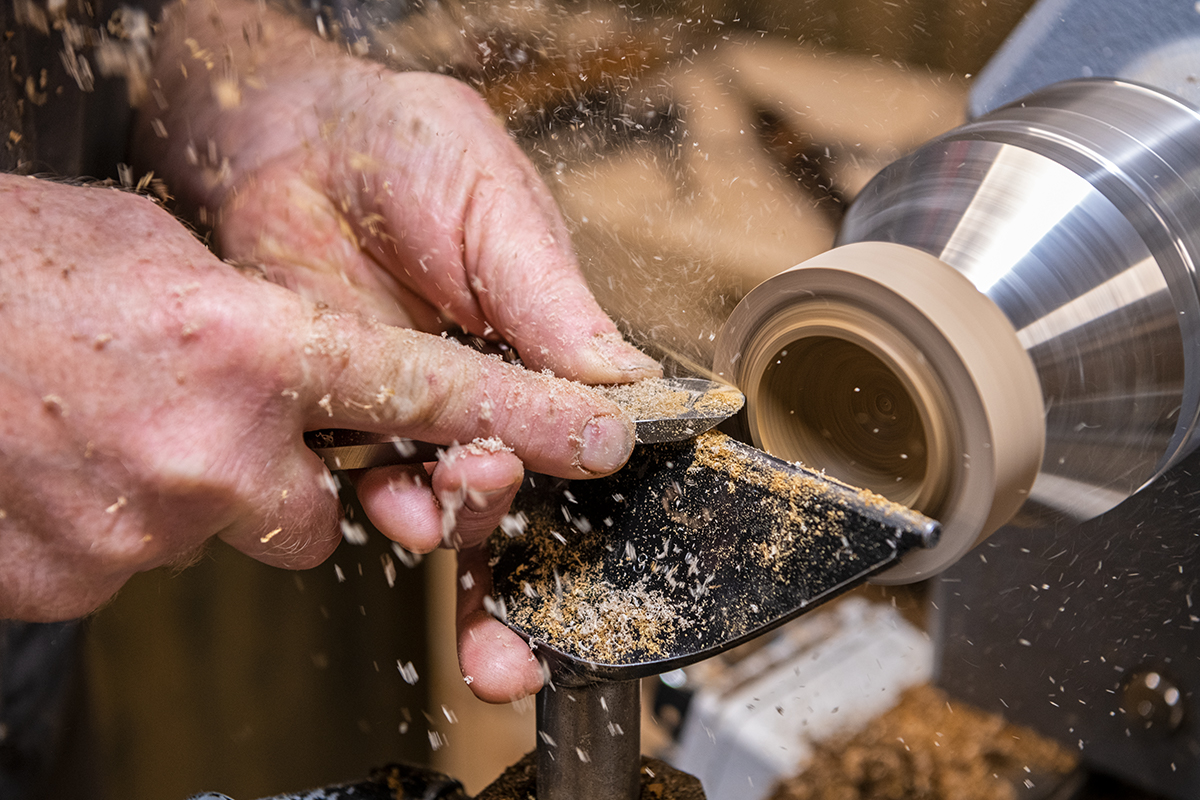
Set a depth hole as a guide of how deep to hollow the lid. This can be done with either a drill bit or a small spindle gouge. Check with a depth gauge. Using a 1/4 inch bowl gouge, hollow from the centre outwards. The flute of the gouge is between 9 and 10 o'clock. This will remove the bulk quickly. Leave a wide rim at this stage, (about 18mm).
Use the 1/4 inch bowl gouge, working from the rim to the centre, resting the bevel with the flute between 1-2 o'clock to clean up. The aim is to create an even smooth curve. Shape the rim edge using the gouge working larger to smaller, cutting with the tip of the gouge.
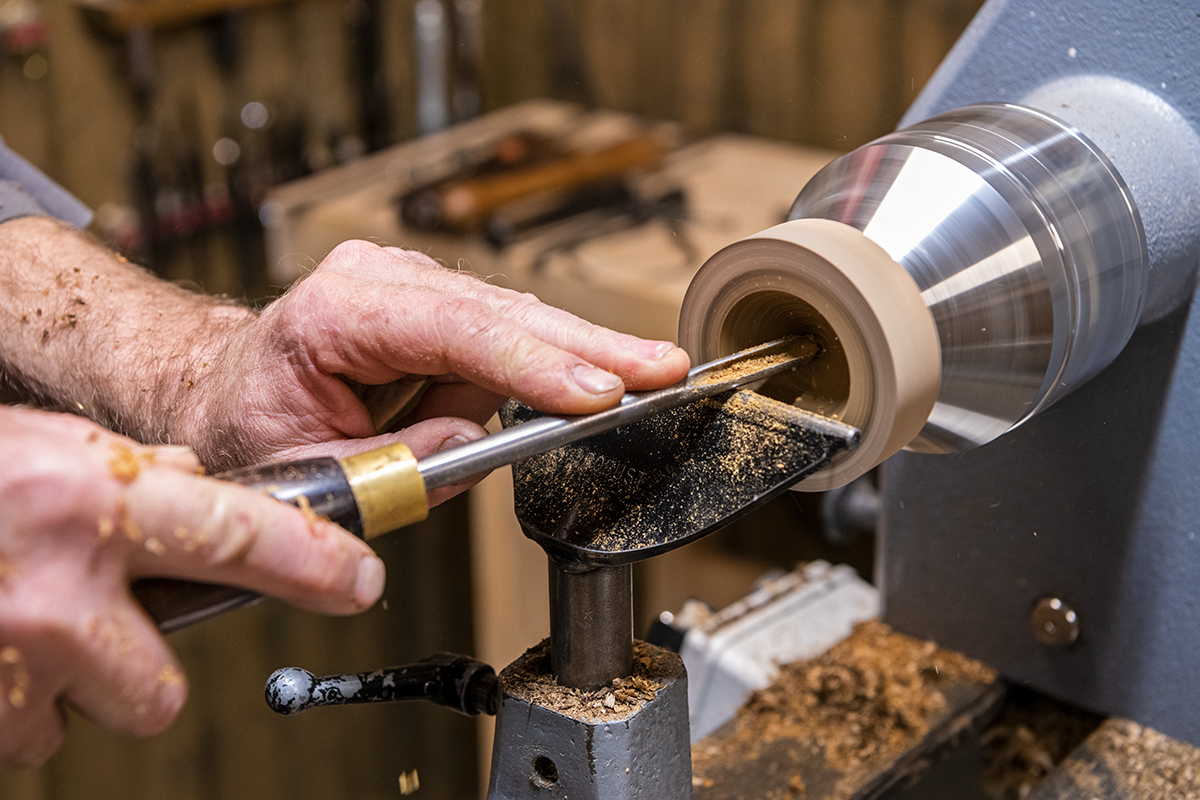
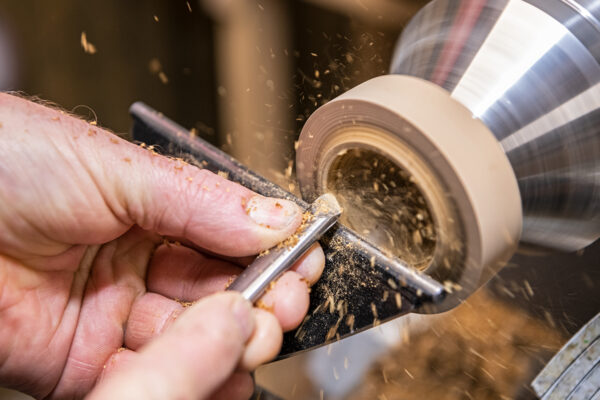
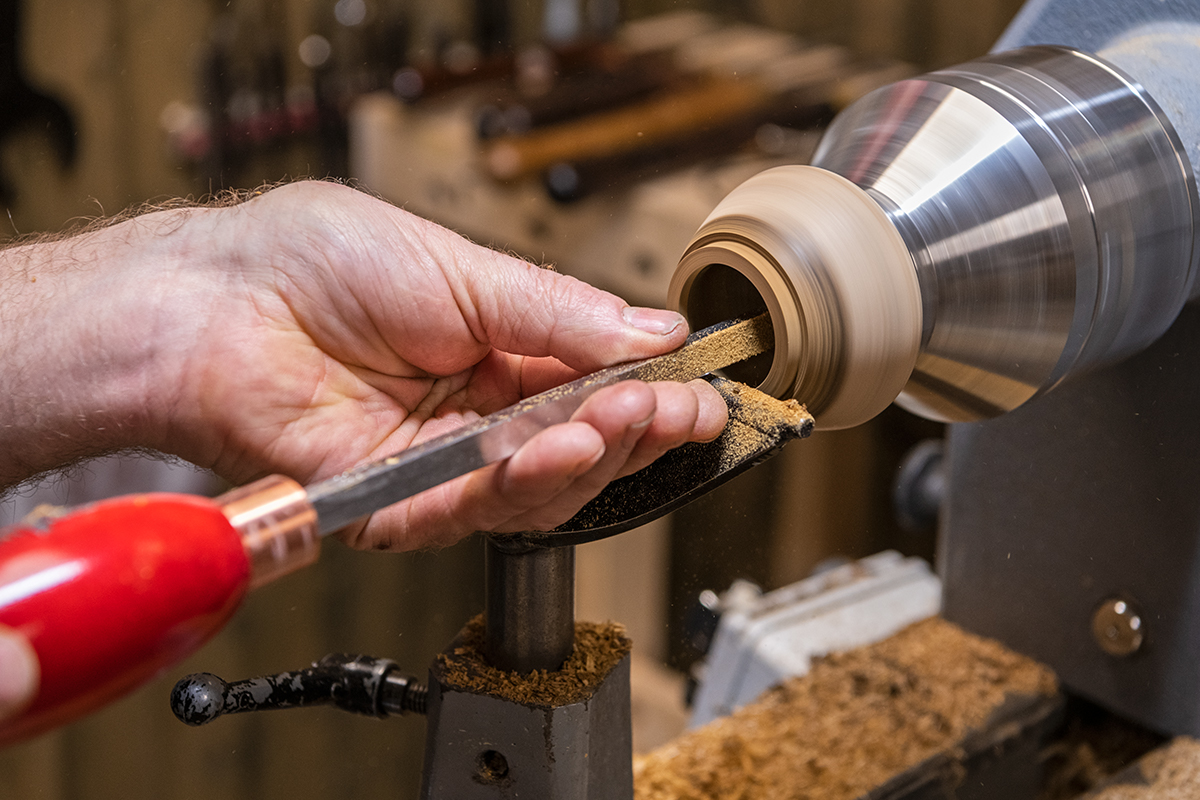
To clean up the interior and the rim, use a Jason Breach Round Nose Box Refinement tool to create an even contour and clean finish This can then be sanded, 150–400 grit.
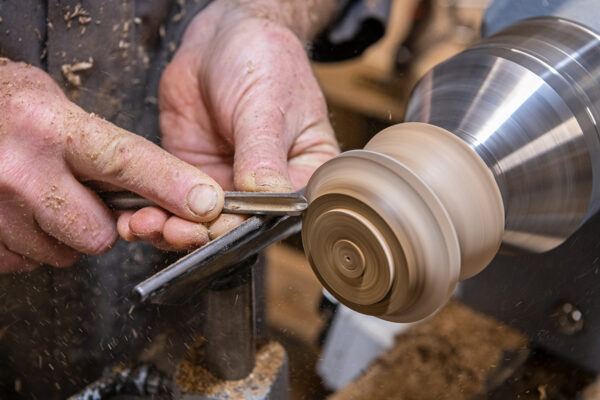
Turn the lid
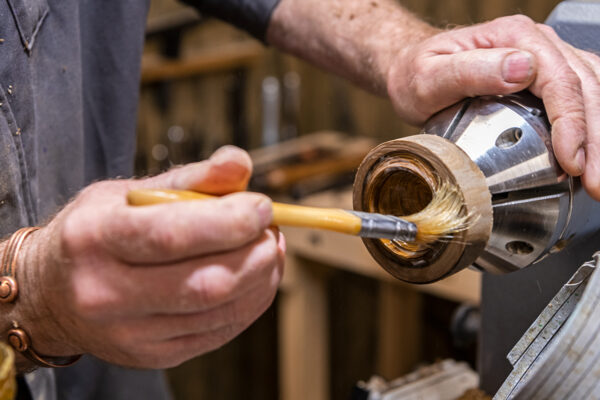
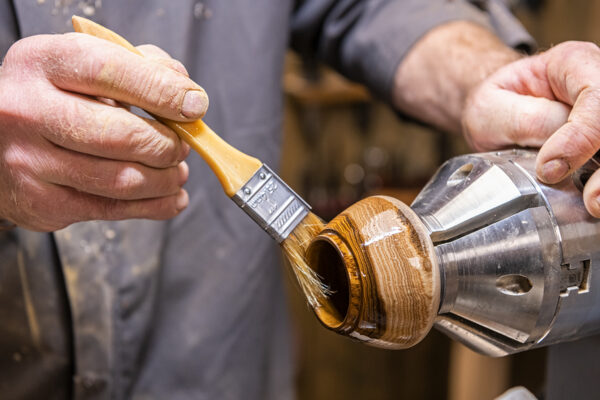
First, cut the recess in the lid. This needs to be nice, straight and parallel. The long point and side edge of the oval refinement skew are ideal for this as the thinner section means the tool is not pushed towards the centre of the work. This needs to be about 6mm deep. With the recess cut, seal the sanded areas using a cellulose sealer and wax, and buff to a shine.
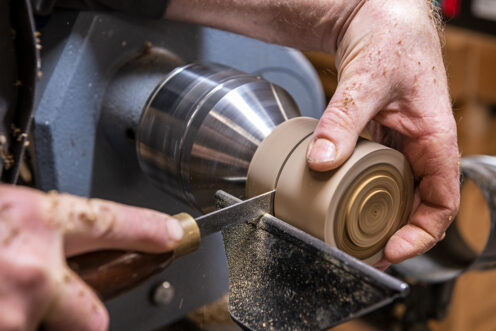
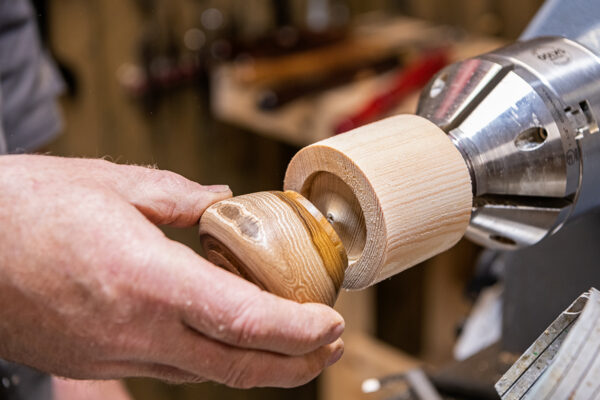
Remove the lid from the chuck and load the base section. Using a 3/8 beading and parting tool, cut the spigot to fit the recess cut into the lid. This needs to fit tight at this stage to allow the exterior of the lid to be shaped.
With the lid removed, rough out the base shape. This allows better access to remove the lid whilst it is being shaped.
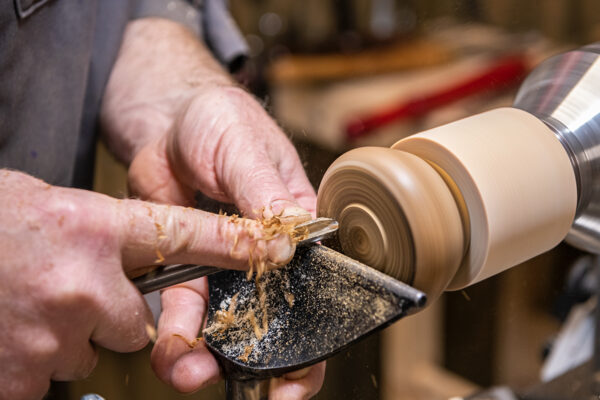
Load the lid onto the base. Using the 1/4 inch bowl gouge to shape the lid, remove the bulk first, then refine the rim section. The last area to shape is the dome of the top of the lid, working larger to smaller with the tip of the gouge taking the cut.
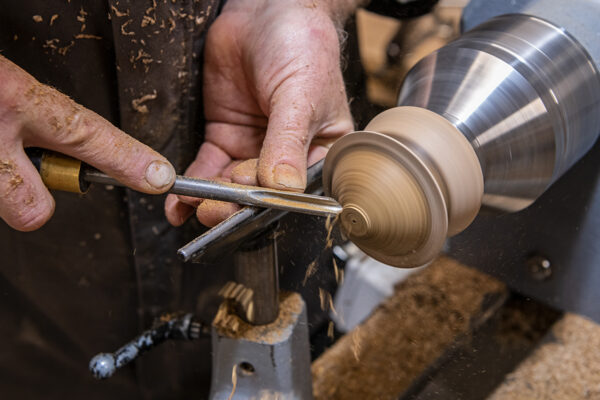
It is important to check the thickness. Remove the lid and feel with your fingers to get an idea of the thickness. The round nose refinement tool is fantastic to refine the shape. Then, remove the lid and finish shaping the exterior of the base.
Hollow the base
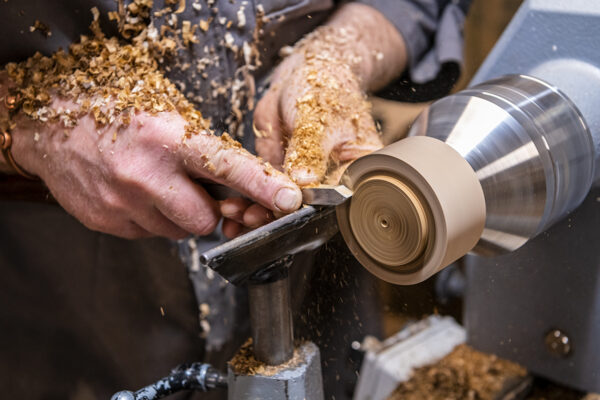
To hollow the base, use the small spindle gouge or drill bit to set a depth hole. Then hollow out the bulk material with the 1/4 inch bowl gouge, working centre outwards with the flute between 9-10 o'clock position. Remove as much of the bulk as possible and then clean up the interior to blend into a uniform shape using a scraper or carbide tipped tool.
Sand and finish
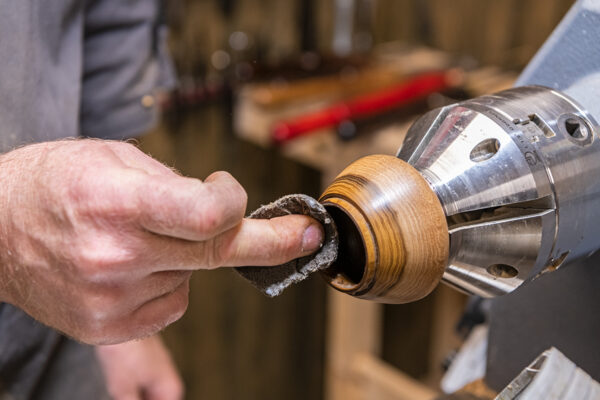
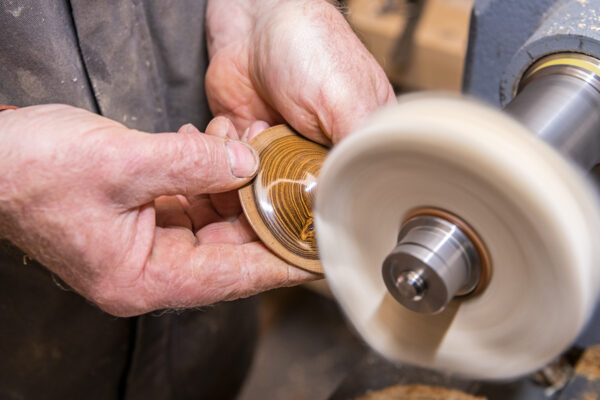
Sanding through the grits from 150-400, sand the interior first then the outside of the base, then the exterior of the lid working up through the grades. With the sanding done, seal all the sanded areas and then wax the interior of the base and buff to a shine.
To reverse the base lid, place a scrap block into the chuck and cut a recess to fit the size of the spigot on the top of the base. This needs to fit tight. Then using the bowl gouge, remove or shape in the holding tenon. Sand and seal this to blend into the overall shape.
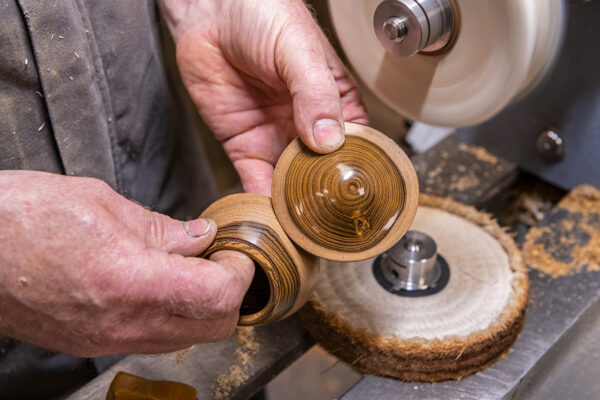
To create a high gloss, durable finish, use a buffing wheel. Use a light or dark compound depending on the colour of the timber used. Use a stitched mop to cut back the sealer, then the final finish is a loose-leaf mop and carnauba wax to create a high gloss shine.
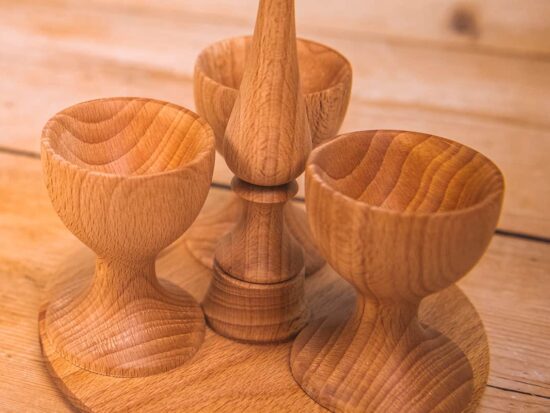
More demos on woodturning boxes
Made it? Share it!
If you have had a go at woodturning boxes, then share your pictures with us. Take a picture, upload and share with us on social media. Search @axminstertools on Instagram and Facebook. Or upload to our online gallery.