Bowl Turning | How to Turn an Emerging Bowl
Bowl turning is a staple for any woodturner. And while some say a 'bowl is a bowl' we disagree! There are many unique and interesting bowls that can be turned, and in this article we explore how to turn an emerging bowl.
An emerging bowl is where the bowl emerges from a piece of timber and often looks like it is suspended.
Watch Colwin in this Woodworking Wisdom demo or follow our step by step guide below to learn how to turn your own emerging bowl.
Prep your blank
For this project we are using a piece of birch and have started with a piece 150mm x 100mm, held between centres.
Start by making a tenon to fit your chuck on one end. Once the tenon has been formed, remove the centres and add the chuck to the lathe to hold the blank.


You are going to be making a perfect half sphere, so cut a diameter that you want your bowl to be. Here we have cut to 75mm and half this diameter for the length, however, add a little for waste. This is usually around 10mm.


Begin turning
Using the skew, clean the exposed surface and start rounding your half sphere with either a bowl or spindle gouge. You can use a skew held flat or a scraper to refine the shape.


To ensure the half sphere is symmetrical we made a card template. Once turned, sand to a good finish.

Cut the blank in two
Next, you need to cut the blank in half down its length. Ensure you have a stable base before doing this. We used two pieces of timber for extra support either side of the tenon whilst cutting.
Using a set of dividers, plot in the centre of the bowl, using the half sphere.


Create a support for the blank
Position your blank using the tailstock to centre the bowl over a plywood disc screwed to your face plate. This disc can be used several times for the same project. Once positioned, size and cut two scrap wood cradles to seat your bowl into. Place these in position and trim until your bowl is sitting flat. Now mark the position of the cradles and disassemble. Drill screw holes into the disc to add extra security when reassembling.


Using hot melt glue reattach the cradles into the marked positions. Add hot melt glue to the inner part of the cradle and using the tailstock to centre and hold in position, insert the bowl. Glue on extra supports where you think the bowl needs it. Using the holes already drilled, screw in from the back of the ply plate.


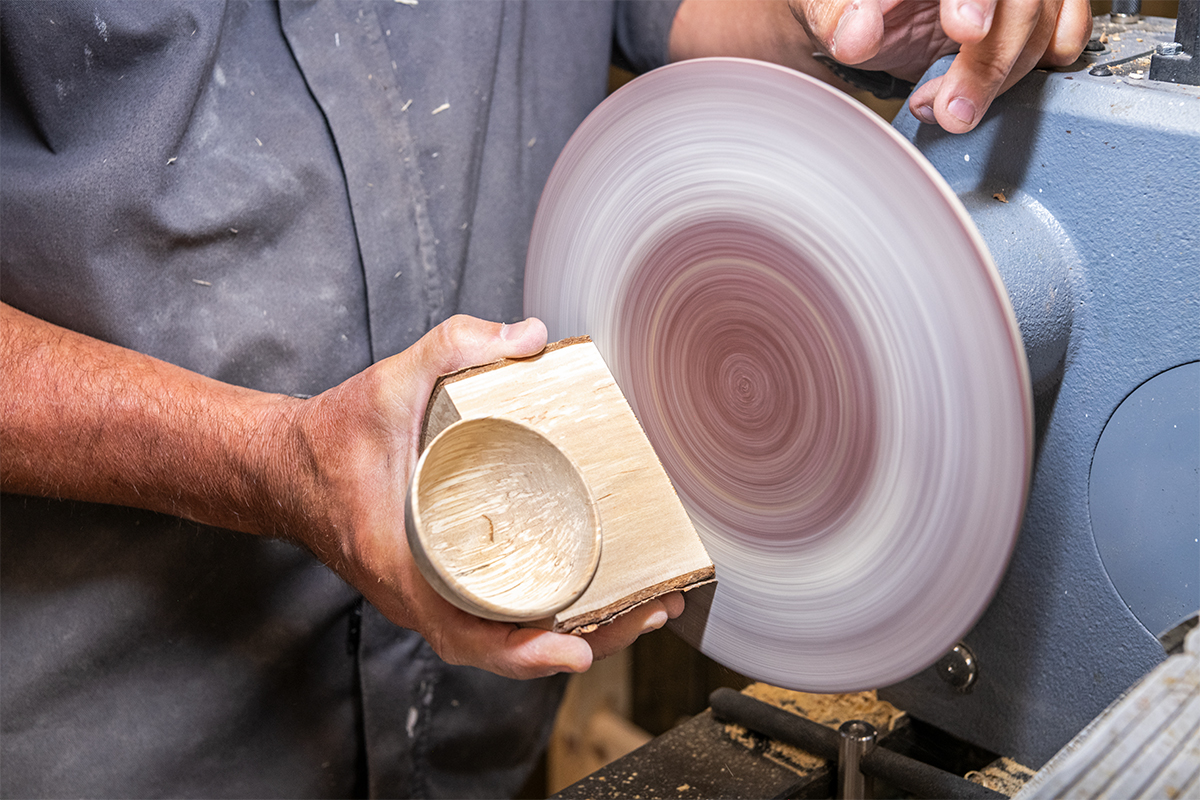
Wait until the hot melt glue has fully set and clean off the front of the blank. We used a gentle pull cut from a bowl gouge to do this and tidied up with a skew, used flat for the wings. Again a soft and gentle action is required.


Core the bowl
You can now core the bowl and you do this the same as any other bowl. It's nice to have the bowl standing proud of the rest of the timber, so in this project we relieved the wings of the bowl to give the illusion of the rim sitting separately. This can be done by using the skew and bowl gouge again.


Sand the emerging bowl
You are now ready to sand. Sanding the bowl itself is easy enough to do and can be done in the usual way with the lathe running, but hand sanding where needed. The wing of the bowl will need to be sanded with the lathe off and by hand. This is for safety and to prevent the edges of the bowl being sanded over and rounded.

Remove the bowl from the support and finish
Once sanded, the bowl can be removed from the ply plate by first of all knocking out any wedges. Then carefully heat the glue with a craft heater or heat gun and prize out the bowl. Gently sand off any residue hot melt glue. Trim off any spare or waste wood, once again supporting the bowl with a piece of timber if necessary then sand the cut area.


Give it a coat of finishing oil and leave to dry before buffing to a finish.

Made it Share it!
We hope that you’ve enjoyed learning how to turn an emerging bowl. If you’ve made your own emerging bowl, we would love to see it! Get in touch via our social media platforms. Find us on Facebook or connect with us on Instagram. Don’t forget to tag us @AxminsterTools. Or upload your project pictures to our online gallery.