Make an Automaton Toy
What you'll need
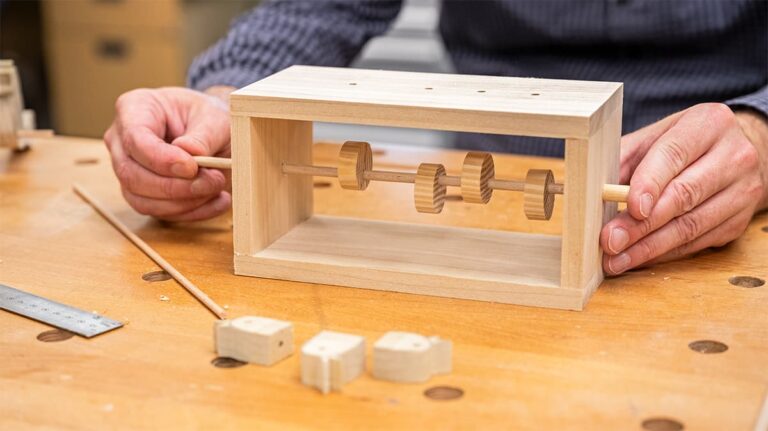
This simple automaton toy is great fun to make and is sure to raise a smile on those that play with it. A fun design featuring a mother bird and baby chicks, this automaton toy is easy to replicate with a number of different designs, to create numerous fun scenes and characters.
Join Ben in this Woodworking Wisdom demo or follow our simple step-by-step guide to make your own.
Make the frame
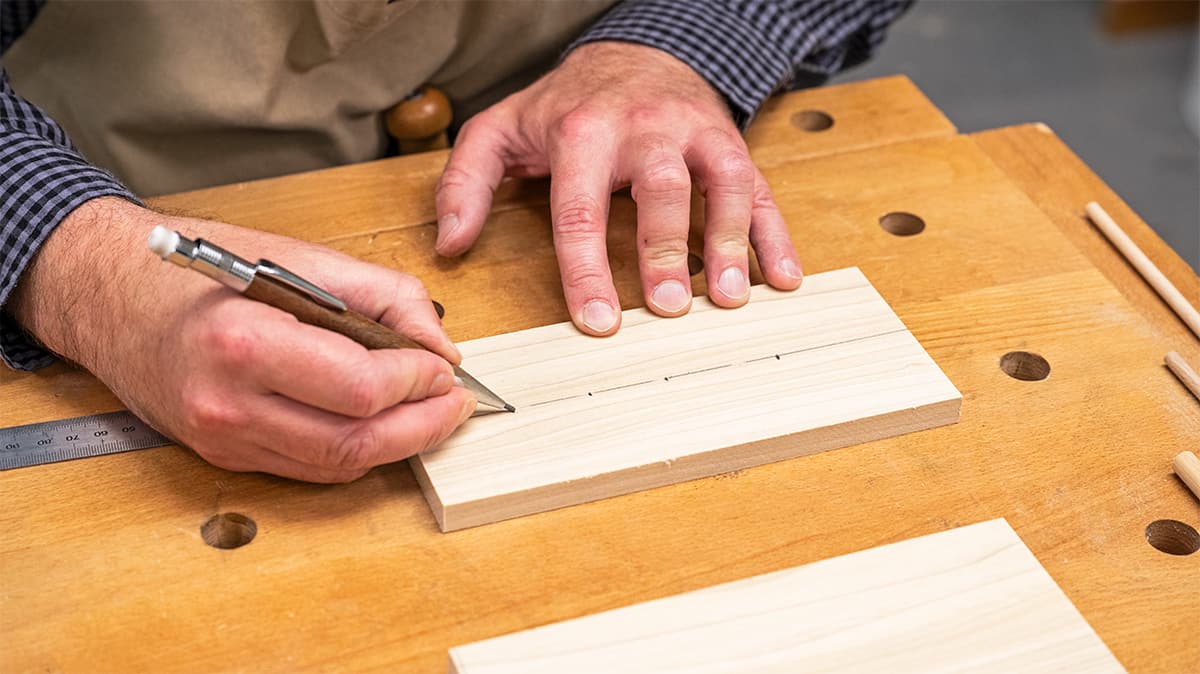
1. Choose a piece to be the top and measure and mark a centre line with a pencil. Also, draw a line from corner to corner on both end pieces to reveal the centre.


2. Mark on the centre line of the top piece where your moving parts are going to be. We wanted three chicks and a parent bird so there are four holes to drill. Consider the layout and spacing so that the moving parts do not rub on each other.
3. Set up the Pillar drill with a 4.5mm drill bit (to fit the 4mm dowel) and set the depth so that the drill bit will travel all the way through our 12mm thick piece of timber and into a sacrificial board on the drill table. This will help with breakout. Drill your holes.


4. Fit a 6.5mm drill bit into the pillar drill and drill the two end pieces in the centre, this is where the main 6mm dowel drive shaft will sit and rotate. Dry fit before glueing. The holes drilled in the top piece should sit directly above and parallel to the drive shaft.


5. Glue the top, sides and bottom together. We have used a butt joint and a quick curing 5min epoxy resin. Clamp and put to one side to dry.

Cut the moving parts
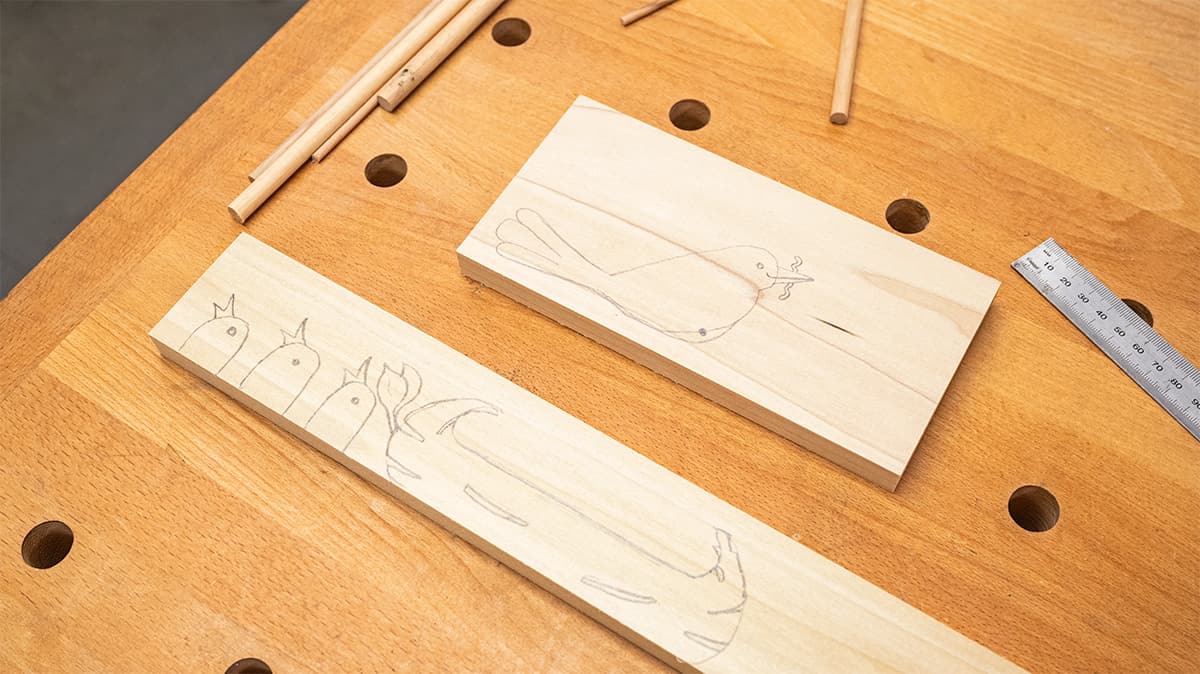
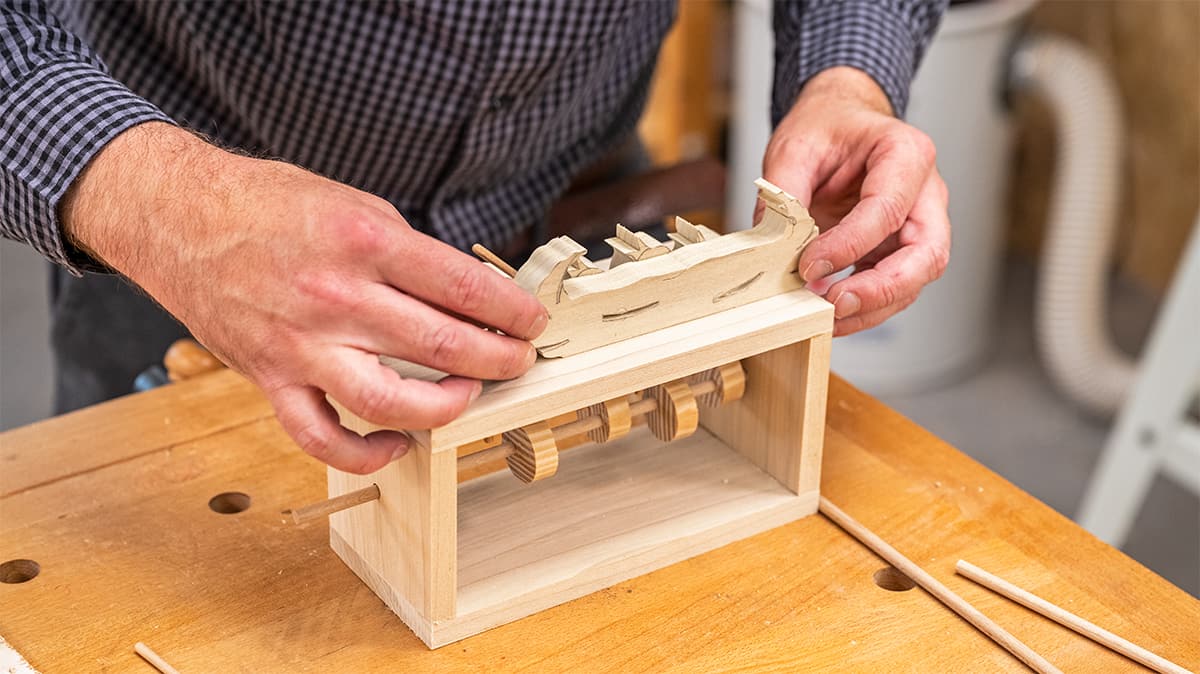
6. Now it's time to cut all the moving parts. We have three chicks, a parent bird that feeds them and a fixed nest that will mask the workings. Transfer or freehand draw out your design paying attention to sizes and spacing.
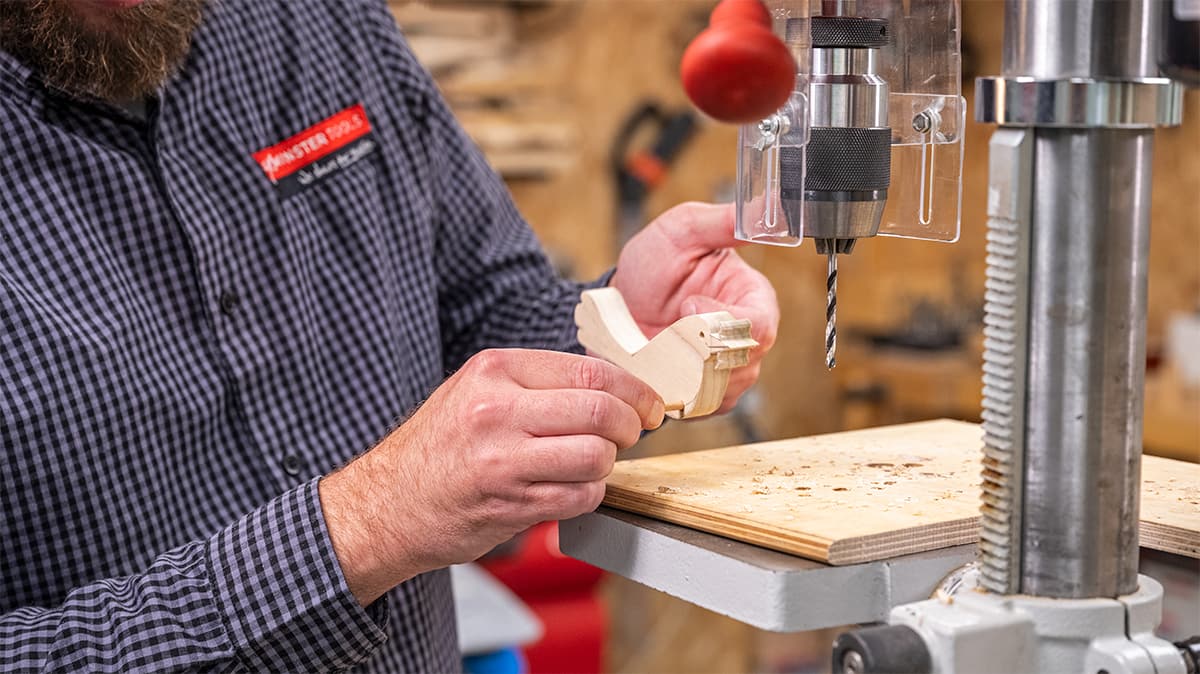
7. Depending on the design that you are making, you may wish to pre-drill some of the components with the 4mm drill bit on the underside. Cut out your designs on the scroll saw.


8. To make the parent bird dip up and down we need to create a pivot point. To do this we drilled a 4mm hole in the back of the nest and put in a 4mm short piece of dowel. The bird was then drilled at 4.5mm so that the bird can rotate on the pivot point. (You may need to experiment with this to find the correct tipping point so that the bird tips back and forth).
Create the cams and crank
9. Cut four slices of the Broom stick, roughly 10mm thick. Drill a 6mm hole off-centre. The further off-centre you drill, the bigger the movement when rotated. These will act as a cam when fitted onto the 6mm dowel drive shaft.


10. Align the cams directly underneath the holes drilled in the top and offset them to create the movement. We alternated ours so that the middle chick was coming up as the two side chicks were going down. Glue in position if necessary.

11. Fit 4mm dowel into the bottom of the chicks and cut the dowel to length. Do these individually by rotating the cam to its lowest point, then cut the dowel so that the chick rests on the top face and the dowel rests on the cam.
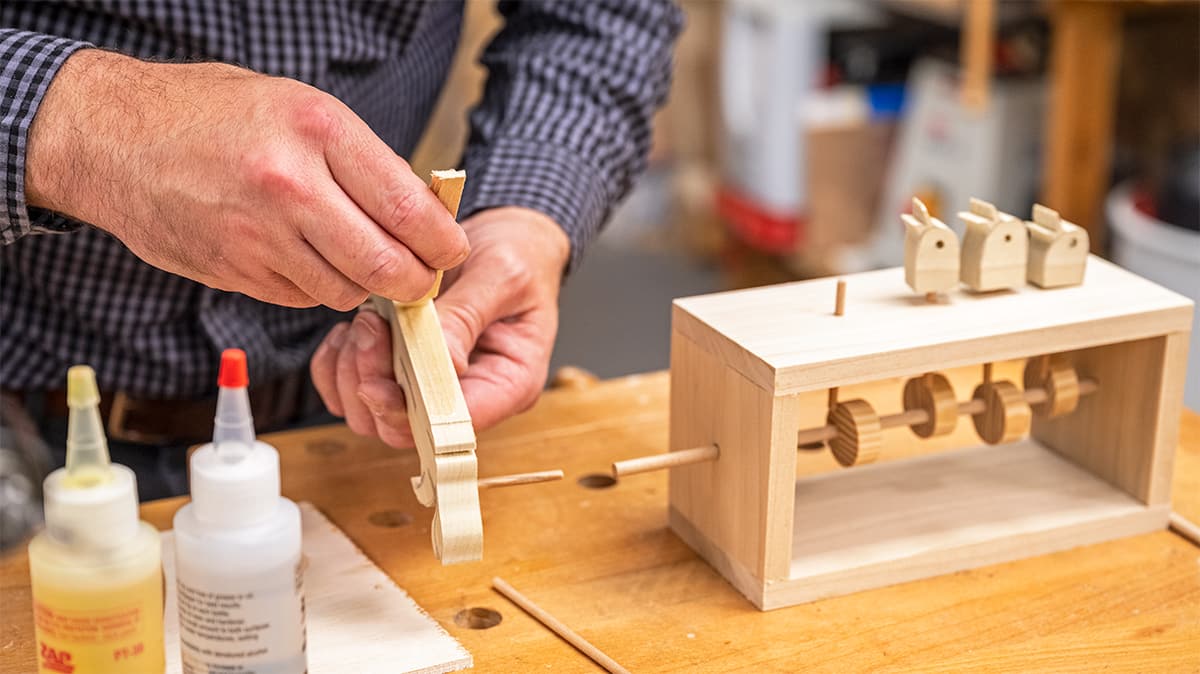
12. Glue the nest to the top leaving a slight gap between it and the chicks, allow to dry. Slide the parent bird over the 4mm dowel in the back of the nest (see step 8) and cut and fit the last dowel between the bird and its cam. Turn the main drive shaft to test. You may need to make a few adjustments and lubricate parts with a hard wax.
13. Drill two 6mm holes into an oval or lozenge shape roughly 25mm long, 10 mm wide and push it onto the main drive shaft. Cut off the excess and pop that into the other drill hole.


14. Turn the crank and watch out for any sticking or jamming points. You may need to sand off rough ends on dowels or use a lubricant to free up the mechanism.
Decorate the automaton toy
15. Decorate how you like. You could paint, stain or use pyrography. Just remember to leave any points of contact paint free as this will increase the friction.
Once decorated, you are ready to play!
Enjoyed this? Try this!
If you have enjoyed making your own automaton toy, why not have a go at making one of our Timberkits. Fun woodworking projects for all the family, these are perfect for small children to make.
Or why not try this more complex version of Ben's toy involving different cams and movements.
If you have had a go at making our projects, share your pictures with us! Search and tag us @axminstertools on Facebook and Instagram or upload your pictures to our online gallery.