Wood Turned Tea Light Candle Holder
What you'll need
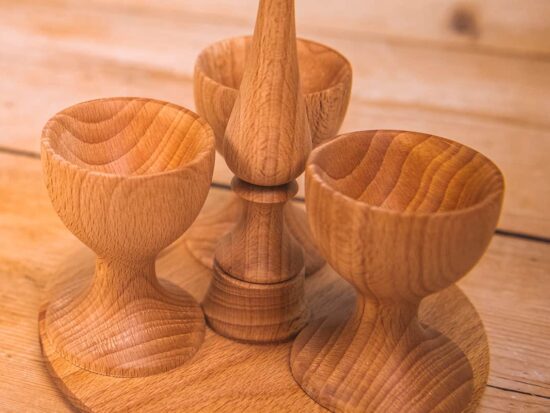
A candle holder is the perfect project for your workshop offcuts. These wood-turned tealight candle holders are the perfect size and a great project for the beginner woodturner.
A great addition to your Christmas dinner table, or use to create a cosy romantic setting, these versatile candle holders are not only beautiful decorative homeware pieces but are great projects to make as gifts or sell online or at craft fairs.
Watch Colwin in our Woodworking Wisdom demo, or follow our step-by-step guide below.
Prep your blank
Mount your timber between centres and turn down to a cylinder. Next, measure your internal service of your chosen chuck jaws and turn a tenon on the tailstock end of your blank to match the jaws.
Remove the blank from the lathe, mount your chuck, and hold your workpiece in the chuck then clean off the end of the workpiece.


Create the candle holder
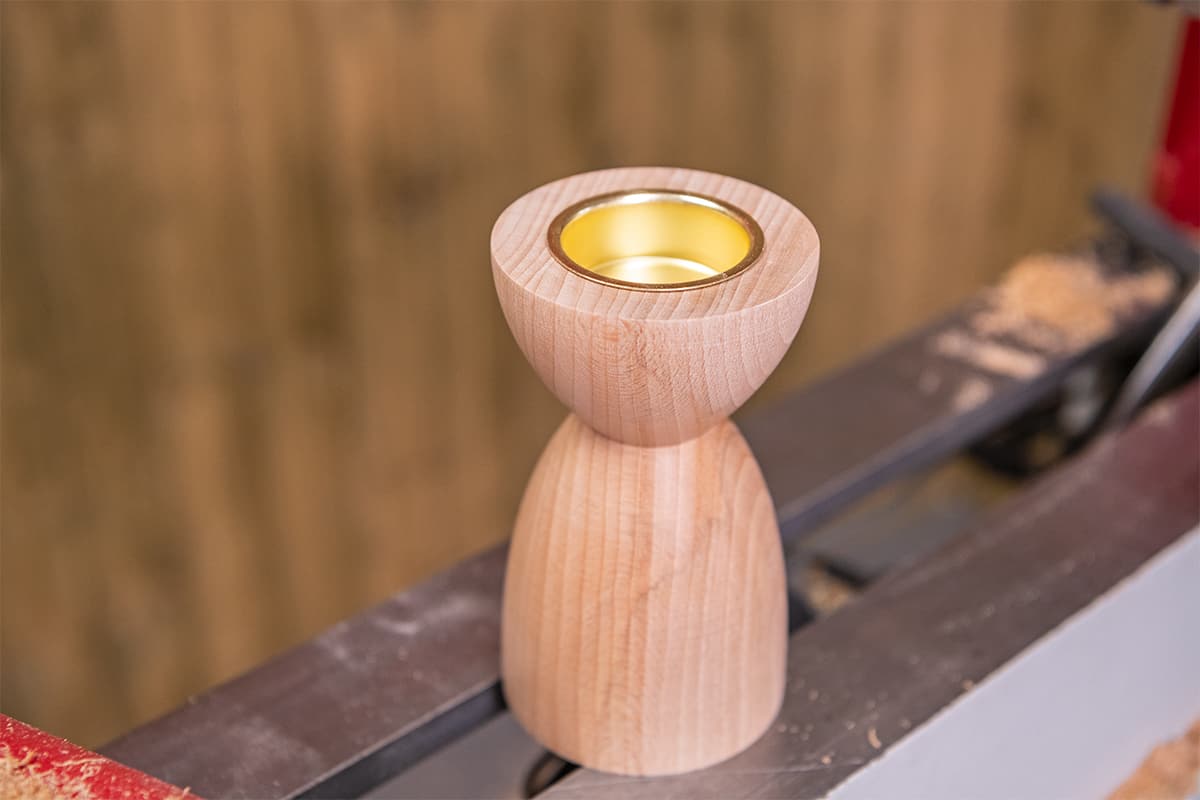
Drill a hole to take the tealight holder 20mm deep x 42mm wide.


Bring the tailstock into the drill hole to support the work while turning the outside. Turn your desired shape.
Clean the surface before sanding with a skew chisel.


Clean the bottom
Part the candle stick using a parting tool. Then, using a small set of jaws, expand them into the 42mm hole to hold the candle stick. This will give you access to clean the bottom of the piece.


Clean the bottom of the candlestick using a small bowl gouge. If needed, use the tailstock to support the piece while cleaning the bottom.
Add decoration with the skew or decorating tools if you want to add a little extra.
Sand and finish.


Made it? Share it!
If you make this project we would love to see it. Share your pictures with us on social media. Search and tag @axminstertools on Facebook or Instagram. Or upload to our online gallery.
If you enjoyed making this candle holder, why not try our Christmas candle arch project.