
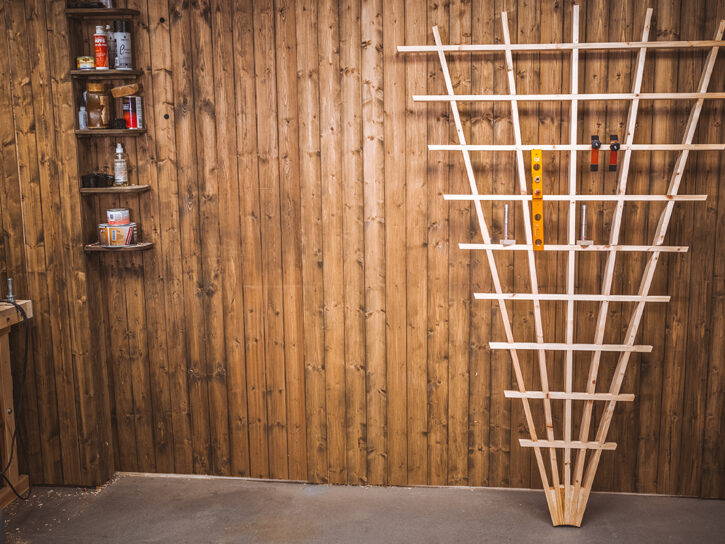
How to Make a Garden Bench
In this article we show you how to make a garden bench that is lightweight and easy to move and perfect for any size garden. It uses simple halving joints to create an elegant design...


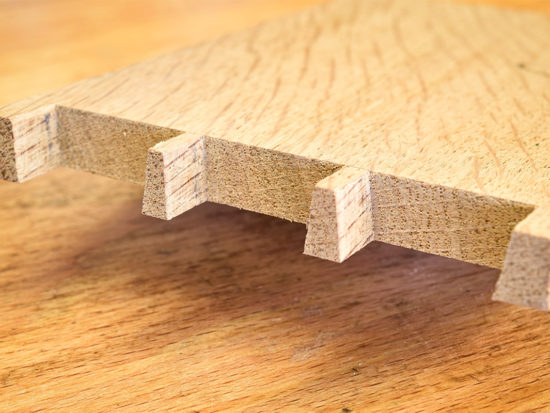
A halving joint is a useful woodworking joint best suited to frameworks. This joint joins two pieces of timber by cutting the full width of each part by half the depth and then overlapping.
It’s a simple joint, but requires attention to detail as any imperfections can be seen.
In this article, we show you how to cut a halving joint by hand, as well as demonstrate other ways to achieve the joint using a mitre saw, table saw and router.
Watch our Woodworking Wisdom demonstration with Sean Evelegh, as he guides you step by step in how to cut a halving a joint by hand. Or read our guide below. You can also watch some of the other methods using machinery, to help speed up the process.
First, prepare your timber so it is square. You can either do this with a planer thicknesser or by hand. You can also buy your timber ready square.
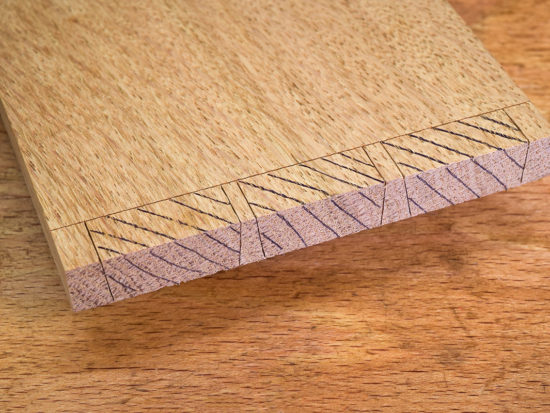
Next you will need to mark out the position of the halving joints. Make a pair of knife lines all the way round each piece. The distance between the lines should be equal to the width of the wood, or slightly less (0.5mm) for a very tight fit.
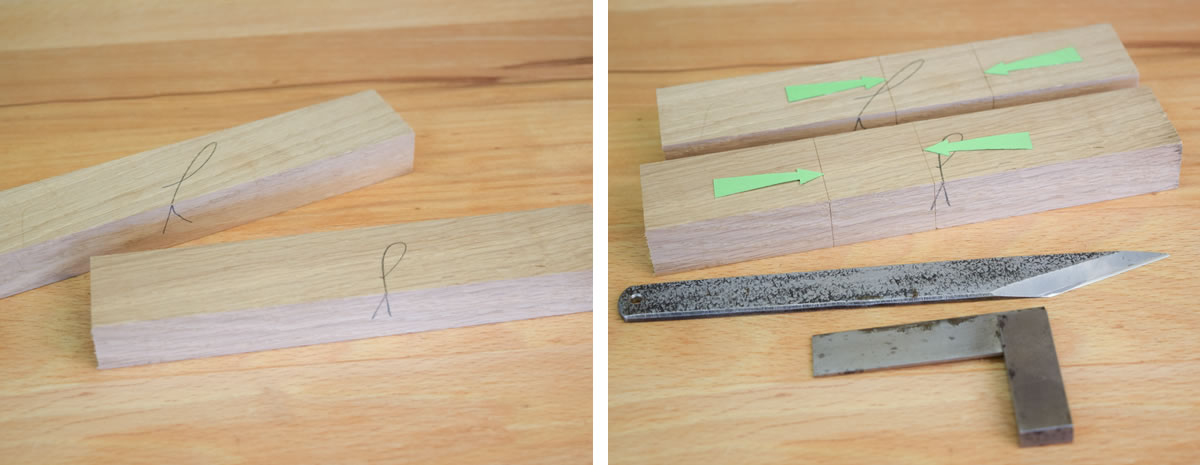
Next, set a marking gauge to half the thickness of the wood and gauge a line along the edges between the knife lines on each piece. Then mark the waste on alternate sides (arrowed).
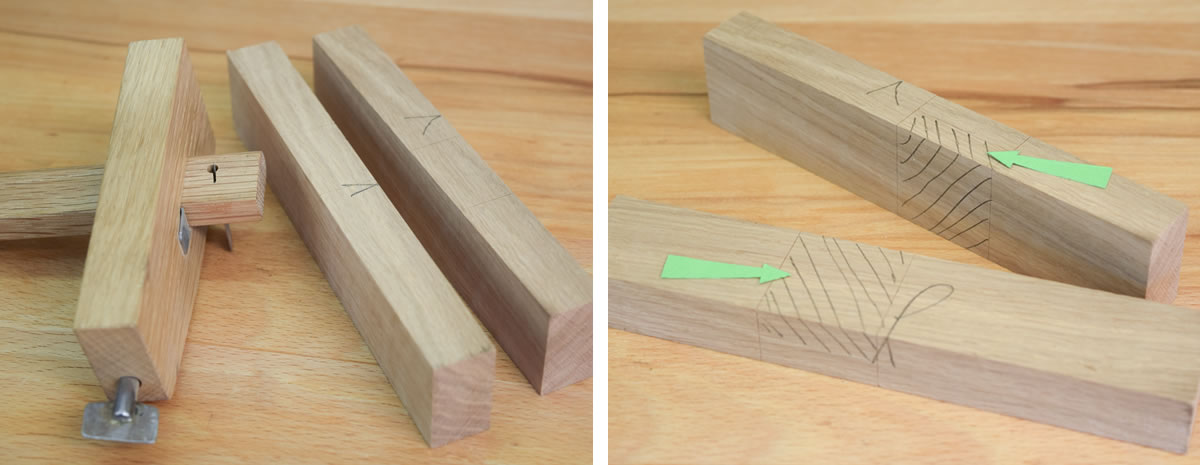
Then, reinforce the initial knife line cuts on the waste areas and then use a bench hook to steady your workpiece as you prepare to make the cuts.
With the joints marked out and double checked, cut the halving joints. You can do this is various ways, depending on what tools you have access to.
Watch our video on how to cut a halving joint using different methods including by hand, with a mitre saw, table saw or hand held router.
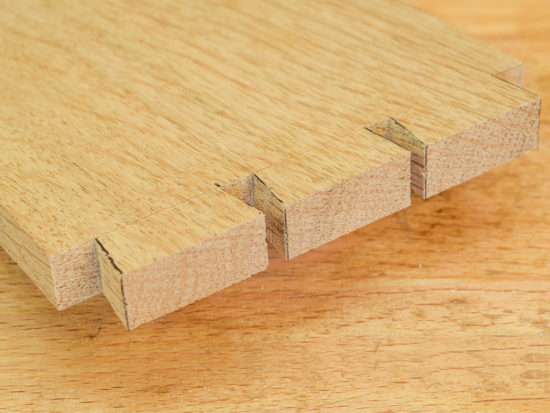
If hand cutting, clamp your board to your bench to hold it in position and use a saw to cut the shoulder lines down to the marked depth line. Use a support block which is half the depth of your board to act as a depth guide. Make several cuts about 20mm apart between the shoulder line cuts. Then, use a chisel with the bevel face down and a mallet to remove the bulk working in towards the centre of the board, reducing the breakout.


With the bulk removed turn the chisel over (check whether re-sharpening is required). Flatten the rough removed section, working in from both sides to level this down to the support board. A shoulder plane or even a Japanese carvers rasp helps with this.


Begin by unplugging from the mains power whilst setting up. Set the depth of the cut. If possible, set out a start stop block to limit the amount of movement of the board when being cut.
Double check that the cut is level all the way through and if needed, use a parallel piece of material behind the workpiece to allow this to be cut level. Work from one end to the other feeding the board from right to left (if right-handed), taking small cuts about the width of the blade apart. Break off the scrap thin sections and level back with a chisel or carver's rasp.

Isolate from the power whilst setting up. Use a sliding bevel to set up the angle of cut. Working off the flat of the saw blade ensuring that the teeth of the blade are not interfering with this set up, adjust the fence to align the angle cut.
Adjust the height of the blade to the halfway line, then set up length stops either side to allow only the material that needs to be cut to be removed. These can be the flip stop on the fence and the main rip fence.
Take several cuts working along the length of the board to remove the bulk, then break off the thin sections and clean up with a chisel, shoulder plane or carver's rasp.


To do this, use a straight bottom cut cutter. You will also need to make a very simple jig. The jig is made from two pieces of batten (530mm x 40mm x 35mm) and a piece of sheet material (400mm x 300mm x 10mm+). Cut accurately and ensure the cut is clean and smooth using a plane, if needed.
Clamp the battens either side of the marked-out workpiece. Load the router cutter into the router (isolate from the power), then measure from the edge of the cutting tip to the outer edge of the router base.


Mark this length to either side of the marked out joint, clamp in place, pilot drill and screw the sheet material onto the battens to fix in place. Clamp this jig in place. Then, set the depth stop to limit the depth of cut to the halfway depth line. Start in the centre of the workpiece and work out towards the sheet material. This allows more stability. Lower the cutter into the work down to the depth stop and move back and forwards to remove the waste material. Ensure that the measured side of the router base meets the edge of the sheet material.

Once both sections of your timber have been cut, test fit your joint. Once happy you can glue the joint together.
Once you have mastered your halving joint skills, you could try and make one of these other projects. If you have made one of our projects, we would love to see it. Share your photos with us on social media. Search @axminstertools on Facebook or Instagram and share your project pics with us.


Step 6, 2nd sentence is garbled. I would make sawcuts into the waste just inside the line, allowing for finishing with a chisel on the line.
Thank you and well spotted. It should read 'Saw cuts slightly away from the lines...' That said, you can clearly see the finished saw cuts in Step 8.
I would like to comment about the knife lines, my college tutor from many years ago (Jack Lazenby at Rycotewood College) would have had my guts for garters if I had left knife lines on the visible side of a joint.
Good knife lines are an essential part of marking out but they should only be used where they are needed.
Thanks for the comment Nic and yes, I would agree but in this instance the lines were left to aid clarity in the process and under normal circumstances, they would be removed. Planing off marking out lines is a moot point though, particularly on drawer sides. Some makers remove them and some leave them showing and there's no real consensus as to what is right. As ever, we have to go with with our own personal convictions and I always plane them off.