Make Your Own Garden Trellis | How to

What you'll need
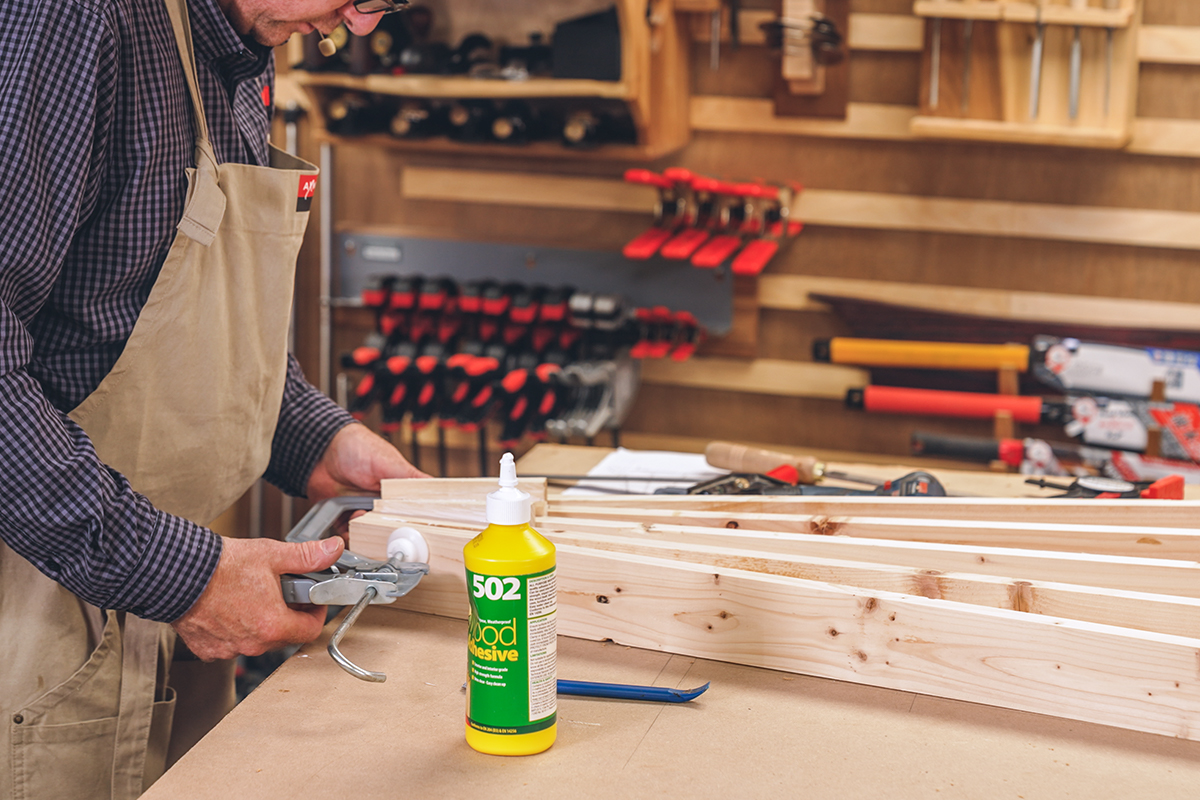
In this article we show you how to make your own garden trellis without the use of screws. Instead we have opted to use simple, repeatable halving joints to create a framework that slots together. The benefit of making your own garden trellis with this method is it will be built to last for many years to come.
This project can use any timber, but is great for using pallet wood.
If you want to learn how to make your own garden trellis, watch Jason in our Woodworking Wisdom demo, or follow our step by step guide below.
Create the template
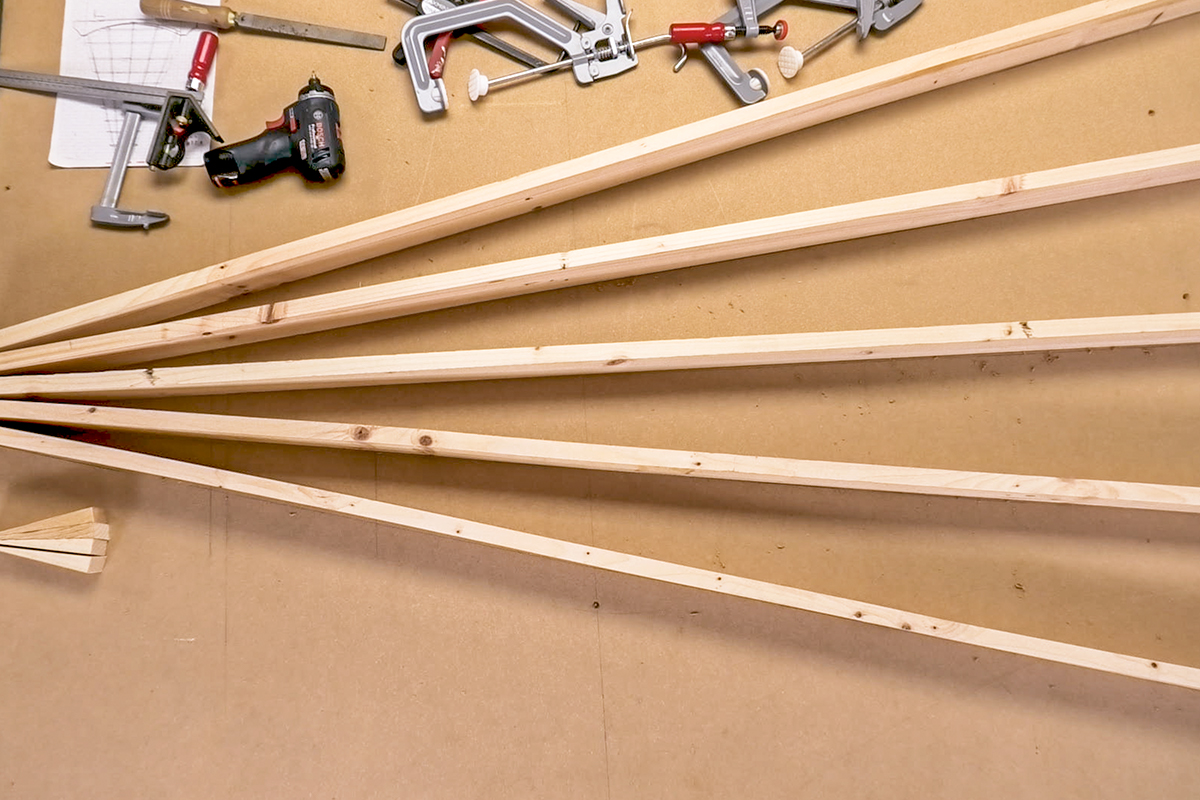
Begin by drawing out your template on a piece of MDF. You will see when looking at this design that, every joint has a slightly different angle, and position. The tricky part of this project is knowing how to accurately cut these. In this case, we have decided to take the saw to the work and not the other way around.
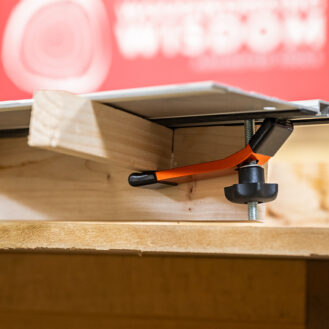
With the location of each of the vertical rails drawn on some MDF, mark a central line for each of these uprights. Then, mark out and drill the screw holes through the MDF sheet. Position the five upright rails, clamp in place, then screw up through the MDF into the pine sections to fix and hold these in position.
To strengthen the base and to join the five up rights together, mark out and cut some taper sections, narrower than the main uprights, to allow access for the climbing plants to grow. Next, carefully cut these using a bandsaw then clean up the sawn face and glue in place. Clamp to hold until dry.
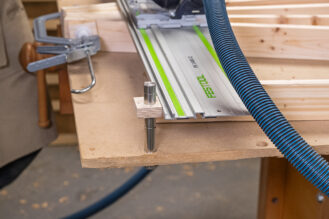
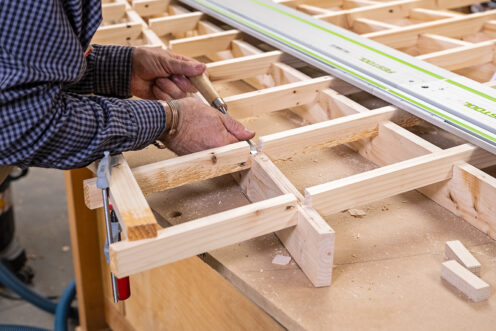
Drill your Parf holes
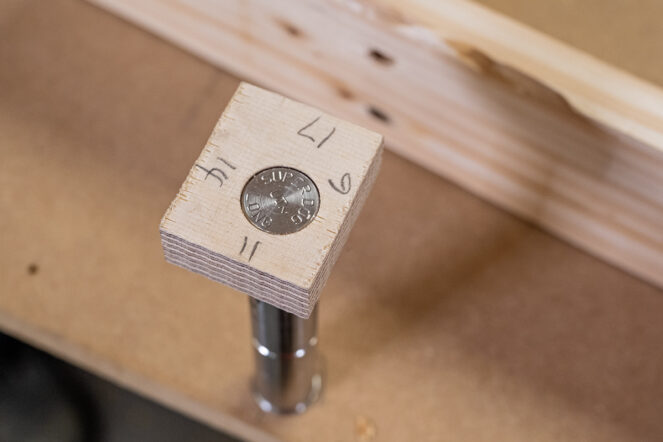
To make the halving joints accurate and repeatable we used the UJK Parf Guide Mk II System. This allows the accurate drilling of a series of holes along either side of the MDF board. Measure from the same end of the MDF board, mark out and drill the guide holes using the Parf rule and drilling guide, then use the main drilling jig to drill out the 20mm holes that are required to hold the Parf Dogs and guide rail. Drill all the small pilot holes to create a line. Then, using the drilling jig, drill out every other to 20mm diameter to house the Parf Dogs.
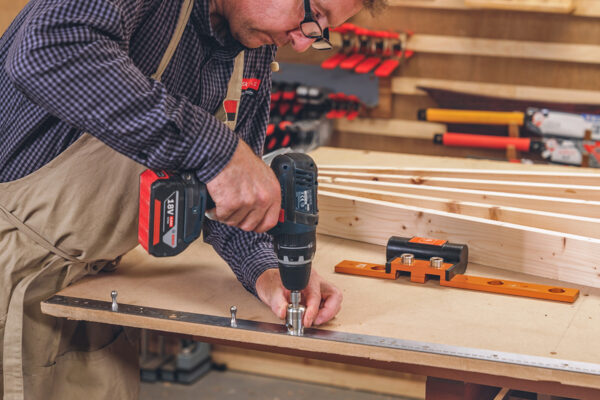

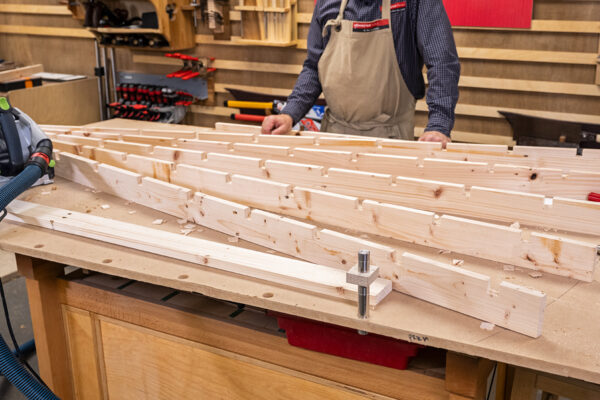
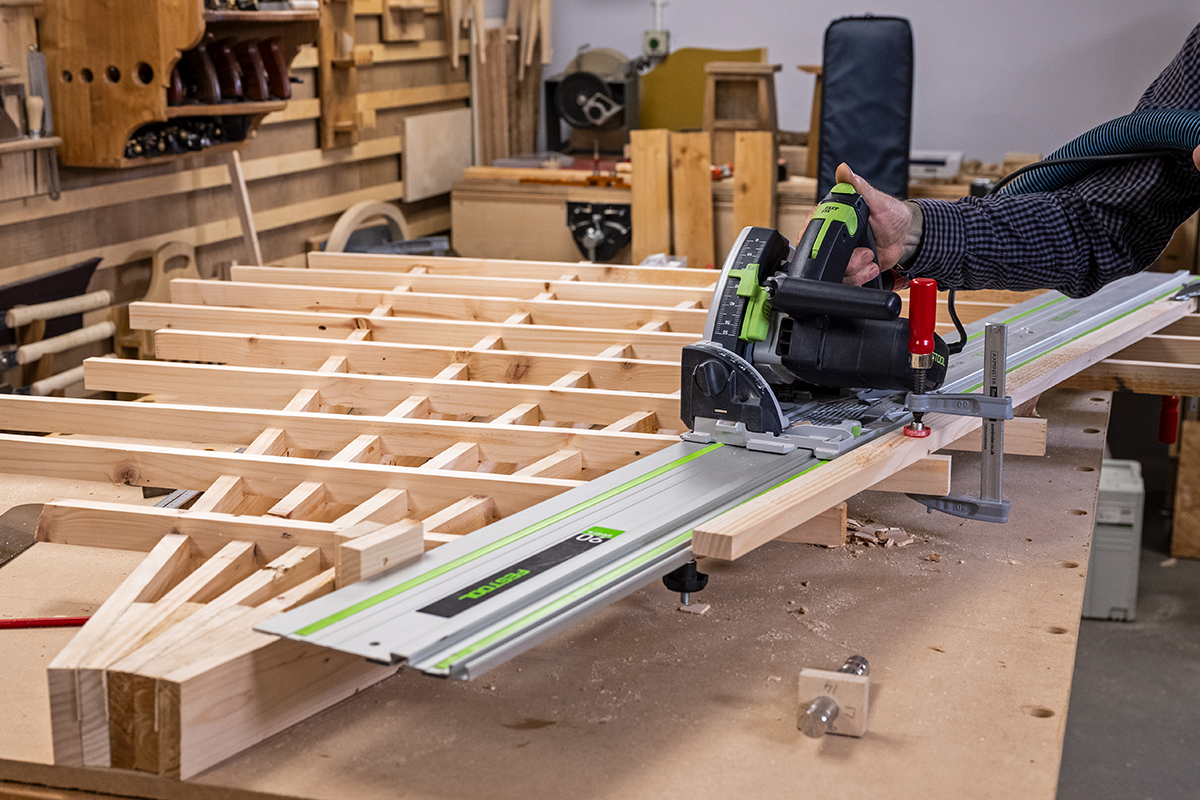
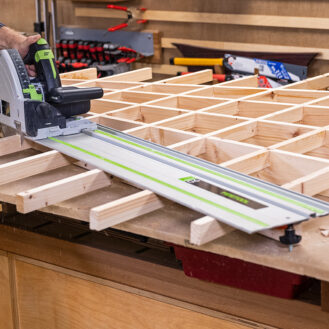
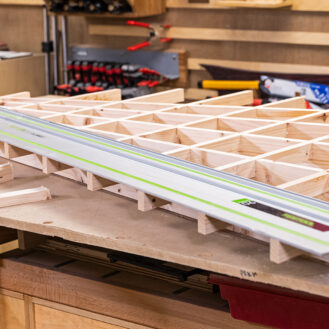
Use two Super Dogs, one either side of the MDF board in the same 20mm, aim to position the first horizontal rail about 300mm up from the base, to hold the guide rail in place use two UJK Parf Dog Guide Rail Clips. Due to the narrows width of to support the guide rail a waste section of timber was also used to help keep the rail level. Set the depth of cut to about 20mm. Do the first cut across the 5 uprights
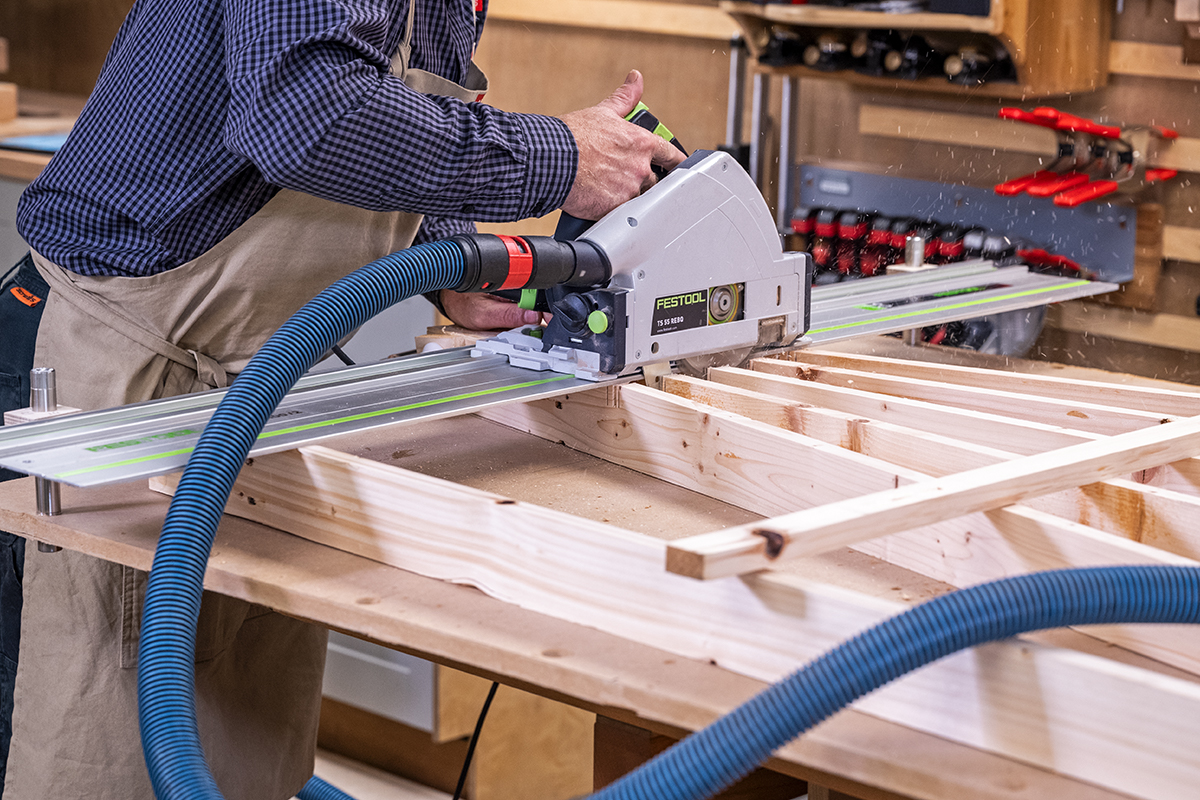
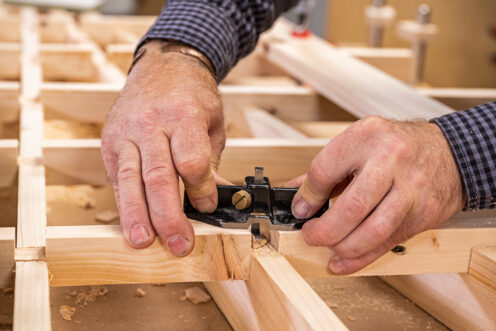
Make your horizontal cuts
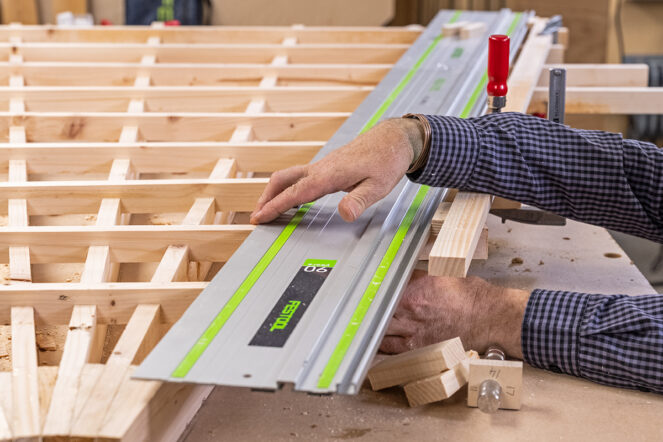
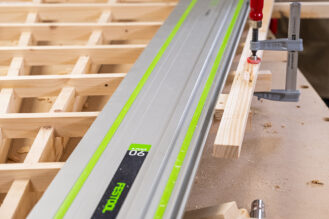
Next, move the guide rail up to make the width of cut the same width as the horizontal material. To ensure we can make repetitive cuts we need to make a guide block to locate onto the top of the Parf Dog. We started with a piece of plywood cut to 48mm x 40mm. This block will help to produce a series of cuts that will make the material easy to remove in each of the horizontal halving joints.
The width of the material we used was 20mm and the saw blade is 2.2mm. This creates an offset of 17.8mm. We want these to fit together firmly so made this 17mm, then removed about 3mm off this 14-11 and 6mm. We transferred these measurements on to the guide block, set off the drilled 20mm hole.
By moving the block around on the Parf Dog, and ensuring the guide rail is up against the face of the four sides of the plywood block, four repetitive cuts can be taken to the 20mm depth. This offset creates the width of the cut
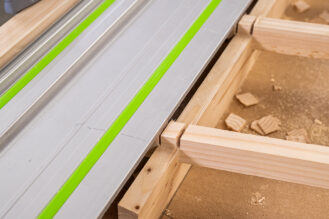
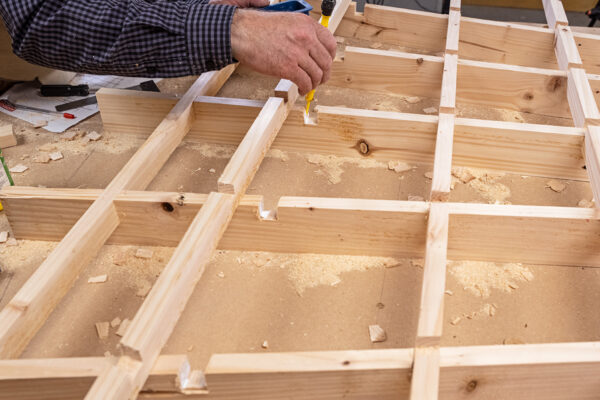
The narrow sections between the cuts can be broken off and a chiselled to clean up the surface to level between the saw cuts. Locate the first rail and check this sits flat on the cut surface. This at this stage will be about 15mm up above the vertical rails.

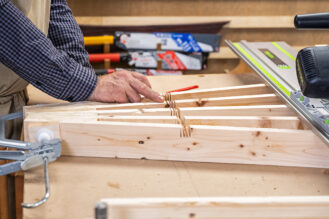
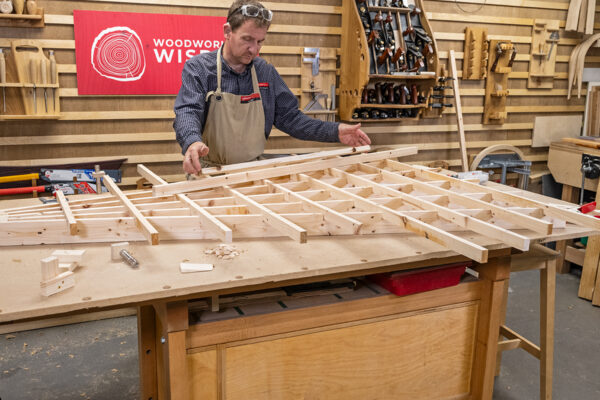
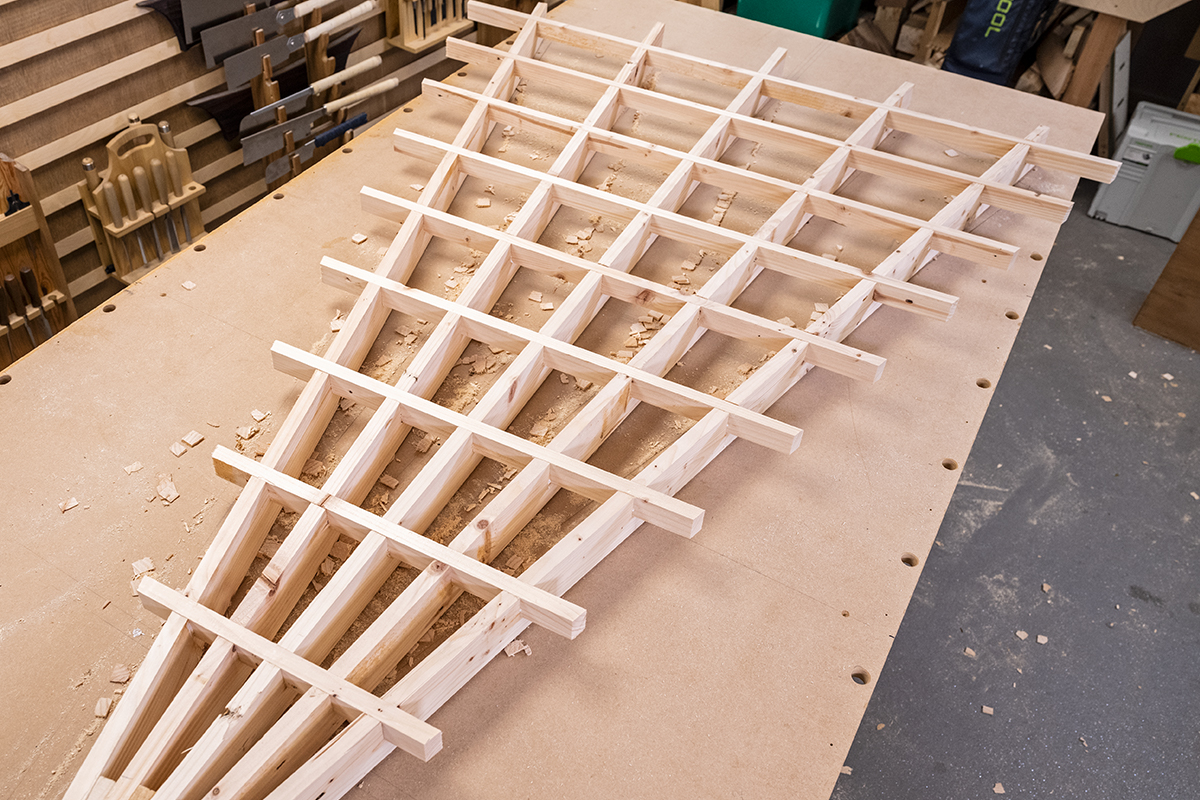
You can then repeat this process so that all the horizontal cuts are made and cleaned up. Then, insert the horizontal rails, starting with the longer selections. Use the better material for these. The short lengths can be taken from the material that has more knots. Leave these over length at this stage they will be cut at the end.
Make the vertical inserts
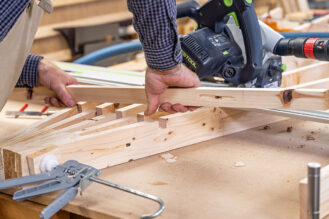
To cut the halving joint into the horizontal, we used a joiner kit to lengthen our guide rail. Join a 1,200mm and 800mm guide rail together.
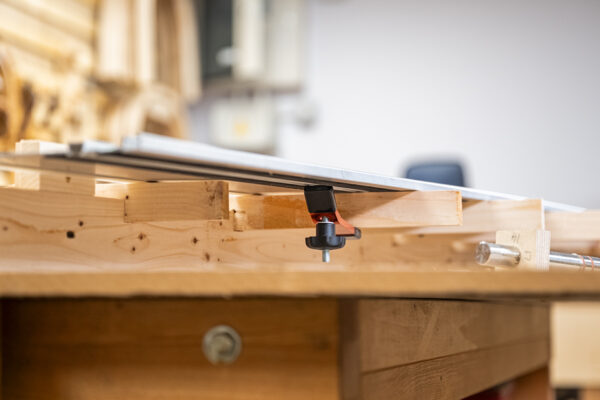
The vertical rails below are the template for this cut. Using some offcuts of the same thickness material, make two little T shaped brackets. These will act as stop points against the guide rail. These are screwed together and can be placed on top of either end of the vertical rails and clamped in place. Then, slide the guide rail up to the edge of these brackets and clamp in place. UJK hold down clamps are perfect for this as they will slide into the underside of the guide rail and clamp onto the horizontal rails.
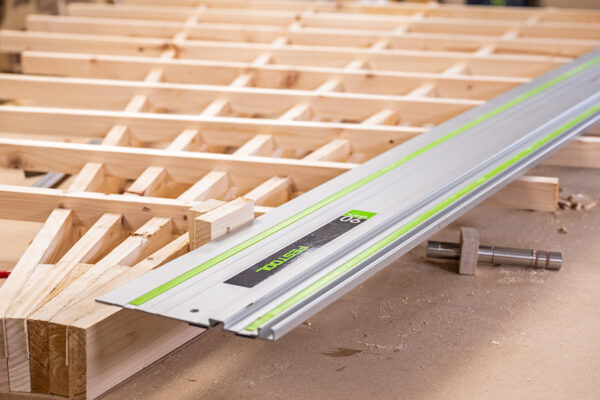
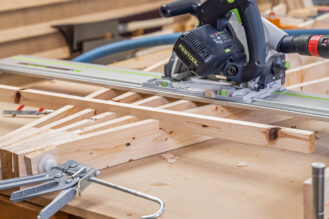
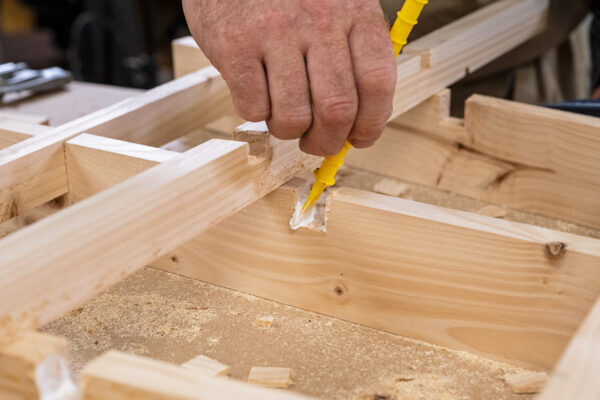
With the guide rail fixed in place, clamp on a straight batten on the outer edge and fix the clamp onto two of the horizontal rails. This becomes the measuring point to offset the guide rails. Rest the depth of cut so that when the saw is on the guide rail it is just short of the vertical rails. Take the first cut, cutting across the upstanding sections of the horizontal rails.
With the first cut done, undo the clamps holding the guide rail and place a 17mm block between the clamped on batten and the guide rail. Re-clamp the guide rail in place and take the cut through the horizontal rails. Then, remove the 17mm spacer block, move the guide rail back about 5mm and take the cut. Then move the rail back again and cut - this will leave 3-4 short grained sections that can be broken off and chiselled out. Or easier still, use a small router plane as the framework starts to block the access to cut with a chisel.
If the joint fit is too tight, then add a layer of masking tape to the edge of the 17mm spacer block. Repeat this set up for the rails.
Assemble and glue
Carefully remove the horizontal rails turn these around 180 degrees, check that the top rail will locate, then start to glue these in place using a water-resistant glue. Use a clamp to help hold the outer edge of these and use a rubber mallet to tap these together.
Mark out the measurement for the two outer cuts to trim the horizontal rails to length. Clamp on the guide rail, reset the depth of cut on the saw and trim these off. With this done, remove the screws that are fixed into the underside of the MDF sheet to allow the trellis to be separated from the template.
The completed trellis is now ready to come off the template board.
Made it, share it!
If you have made your own garden trellis and want to learn more, why not try our potting table project? If you have made any of our Woodworking Wisdom projects, we would love to see them. Share your pictures with us on social media, tag us @axminstertools on Instagram and Facebook or upload to our online gallery.