Make a Sofa Tidy and Table | How To
What you'll need
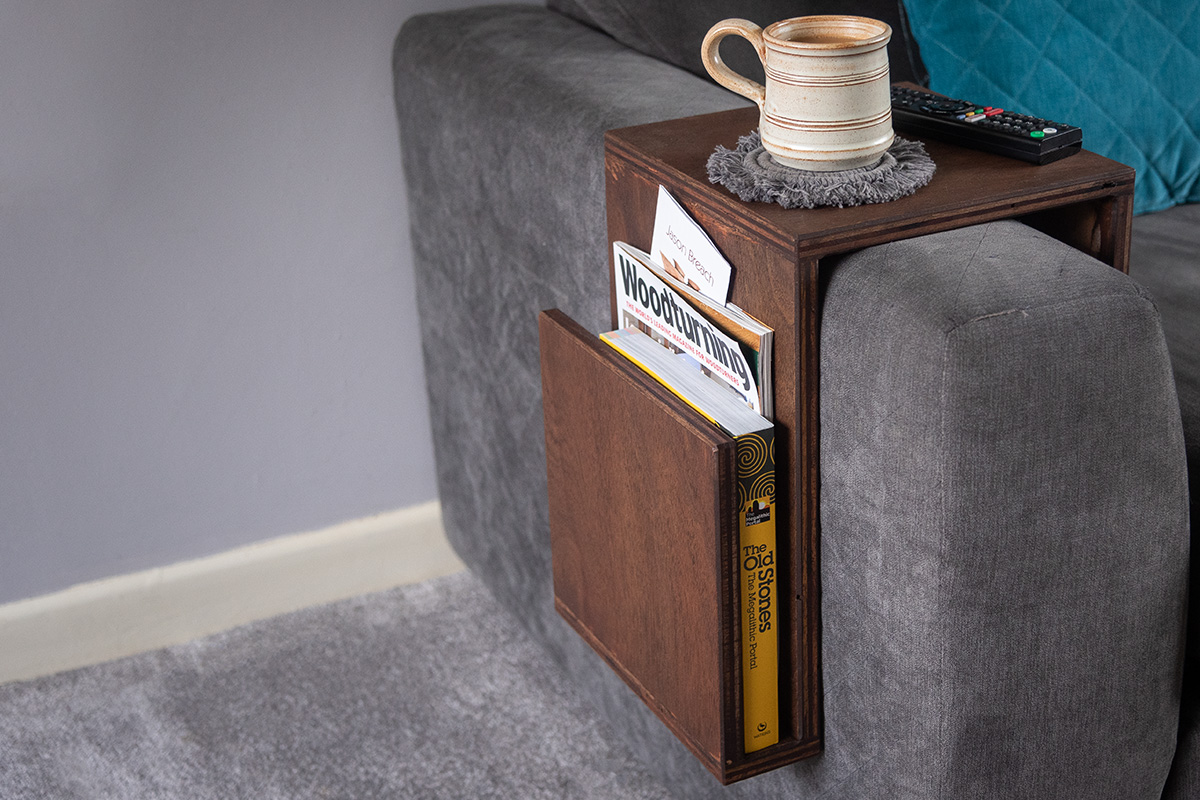
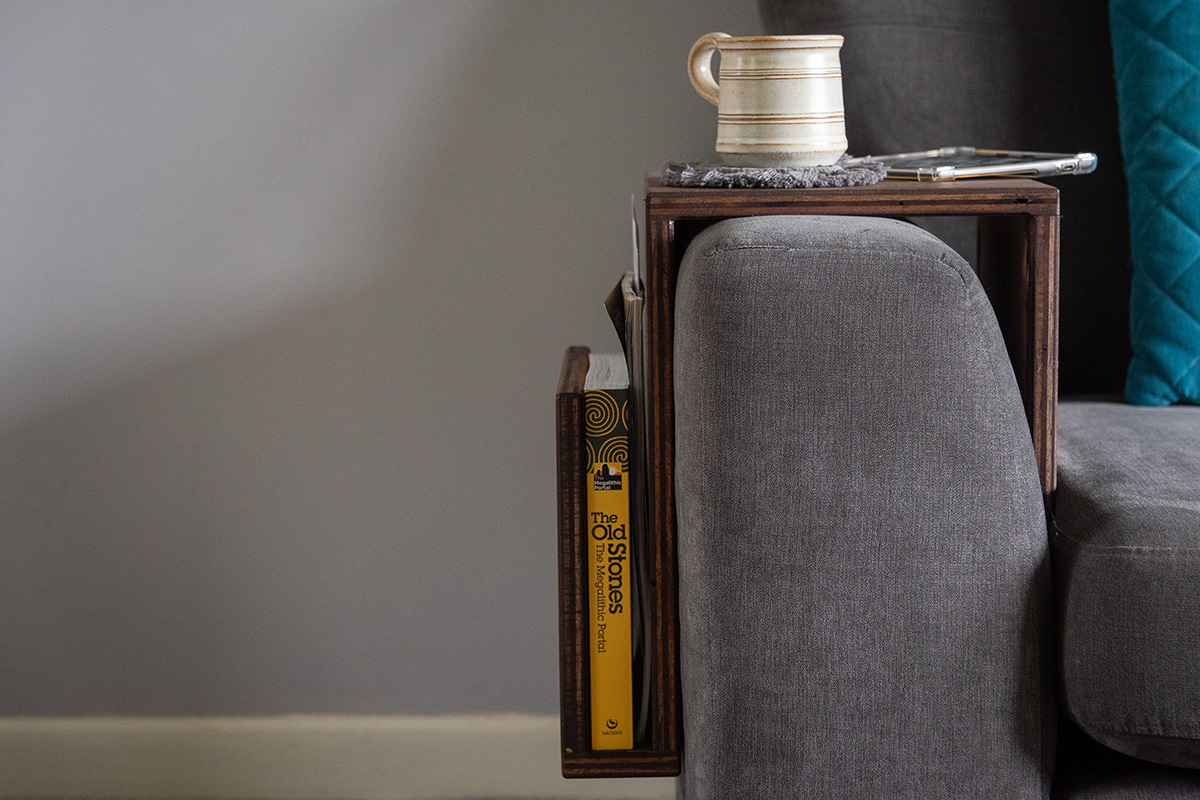
This article will guide you step by step to make a sofa table and tidy to keep your armrests clean of tea rings and keep you magazines within easy reach. A simple and quick home DIY project that is great for those woodworkers that own just a few tools or who are new to woodwork.
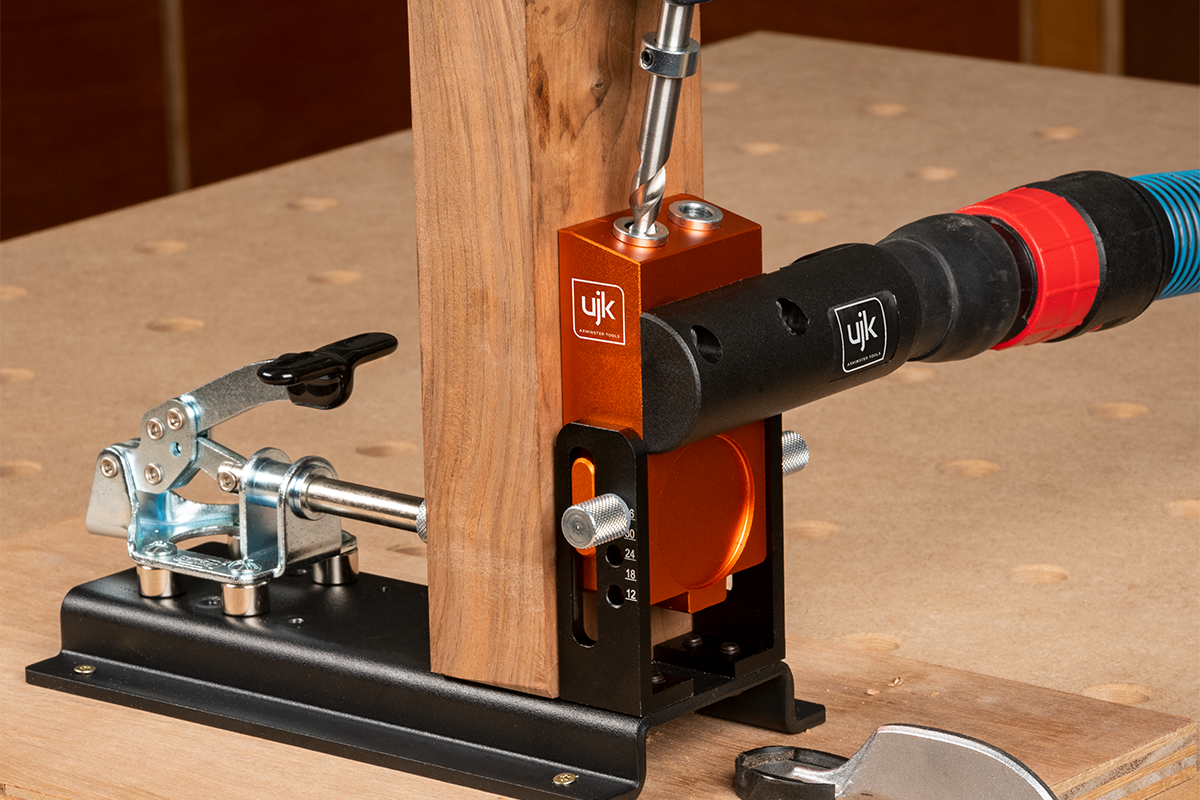
This project uses a pocket hole jig to help drill hidden holes accurately, ready for gluing and screwing.
What is a pocket hole jig
A pocket hole jig is great for making strong, hidden joints fast and is great for many applications. From helping swiftly make frames for furniture, kitchen fitting and more; the list is almost endless. Use the jig and drill a hole at an angle into one workpiece, then join it to a second workpiece with a self-tapping screw. Take a look at our UJK Pocket Hole Jig here.
Make a sofa table
Watch our Woodworking Wisdom demo to make this simple sofa table and tidy or follow our step by step guide below to make yours.
Measure up and cut your timber
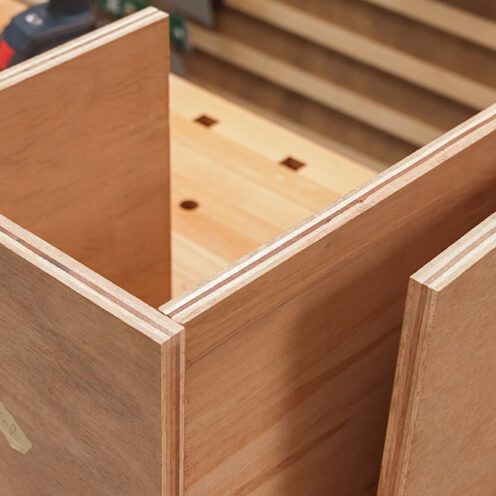
The first stage of this project is to measure the sofa arm that this will be positioned onto the internal face needs to drop down the side of the seating cushion to help hold it in place and this will need to be measured too. For this project we used an offcut of plywood. Using your measurements make a rough drawing to work out the sizes to get the best out of the plywood.
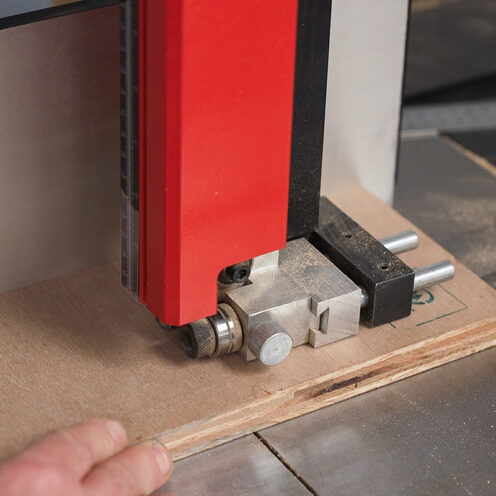
Next, cut the plywood to the required sizes. You can do this using your favoured saw, either a handsaw, table saw or jig saw. We used a bandsaw.
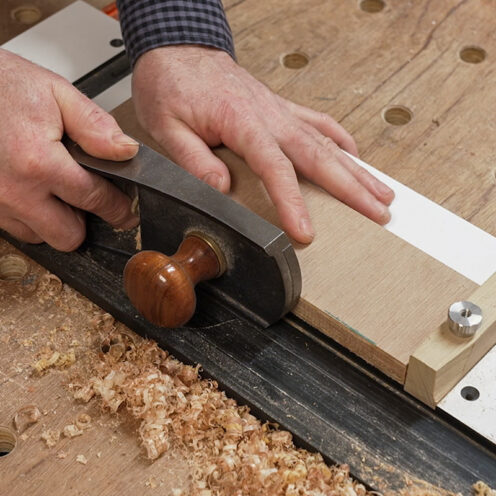
To ensure everything is straight and square, the sawn edges are cleaned up using a shooting board.
Rough assembly
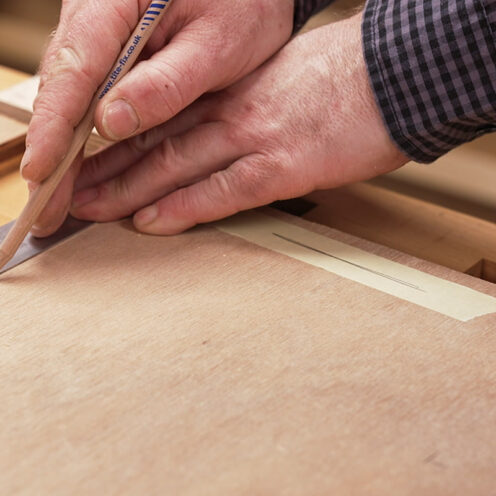
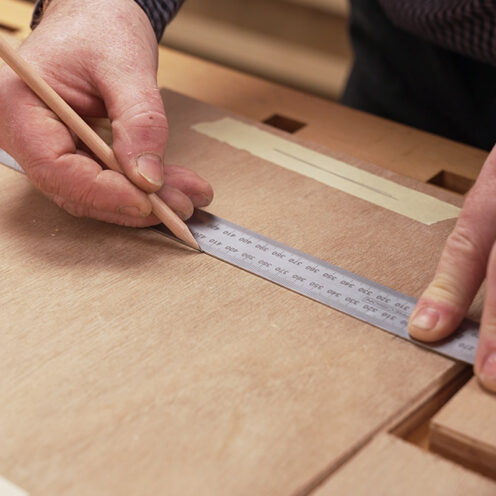
Lay the components out in order that these need to be assembled. This allows you to double check the sizes, understand which way the boards will come together when jointed and which side the joints need to be on the boards to hide the joint screw holes. We used masking tape to label the face side of the boards.
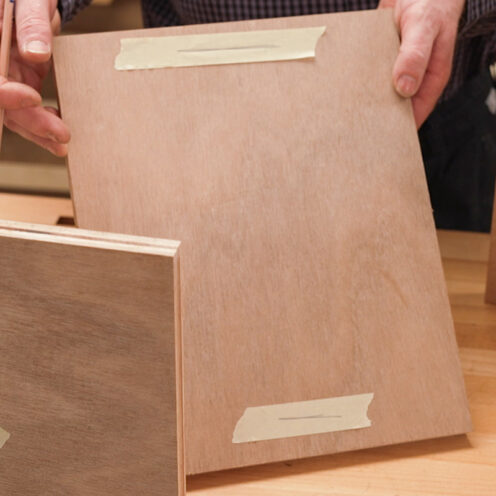
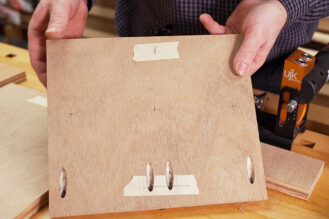
The pocket hole screw holes ideally want to be on the back of the boards. To highlight where these will go, stick strips of masking tape to the side of the boards where the joint will be drilled and mark out the position of the pocket holes.
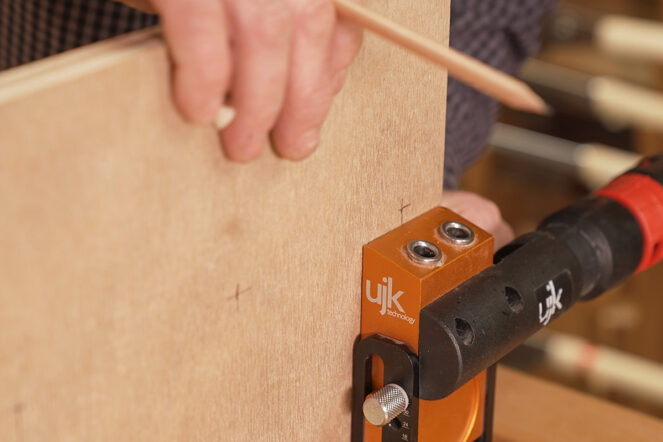
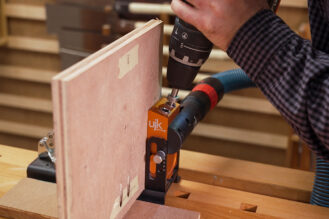
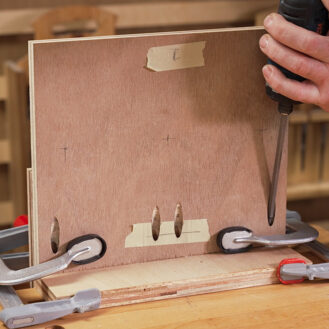
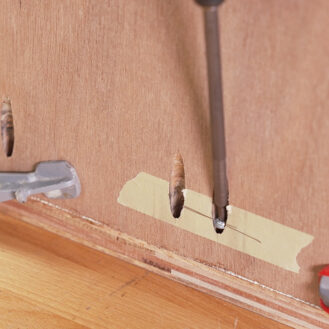
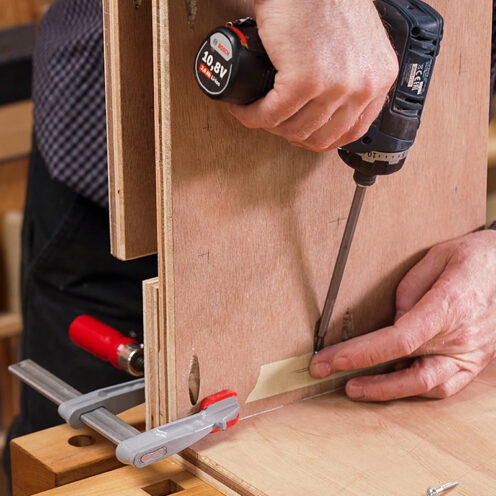
Make your pocket holes
Set up the pocket hole jig, adjusting the jig for the board thickness, drill length and clamping pressure. Load the boards into the jig and align the positions of the joints to the jig. Then, drill the holes in short bursts to clear the waste down to the collar stop. Repeat this to drill all the pocket holes.
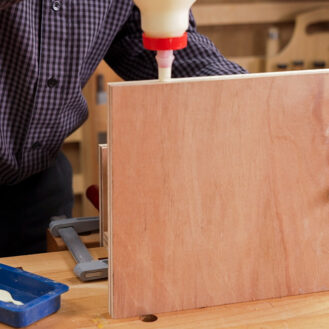
Glue and screw the sections together, paying attention to which way these go. Check the screw size and type. Also think ahead as the corner edges will need softening so think about access to do this and which boards you can screw together.
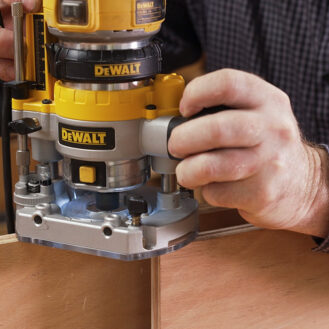
Soften the edges
To soften the corner edges of the board, a chamfer cutter and router can be used. Access and stability can be an issue when using a router on thin edge section like the plywood. Before gluing the project totally together, assess which edges need doing and which face to work off. With the routing done, complete the gluing up and then check the routed edges. Remove the masking tape and sand the outer faces, and edges. Finally apply a finish of your choice.


Enjoyed this? Try this!
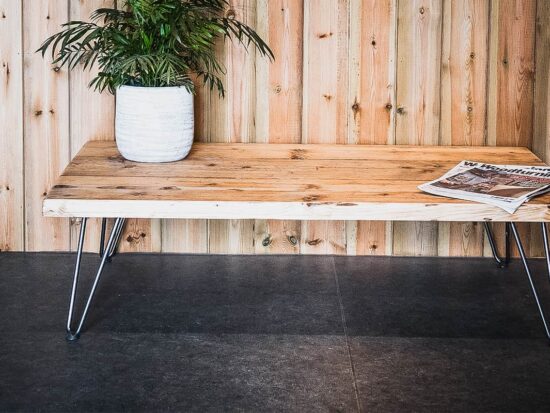
If you enjoyed this home DIY project, why not push your skills and have a go a making a folding camping table or have a go at making a bath tray. Both are great projects for getting into woodwork and are useful around the house.
If you have made any of our projects we would love to see them. Share your photos with us on social media. Search and tag @axminstertools on Facebook and Instagram. Or upload to our online gallery.