Make Your Own Garden Trellis | How to
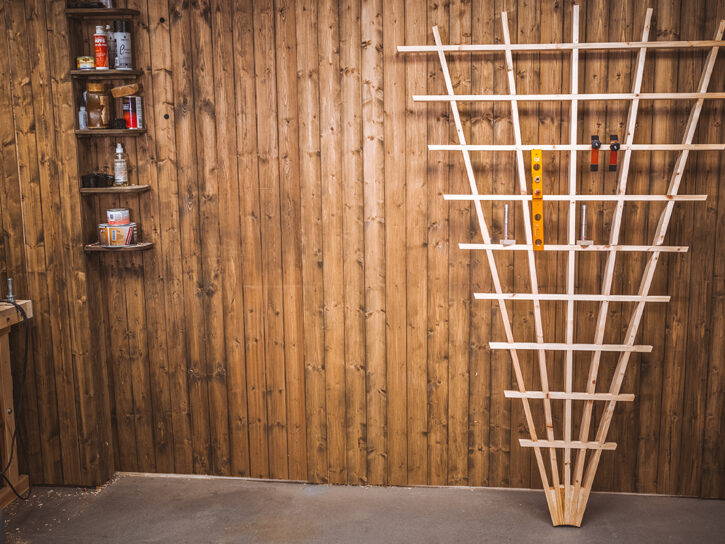
In this article we show you how to make your own garden trellis without the use of screws. Instead we have opted to use simple, repeatable halving joints to create a framework that slots together....


In this article we show you how to make a garden bench that is lightweight and easy to move and perfect for any size garden. It uses simple halving joints to create an elegant design feature that's a little different.
A halving joint is a simple joint to achieve and can be cut with whichever saw option you favour. This bench looks impressive and is easy enough to make with simple tools, whether you have a hand saw or a table saw.
Watch our Woodworking Wisdom video guide on how to make a garden bench or read our step by step guide below.
For our bench we have chosen to use wellingtonia, or giant sequoia, a native tree to California, but UK grown. This is a good choice for an exterior project as it will withstand weathering. Other UK timbers that could be used include western red cedar, larch, sweet chestnut and oak. For advice on how to select timber, read our blog.
If you have no access to a planer thicknesser, then pressure treated soft wood bought pre machined to size could also be used for this.
The main design feature of the bench is the halving joint that connects the main front and back rails. These joints can be cut in several ways, by hand, mitre saw with a depth stop, table saw and even using a handheld router and a very simple jig.
Begin by machining your materials to size using a planer thicknesser. The spiral block planer makes short work of this, and breaks the shaving down into smaller particles leaving a better finish.
Mark out the position of the halving joints on the back leg and front seat leg sections. Measure up from the base 230mm back leg and 280mm front leg. Use a pencil to a mark line squarely across the face of the board and then mark out the angle cut line, which is five degrees. Highlight the material is going to be removed to make the joints fit together. Use a marking gauge to scribe a depth cut line as a guide to cutting the halving joint.
With the joints marked out and double checked, cut the halving joints. You do this is various ways, depending on what tools you have access to, using either a hand saw, mitre saw, table saw or handheld router.
Saw to cut the shoulder lines down to the marked depth line, make several cuts between the shoulder line cuts. Then, break out the waste or use a chisel with the bevel face down and a mallet to remove the bulk working in towards the centre of the board, reducing the breakout.
Use a support block as a paring board to flatten the rough removed section, working in from both sides to level this down board. A shoulder plane or even a Japanese carvers rasp helps with this.


With the halving joint cut and dry fitted together, they can be glued using an exterior grade wood glue. Clamp together on the joint.
Next mark out the infill triangle shape pieces to fit into the seat area, this has the same angle. With these cut and test fitted, they can be glued and clamped into place.
Set aside to dry.


Next you need to mark out the curve of the seat shape. Choose one of the end sections and use a flexible steel rule to help draw the main long back rest and seat shape. Clamp in place and manipulate the rule to get the right curve. Mark with a pencil the curves. For the tighter curves use what you have on hand, a side plate, wax tin, anything that works.

With this clearly marked out, cut the shape with either a hand jigsaw, with the work clamped to the bench, or with a bandsaw. The bandsaw will need to be set up with a narrow blade 1/4 to 3/8 width will work well, with 4-6 TPI leaving a good finish. Slow feed speed will allow the curved shape to be cut. With the first one cut out, use as a pattern to transfer to the second one.
Clean up the saw cuts using a spokeshave to achieve the smooth shape.
The support for the middle seat section can then be made. This has a halving joint to join the two sections and needs to mirror the shape of the back support and top of the seat area (minus the leg section). Cut the joint as before, glue together and then use one of the end cross sections to draw around, cut the shape out, and clean up the saw cut edge.


The underside lower support rail can be cut to the required length. Keep offcut of this machined section to make a drilling block. Shape the lower support rail by drawing a light curve on the underside, cut and cleaned up. The surface of the end frames and the lower rail can be sanded to a flat surface, then using a round over cutter, in either a hand held or router table, round the corner off, leaving the square edge on the areas the seat slats will cover.


Lay the middle seat shaped section on top of one of the bench ends, align the shape, and mark the position of the underside of the seat section onto the bench end, this will provide the position of the lower support rail, the aim is to get the middle seat support to rest on top of the lower cross rail. Mark out the position of the lower cross rail onto the bench end, this need to be in the halving jointed section.
You can now drill the holes for the support rail running along the underside of the bench. This is to bolt the sections together.
A very simple drilling block can be made to allow repetitive drilling of the two required holes to ensure everything lines up. Clamp the two end sections together with a scrap board on the underside to reduce brake out. Then position and clamp on the drilling block in location.
Using a long series drill bit will allow both sections to be drilled together. Clamp the drilling block into position on the lower rail support and drill the two holes in either end.


Cut the 8mm threaded rod to lengths. Use a solvent to degrease this and let dry. These can then be glued into the holes in the lower rail support using an epoxy glue. When inserting the rods with the glue, push up and down to force the air out that gets trapped under the glue, or this will push the rods back out. Leave this to fully dry for a day.


The seat slats can be cut to length, allowing about a 50mm overhang either end. These can then also be routed with the round over cutter on the top face and ends.

Mark out and set up the drilling position for the screws to fix the slats onto the seat. This can be done free hand, but will be easier using a pillar drill set up with a repeat stop to allow these to be accurately drilled. Use a 4mm drill bit.
Before putting this together, it would be worth adding the finish. An exterior finish will help preserve the timber, add colour and stop the algae growing on this, this will be easier to do in the smaller form and allow better coverage.
Begin by connecting the lower support rail to the two ends, feeding the threaded rod through the drilled holes in the bench ends. Use a washer to add support and limit damage and secure with a dome nuts. Tighten to hand tight.

Start to lay out the slats, use a spacer between each slat to get even spacing (12mm plywood works well). Start by fixing the first slat on the front of the seat area, then, using two clamps, temporarily fix a slat on the back of the back rest to maintain the width and lay out the slats with the spacers in between checking the overhang is equal. Then fix in place.


Stainless steel screws will last longer, look better and will not corrode or stain the surround timber. With the seat area done, continue up the back support area, ensuring the gap between looks equal and the overhang is correct.
And there you have your finished bench.
If you have enjoyed making this garden bench project, then why not have a go at one of our other outdoor projects. If you have made one of your project then we want to see it! Share your projects with us on social media. Search @axminstertools on Facebook or Instagram and share your woodworking pictures.