The holy grail of shooting boards
In the last AxBlog - Using Burr Veneer - there was a rather unimpressive pic of the excellent Veritas Shooting Sander being used on a new shooting board, as the latest addition to the workbench. A while ago, I wrote about these most useful of all jigs and how to go about constructing one and it took up several quite detailed blogs.
Some years ago I had a succession of table saws in the workshop, but for various reasons (principally one of space) I no longer use one, so the shooting board is absolutely indispensable. The one shown in the original blog was in use for several years and worked very well, with the proviso that the end of the fence needed to be replaced from time to time...no big deal, but a little irksome none the less.
However, I was aimlessly noodling around on t’interweb late one evening and came across this intriguing video from Fine Woodworking in the USA which immediately piqued my interest as it looked like this could be the ‘Holy Grail’ of shooting boards.
The method of construction and setting up is simplicity itself, requiring no further explanation, so without further ado I decided to build one.
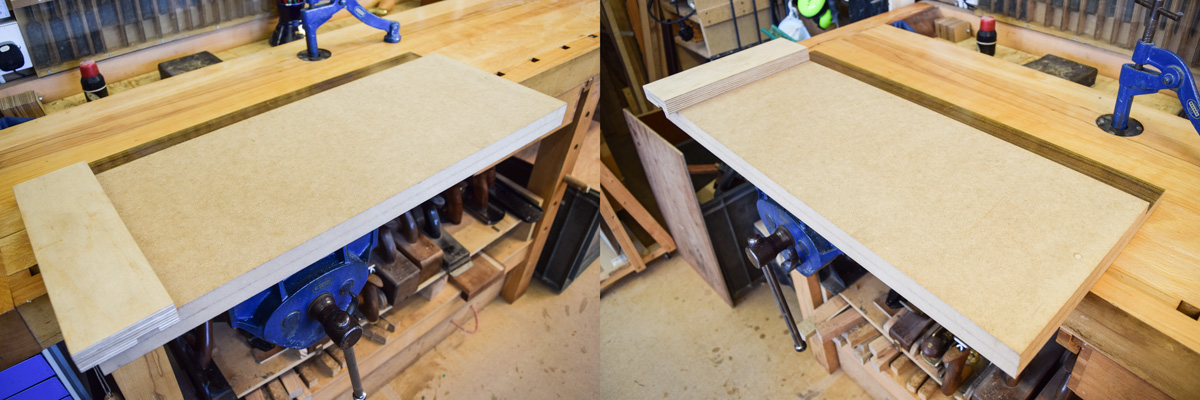
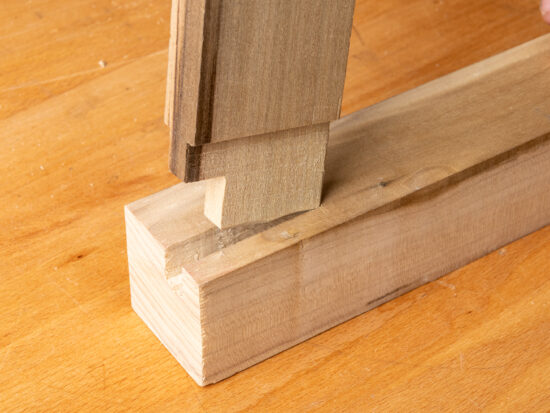
I already had part of an old, much longer shooting board which I used for veneers and the cunning plan was to use this as the basis for the new board, the advantage being that it already had a runway covered with very hardwearing Formica laminate (the proper, ‘old skool’ stuff about 2mm thick) which is the brown strip you can see in the pics.
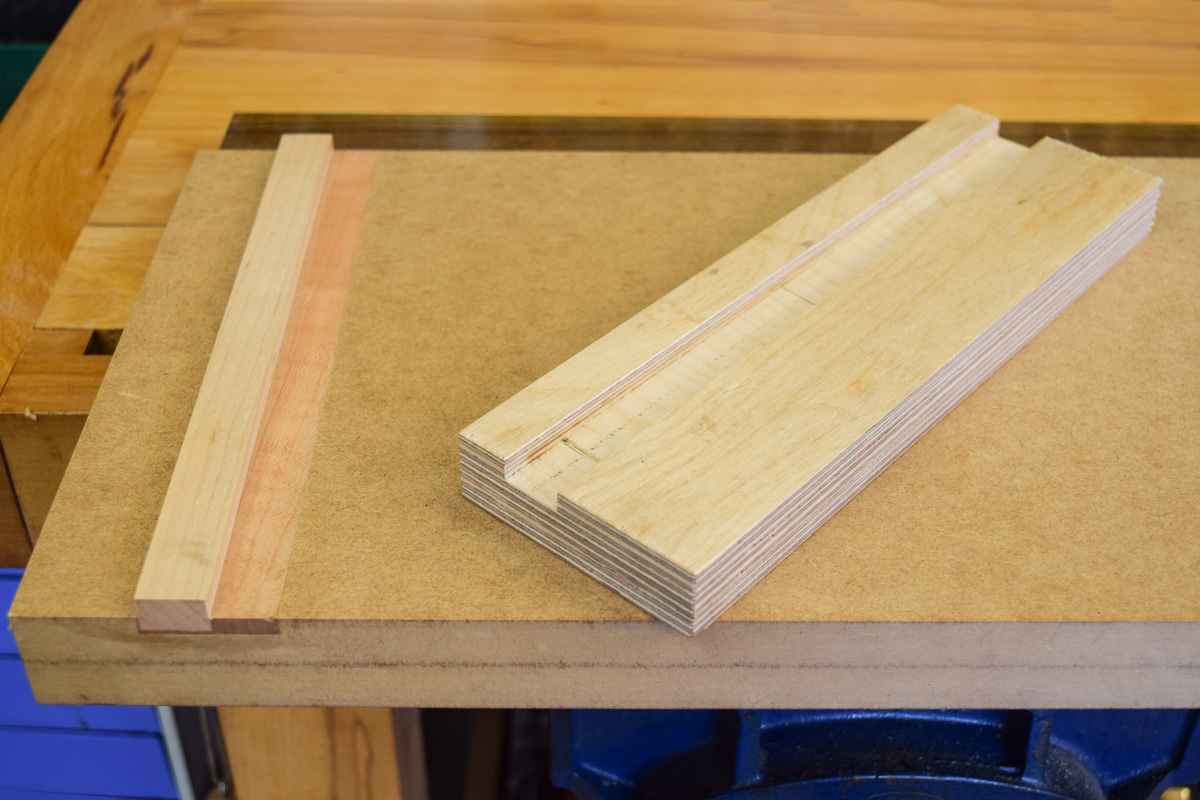
The block or fence sits on top of a 19mm wide piece of sugar or rock maple which is pretty tough stuff. This was glued into a corresponding groove which was routed across the width of the board, but if you observe closely, there’s also a strip of differently coloured timber which is flush with the mdf.
This was a mistake. It certainly isn’t the first and it won’t be the last.
It occurred because the 90° fence I was routing against wasn’t cramped sufficiently hard to the job, the result being that instead of being ruler straight, the router developed a mind of its own and the eventual groove resembled a boomerang! Rather than lop off 75mm from the end of the board (and thus reduce the length) instead I re-machined the offending area and set it in a piece of American cherry, which was then subsequently flushed level.
The block is made from a couple of bits of 12mm birch ply from the oddments box glued together. It doesn’t have to be any particular size and is easy to make true, following the guidance given in the video.
I found that in use, the block became slightly loose over the course of a couple of weeks, but that was easily remedied by inserting a piece of cartridge paper in the groove to take up the slack; a smart tap with a small hammer is now all that’s required to move it. It’s early days yet with this new shooting board, but so far it’s proving to be better than my old one, the only disadvantage being that it’s quite heavy.